
Engine mounting - RH (page 2 of 2)
- Make
- MG
- Model
- MGF Factory Workshop Manual
- Year
- 1995–2000
- Section
- Repairs
EngineEngine mounting - RH · page 2 of 2
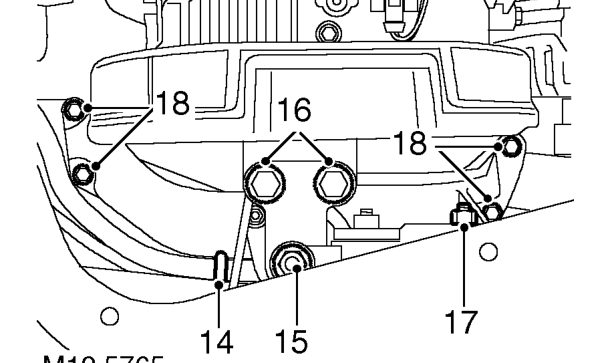
- All models: Release vacuum pipe from clips on body.
- Remove nut from engine mounting centre bolt.
- Remove 2 bolts securing arm assembly to engine.
- Remove nut and bolt securing tie rod to buttress.
- Remove 4 bolts securing buttress to subframe.
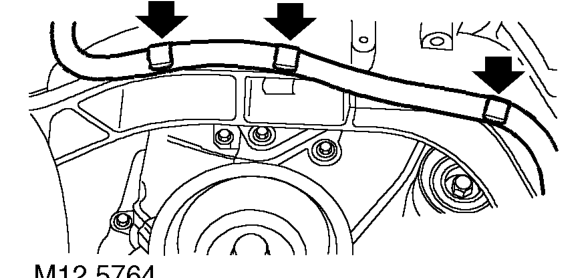
- Release hydragas pipe from buttress clips and position pipe aside.
- Manoeuvre buttress and engine mount assembly from wheel arch.
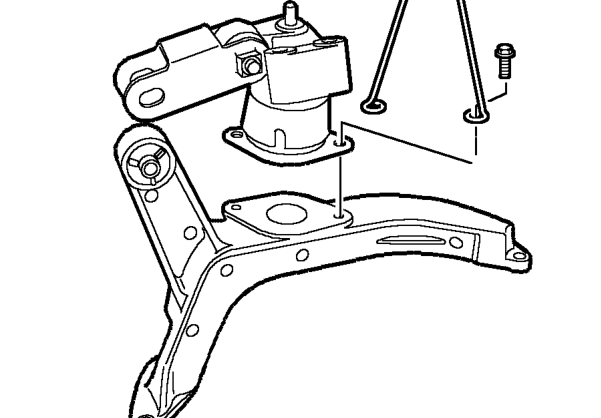
- Remove 2 bolts securing engine mounting to buttress.
- Collect restraining loop.
- Remove engine mounting.
- Collect arm from mounting.
Refit
- Position arm on engine mounting.
- Fit engine mounting and restraining loop to buttress. Tighten bolts to 45 Nm.
- Position buttress assembly to subframe and manoeuvre into position.
- Fit bolts securing buttress assembly and tighten to 45 Nm.
- Secure hydragas pipe to clips.
- Fit nut to engine mounting centre bolt but do not tighten.
- Fit nut and bolt securing tie rod to buttress but do not tighten.
- Fit bolts securing arm assembly to engine and tighten to 45 Nm.
- Tighten engine mounting centre bolt nut to 82 Nm.
- Tighten bolt securing tie rod to buttress to 85 Nm.
- Secure vacuum pipe to clips.
- Fit alternator drive belt and adjust tension. See ELECTRICAL, Adjustments.
- Models with A/C: Position compressor and tighten bolts to 45 Nm.
- Fit alternator drive belt. See ELECTRICAL, Repairs.
- All models: Remove jack.
- Position closing panel, secure with scrivets and Torx screw.
- Fit road wheel(s) and tighten nuts to correct torque.
- Remove stand and lower vehicle.
- Fit engine cover. See this section.
Parts & tools for this job For 1995 MG MGF
- PARTEngine gasket setSearch: MG MGF 1995 engine gasket set
- TOOLTorque wrenchSearch: 3/8 inch torque wrench
- TOOLFeeler gauge setSearch: feeler gauge set
Links open Amazon search results in a new tab. As an Amazon Associate I earn from qualifying purchases.