
Auxiliary drive belt
- Make
- Mini
- Model
- Mini Workshop Manual
- Year
- 1996–2000
- Section
- Repairs › Auxiliary drive belt
ElectricalAuxiliary drive belt
AUXILIARY DRIVE BELT
Service repair no - 86.10.03
Remove
- Disconnect battery earth lead.
- Remove nut and bolt securing drive belt cover and remove cover.
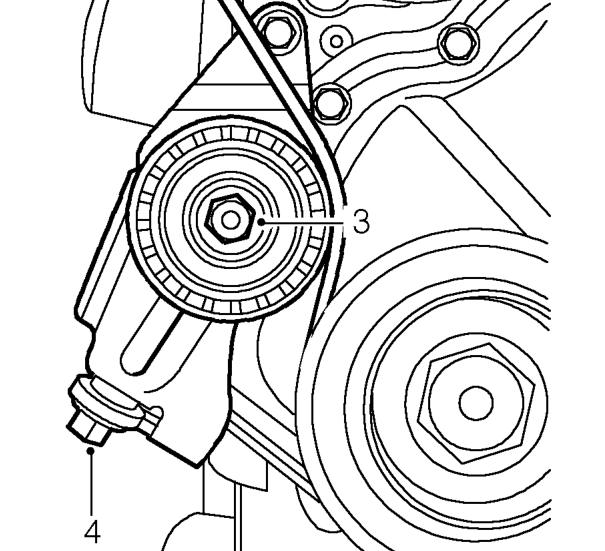
- Loosen tensioner pulley retaining nut.
- Release drive belt tension by turning the tension adjusting bolt clockwise and remove drive belt.
CAUTION: Do not apply excessive torque to adjusting bolt or damage to bolt will result. If bolt appears to be seized or is difficult to turn, apply suitable anti-seize lubricant to bolt.
Refit
- Clean pulleys.
- Fit new drive belt to pulleys. Ensure grooves on pulleys and drive belt are correctly located.
- Adjust drive belt tension. See Adjustments.
- Connect battery earth lead.
ALTERNATOR PULLEY
Service repair no - 86.10.04
Remove
- Remove auxiliary drive belt. See this section.
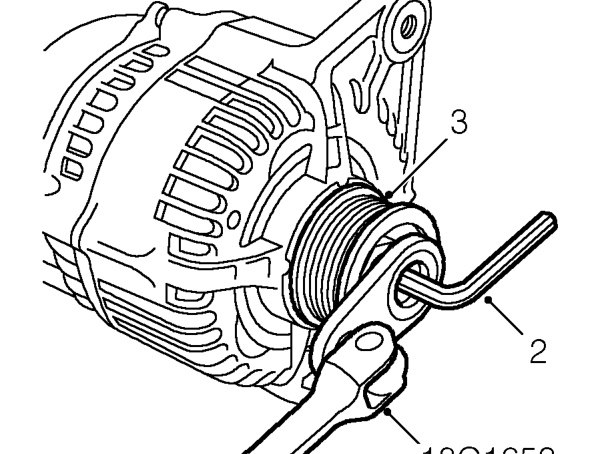
- Hold alternator shaft with an 8 mm Allen key and remove pulley retaining nut with 18G 1653.
- Remove alternator pulley.
Refit
- Clean mating face of alternator pulley and shaft.
- Fit pulley to alternator and tighten nut to 25 Nm.
- Fit auxiliary drive belt. See this section.
Parts & tools for this job For 1996 Mini Mini
- TOOLDigital multimeterSearch: automotive digital multimeter
- PARTAssorted fuse kitSearch: car fuse assortment kit
- TOOLWire crimper and connector kitSearch: wire crimper connector kit
Links open Amazon search results in a new tab. As an Amazon Associate I earn from qualifying purchases.