
Rotary coupler
- Make
- Mini
- Model
- Mini Workshop Manual
- Year
- 1996–2000
- Section
- Repairs › Rotary coupler
ElectricalRotary coupler
ROTARY COUPLER
Service repair no - 86.65.85
CAUTION: See SRS safety precautions before commencement of repair. See RESTRAINT SYSTEMS, Precautions. • Ensure wheels are aligned straight ahead.
Remove
- Remove key from starter switch, disconnect both battery leads, earth lead first, and wait 10 minutes for the SRS back-up power circuit to discharge before commencing work.
- Remove steering column nacelle. See STEERING, Repairs.
- Remove steering wheel. See STEERING, Repairs.
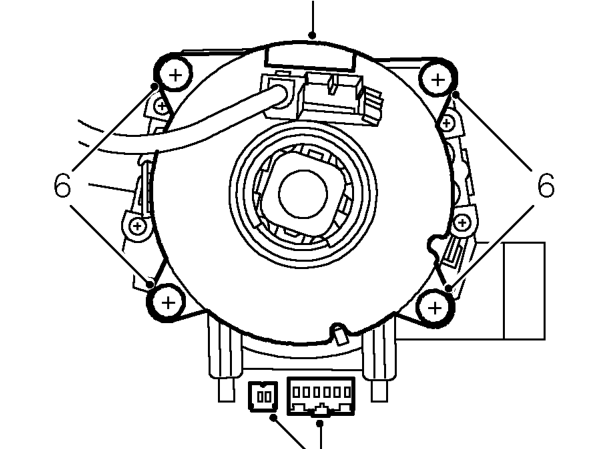
- If the rotary coupler is being re-used place adhesive tape around moulding to prevent rotation.
- Disconnect 2 multiplugs from rotary coupler.
- Remove 4 screws and remove rotary coupler.
CAUTION: Do not dismantle the rotary coupler, It has no serviceable parts and must be replaced as a complete assembly.
Refit
- Fit rotary coupler and secure with screws.
- Connect multiplugs to rotary coupler.
- Remove retaining tape from rotary coupler.
- Fit steering column nacelle. See STEERING, Repairs.
- Fit steering wheel. See STEERING, Repairs.
Parts & tools for this job For 1996 Mini Mini
- TOOLDigital multimeterSearch: automotive digital multimeter
- PARTAssorted fuse kitSearch: car fuse assortment kit
- TOOLWire crimper and connector kitSearch: wire crimper connector kit
Links open Amazon search results in a new tab. As an Amazon Associate I earn from qualifying purchases.