
Disc run-out check
- Make
- Rover
- Model
- 400 Workshop Manual
- Year
- 1995–2000
- Section
- Repairs › Disc run-out check
BrakesDisc run-out check
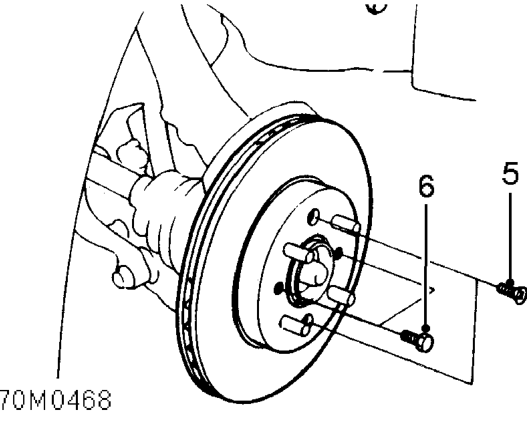
- Remove 2 screws securing disc to drive flange.
- Remove brake disc from drive flange, using jacking screws if necessary.
Refit
CAUTION: Excessive disc run-out can exist after fitting a new disc, with no immediate symptoms being evident whilst driving. The most likely cause of run-out is the presence of contaminants (e.g. rust or paint) or damage to the mating faces of disc and flange, and flange and wheel. Excessive run-out will cause progressive uneven wear of the disc, leading to disc thickness variation, which is the cause of judder. Always ensure that the disc run-out check given here is strictly adhered to.
- Inspect mating surfaces of new disc and drive flange and clean thoroughly using a wire brush.
NOTE: There is no need to remove the silver protective coating from friction surface of new disc.
- Fit brake disc to drive flange, fit and tighten screws to 10 Nm.
- Fit caliper, fit top caliper mounting bolt but do not tighten.
Disc run-out check
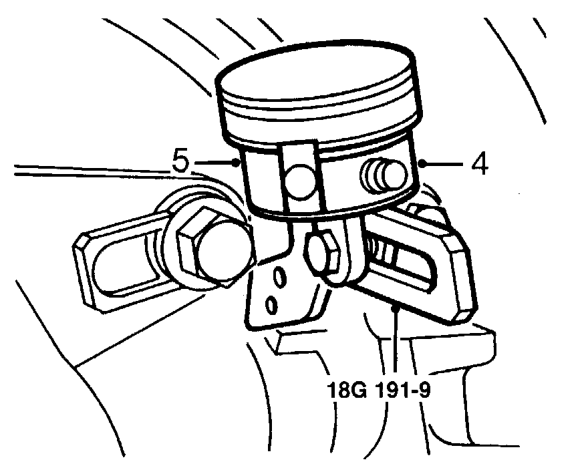
- Mount a dial test indicator to caliper lower mounting using tool 18G 191-9 and tighten bolt. Tighten top mounting bolt.
- Position dial test indicator probe 10 mm from disc outer edge.
- Inspect road wheel and flange mating surfaces and remove any contaminants.
- Fit road wheel(s) and tighten nuts to correct torque. See INFORMATION, Torque wrench settings.
- Rotate wheel at least one turn and measure disc run-out. Front disc run-out limit = 0.040 mm.
Run-out exceeds limit
- Mark wheel to stud relationship, remove wheel, again check mating surfaces for contaminants, then refit wheel 90° from previous position and recheck run-out.
- If run-out is still excessive, move wheel through a further 90° and recheck run-out.
- If run-out is still excessive, fit a new road wheel.
Run-out within limit
- Remove dial test indicator and tool 18G 191-9 .
- Fit caliper lower mounting bolt and tighten both bolts to 108 Nm.
- Remove stand(s) and lower vehicle.
Parts & tools for this job For 1995 Rover 400
- PARTBrake padsSearch: Rover 400 1995 brake pads
- TOOLBrake bleeder kitSearch: one man brake bleeder kit
- FLUIDBrake fluidSearch: brake fluid
Links open Amazon search results in a new tab. As an Amazon Associate I earn from qualifying purchases.