
Rear wheel cylinder (page 2 of 2)
- Make
- Rover
- Model
- 400 Workshop Manual
- Year
- 1995–2000
- Section
- Repairs
BrakesRear wheel cylinder · page 2 of 2
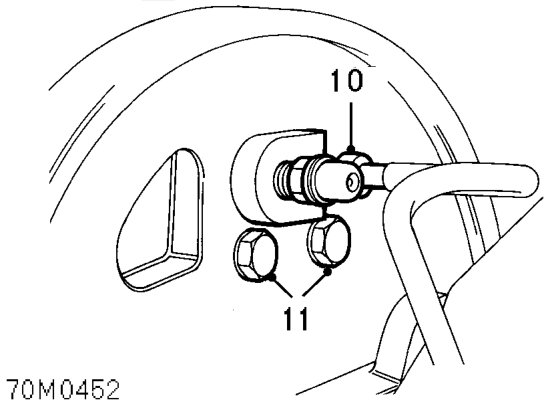
- Disconnect pipe union from wheel cylinder.
CAUTION: Plug the connections.
- Remove 2 bolts securing wheel cylinder to backplate.
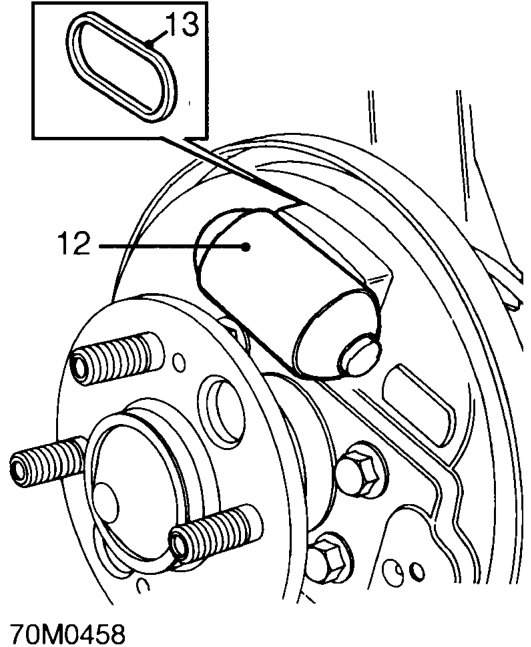
- Remove wheel cylinder.
- Remove and discard sealing ring.
- Clean backplate and drum with brake cleaning fluid. Use a wire brush to remove any corrosion.
WARNING: Do not use an air line to blow dust from brake assembly. Do not use petroleum based fluid as damage will occur to rubber components.
Inspect
- Examine wheel cylinder dust seals for signs of brake fluid leakage, a certain amount of dampness is usual. However, if free fluid is apparent, lift dust seal and check for excessive leakage.
- Renew wheel cylinder if brake linings have become contaminated.
- Check wheel cylinder pistons for freedom of movement.
Refit
- Fit NEW sealing ring to wheel cylinder.
- Fit wheel cylinder to backplate and tighten bolts to 8 Nm.
- Connect brake pipe to wheel cylinder and tighten union to 19 Nm.
- Smear shoe contact points with Molykote 111 grease, ensure grease does not contact linings or dust covers.
- Manoeuvre shoe assembly into position between hub and wheel cylinder and connect hand brake cable to brake shoe lever.
- Fit lower return spring to trailing shoe and connect spring to leading shoe.
- Engage leading shoe in wheel cylinder slot followed by trailing shoe and align.
NOTE: During this operation the adjuster may become extended, this is not important but it must be reset prior to fitting brake drum.
- Fit trailing shoe into abutment bracket followed by leading shoe.
Parts & tools for this job For 1995 Rover 400
- PARTBrake padsSearch: Rover 400 1995 brake pads
- TOOLBrake bleeder kitSearch: one man brake bleeder kit
- FLUIDBrake fluidSearch: brake fluid
Links open Amazon search results in a new tab. As an Amazon Associate I earn from qualifying purchases.