
Cruise control relay - ’t’ series
- Make
- Rover
- Model
- 400 Workshop Manual
- Year
- 1995–2000
- Section
- Repairs › Cruise control relay - ’t’ series
Engine management system - MEMSCruise control relay - ’t’ series
- Disconnect multiplugs from dim dip resistor and cruise control vacuum control unit.
- Release vacuum hose from cruise control vacuum control unit and remove battery tray mounting bracket assembly.
- Release 3 control unit mounting rubbers from battery tray mounting bracket and remove control unit. Do not carry out further dismantling if component is removed for access only.
- Remove mounting rubbers from control unit.
- Apply a soapy solution to mounting rubbers to aid fitment.
- Fit mounting rubbers to control unit.
Refit
- Position vacuum control unit to battery tray mounting bracket and secure mounting rubbers.
- Position battery tray mounting bracket and connect vacuum hose to cruise control vacuum control unit.
- Connect multiplugs to dim dip resistor and cruise control vacuum control unit.
- Position battery tray mounting bracket to fixings, do not tighten at this stage.
- Position air intake hose to battery tray mounting bracket and secure with bolt.
- Position battery tray to mounting bracket.
- Fit bolts and nut securing battery tray to mounting bracket and engine LH mounting.
- Tighten 2 bolts securing battery tray mounting bracket to body 9 Nm.
- Fit air cleaner. See this section.
CRUISE CONTROL RELAY - ’T’ SERIES
Service repair no - 19.75.29
Remove
- Disconnect battery earth lead.
- Remove lower ’A’ post finisher. See BODY, Interior trim components.
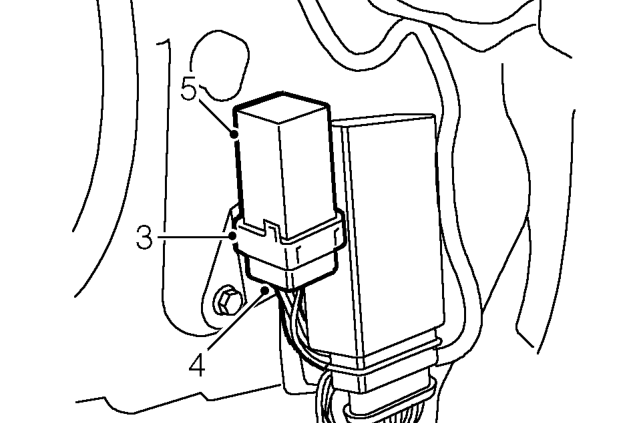
- Remove unit from body.
- Disconnect multiplug from relay.
- Remove relay.
Refit
- Connect multiplug and align unit to body.
- Fit unit to body.
- Fit lower ’A’ post finisher. See BODY, Interior trim components.
- Connect battery earth lead.
Parts & tools for this job For 1995 Rover 400
- TOOLDigital multimeterSearch: automotive digital multimeter
- PARTAssorted fuse kitSearch: car fuse assortment kit
- TOOLWire crimper and connector kitSearch: wire crimper connector kit
Links open Amazon search results in a new tab. As an Amazon Associate I earn from qualifying purchases.