
Latch assembly - front door
- Make
- Land Rover
- Model
- Defender 90 Workshop Manual (NAS)
- Section
- Repair › Latch assembly - front door
Chassis and bodyLatch assembly - front door
LATCH ASSEMBLY - FRONT DOOR
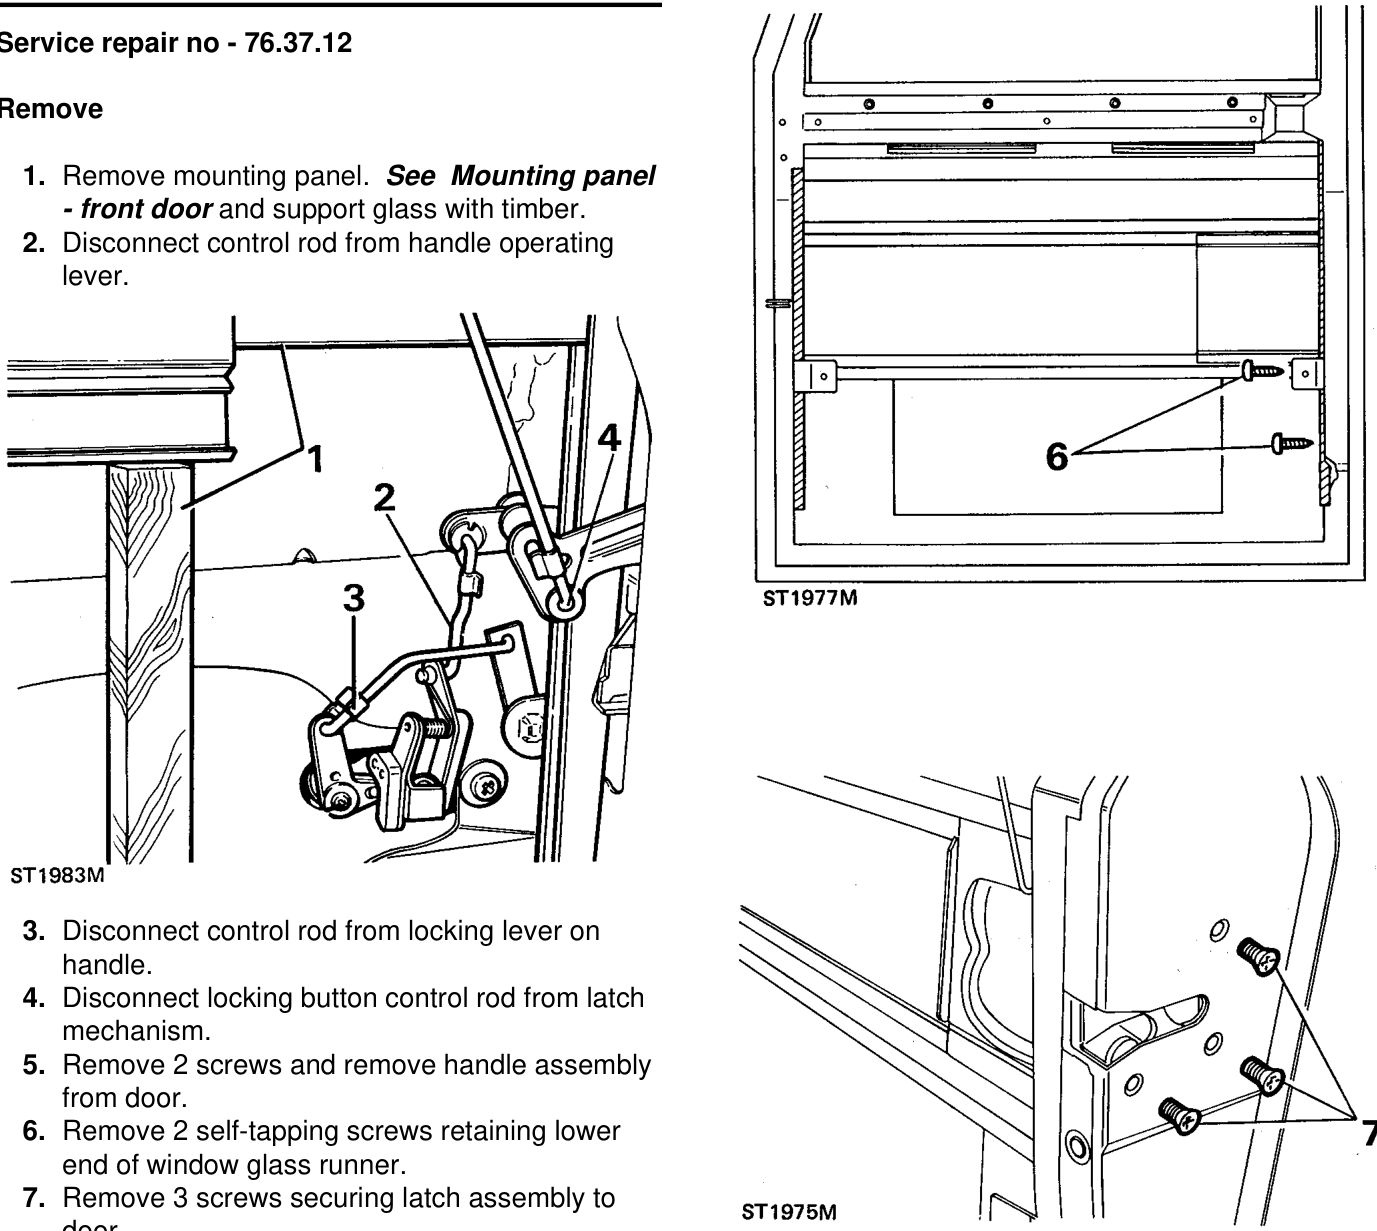
Service repair no - 76.37.12
Remove
- Remove mounting panel. See Mounting panel and support glass with timber.
- front door
- Disconnect control rod from handle operating lever.
- Disconnect control rod from locking lever on handle.
- Disconnect locking button control rod from latch mechanism.
- Remove 2 screws and remove handle assembly from door.
- Remove 2 self-tapping screws retaining lower end of window glass runner.
- Remove 3 screws securing latch assembly to door.
- Whilst taking care not to damage runner, ease runner away from latch and manoeuvre latch asembly from door.
- Fit handle with 2 screws, ensuring that bezels
Refit
- Connect control rod to handle operating lever
- Carefully ease window runner away, sufficiently to enable latch to be located into position. 14. Connect control rod to locking lever and retain
- Secure latch to door with 3 screws.
- Secure window runner with 2 screws ensuring 15. Connect locking button control rod to latch lever that packing strip is in position and that screw heads are below bottom of runner to prevent 16. Fit mounting panel. damage to glass.
are in position.
and secure with spring clip.
with spring clip.
and secure with spring clip. See Mounting panel - front door
Parts & tools for this job For Land Rover Defender
- TOOLTrim removal tool kitSearch: trim removal tool kit
- PARTTouch-up paintSearch: Land Rover touch up paint
- PARTPanel clip assortmentSearch: Land Rover panel clips assortment
Links open Amazon search results in a new tab. As an Amazon Associate I earn from qualifying purchases.