
Rear headlining - hard top
- Make
- Land Rover
- Model
- Defender 90 Workshop Manual (NAS)
- Section
- Repair › Rear headlining - hard top
Chassis and bodyRear headlining - hard top
REAR HEADLINING - HARD TOP
Service repair no - 76.64.11
Remove
- Remove rear end trim panel. See Rear end trim panel - hard top
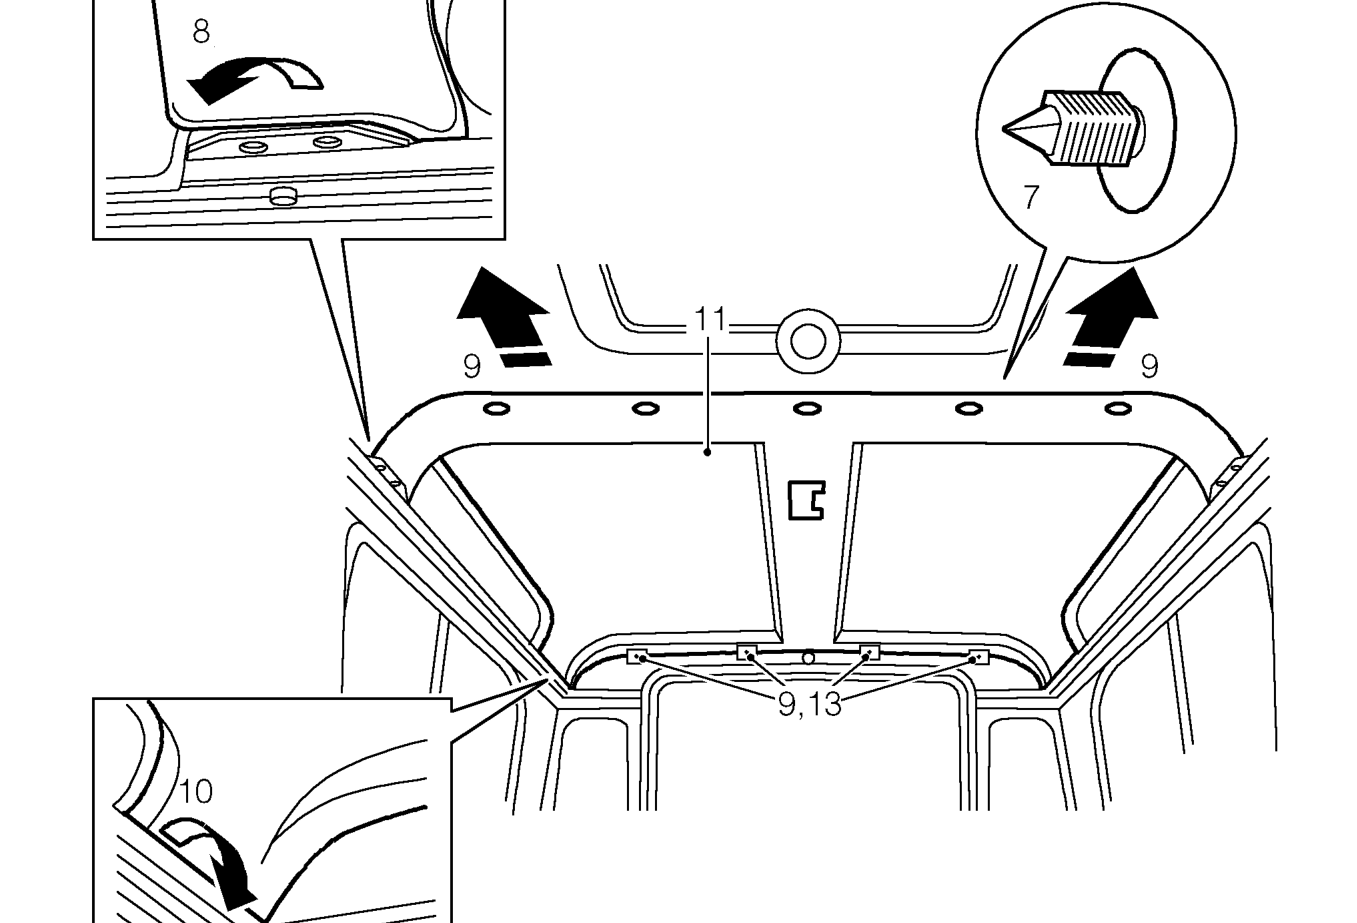
- Remove side trim panels. See Side trim panel 10. Release rear corners of headlining from cant rail, - hard top
- Remove rear grab handles. See Rear grab 11. Lower rear headlining from roof and remove handle - hard top
- Remove rear end lining. See Rear end lining hard top
- Remove rear interior lamp. See ELECTRICAL, Repair, Interior lamp
- Remove interior roll-over bar. See Interior roll-over bar - hard top
- Carefully prise out 7 trim studs securing rear and front headlining to roof mounting brackets.
- Release front corners of headlining from cant rail, on both sides.
- Pull headlining forwards sufficiently to clear rear end lining mounting brackets.
on both sides.
from vehicle.
NOTE: Take care not to bend headlining on removal and refitting.
Parts & tools for this job For Land Rover Defender
- TOOLTrim removal tool kitSearch: trim removal tool kit
- PARTTouch-up paintSearch: Land Rover touch up paint
- PARTPanel clip assortmentSearch: Land Rover panel clips assortment
Links open Amazon search results in a new tab. As an Amazon Associate I earn from qualifying purchases.