
Sill locking button - front door
- Make
- Land Rover
- Model
- Defender 90 Workshop Manual (NAS)
- Section
- Repair › Sill locking button - front door
‹ Prev Refit mounting panel - front doorNext › Window regulator - front door remote control lever - front door
Chassis and bodySill locking button - front door
SILL LOCKING BUTTON - FRONT DOOR
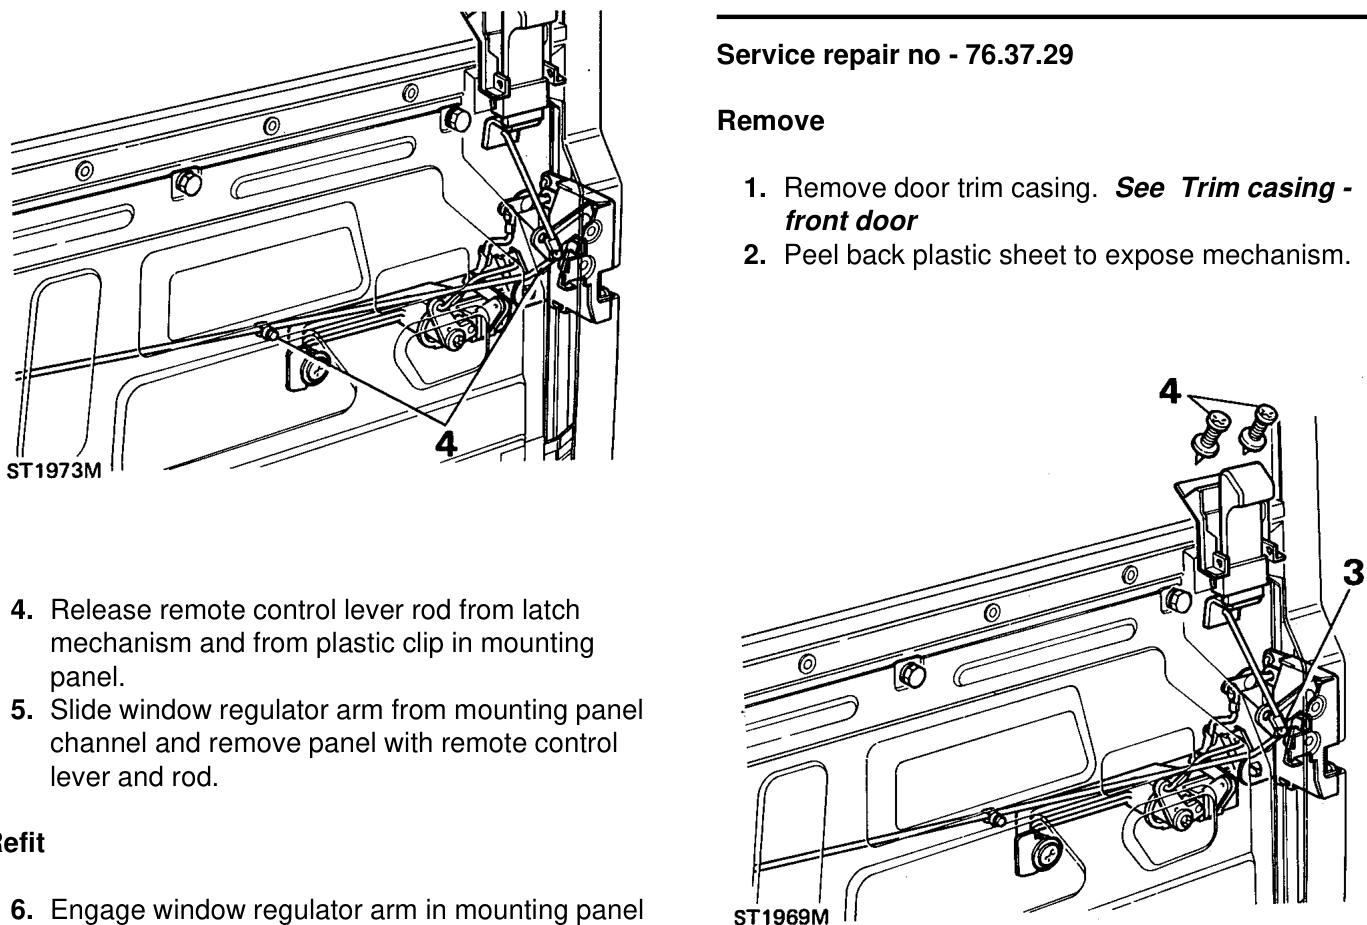
Service repair no - 76.37.29
Remove
- Remove door trim casing. See Trim casing - front door
- Peel back plastic sheet to expose mechanism.
- Release remote control lever rod from latch mechanism and from plastic clip in mounting panel.
- Slide window regulator arm from mounting panel channel and remove panel with remote control lever and rod.
Refit
- Engage window regulator arm in mounting panel channel.
- Connect remote control rod to latch mechanism and secure with clip.
- Fit mounting panel and retain with 5 screws.
- Secure window regulator to mounting panel with 4 screws.
- Raise and lower window to check for free movement.
- Fit plastic sheet and door trim casing. See Trim
Refit
casing - front door
- Release spring clip and disconnect operating rod from latch mechanism.
- Remove 2 screws and withdraw locking button assembly.
- Secure locking button assembly to door with 2 screws.
- Connect operating rod to latch mechanism and secure with spring clip.
- Re-seal plastic sheet and fit door trim casing. See Trim casing - front door
‹ Prev Refit mounting panel - front doorNext › Window regulator - front door remote control lever - front door
Parts & tools for this job For Land Rover Defender
- TOOLTrim removal tool kitSearch: trim removal tool kit
- PARTTouch-up paintSearch: Land Rover touch up paint
- PARTPanel clip assortmentSearch: Land Rover panel clips assortment
Links open Amazon search results in a new tab. As an Amazon Associate I earn from qualifying purchases.