
Refit mounting panel - front door
- Make
- Land Rover
- Model
- Defender 90 Workshop Manual (NAS)
- Section
- Repair › Refit mounting panel - front door
Chassis and bodyRefit mounting panel - front door
Refit MOUNTING PANEL - FRONT DOOR
Service repair no - 76.11.28
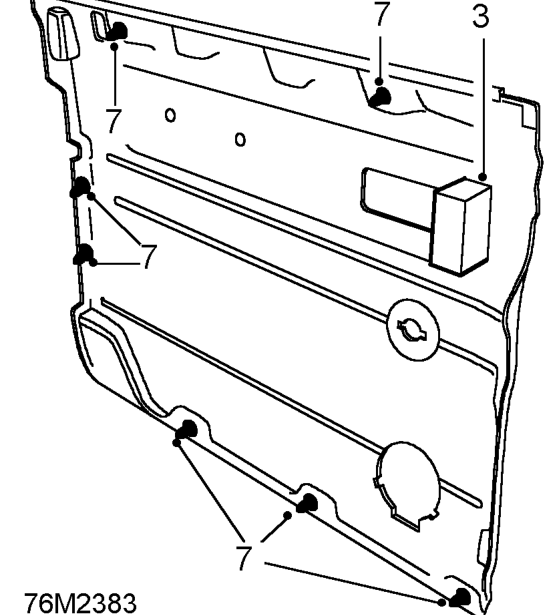
Remove
- Remove any trim fasteners held in door panel. Refit or insert new clips to trim casing.
- Ensure that anti-vibration pads are in position and offer-up trim casing to door. Line-up fasteners with holes in door and firmly push trim into position.
- Fit bezels to locking button and remote control lever.
- Fit single screw behind remote control lever.
- Fit door pull and secure with 2 screws and finisher caps.
- Fit window regulator handle and retain with single screw and finisher.
- Remove door trim casing See Trim casing - front door and plastic sheet.
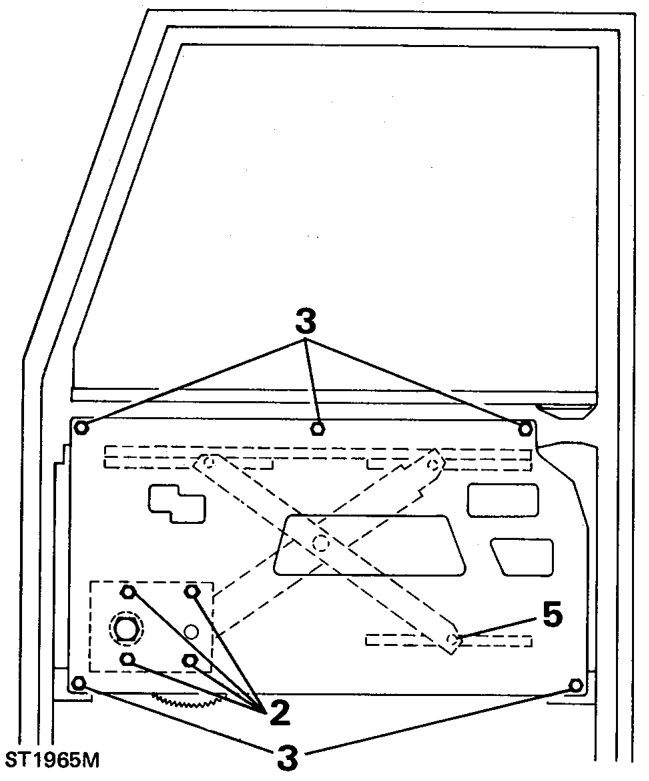
- Remove 4 screws securing window regulator to mounting panel.
- Remove 5 screws securing mounting panel to door frame.
Parts & tools for this job For Land Rover Defender
- TOOLTrim removal tool kitSearch: trim removal tool kit
- PARTTouch-up paintSearch: Land Rover touch up paint
- PARTPanel clip assortmentSearch: Land Rover panel clips assortment
Links open Amazon search results in a new tab. As an Amazon Associate I earn from qualifying purchases.