
Strainer - oil pick-up (page 3 of 4)
- Make
- Land Rover
- Model
- Discovery II (UK)
- Section
- Repairs
Engine - V8Strainer - oil pick-up · page 3 of 4
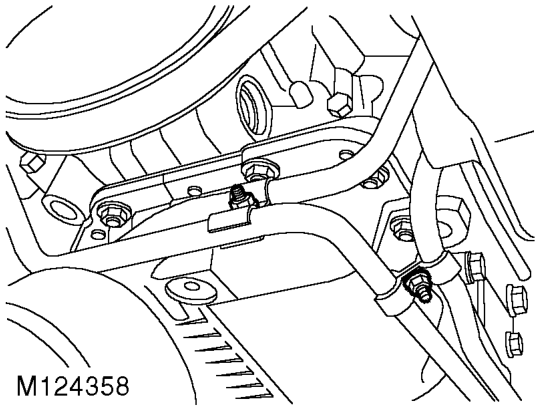
- Remove 2 clips securing oil cooler pipes at front of sump.
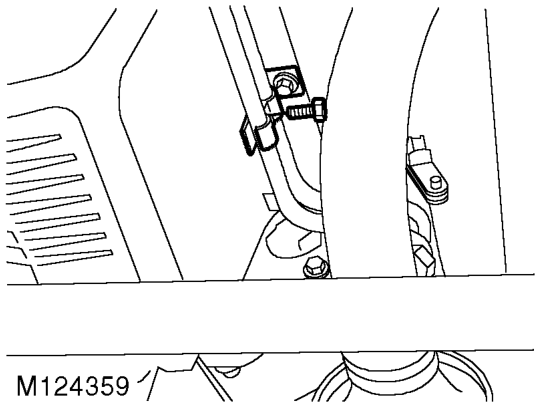
- Remove clip securing oil cooler pipes to side of sump.
- Remove clip bracket.
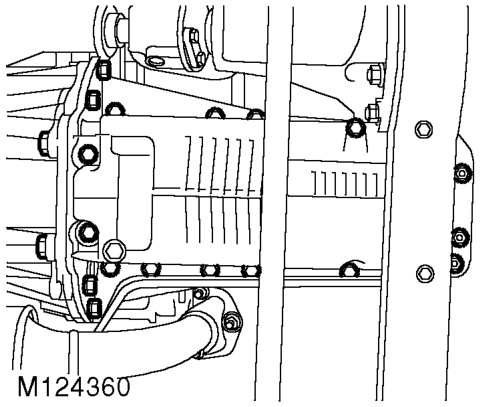
- Remove 2 forward facing bolts securing sump to bell housing.
- Remove 4 rear facing bolts securing sump to bell housing.
- Remove 2 bolts in sump recess.
- Remove 3 nuts securing front of sump.
- Remove 12 bolts securing sump flange to engine.
- Manoeuvre sump over front axle and remove sump.
- Discard sump gasket.
Refit
- Clean all traces of sealant from the sump and sump mating faces using a plastic scraper or solvent.
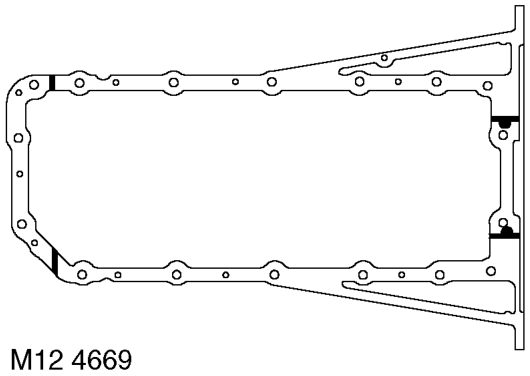
- Apply a 5 mm wide bead of sealant, Part No. STC 50550, across the cylinder block to front cover joint and across the cylinder block to rear main bearing joint. Apply a globule of sealant to cover the end of the cruciform seal, (see illustration).
- Fit new gasket, dry, to sump, ensuring that locating tags are correctly positioned.
- Manoeuvre sump into position, fit and lightly tighten 2 bolts to retain sump in place, then fit and lightly tighten remainder of bolts.
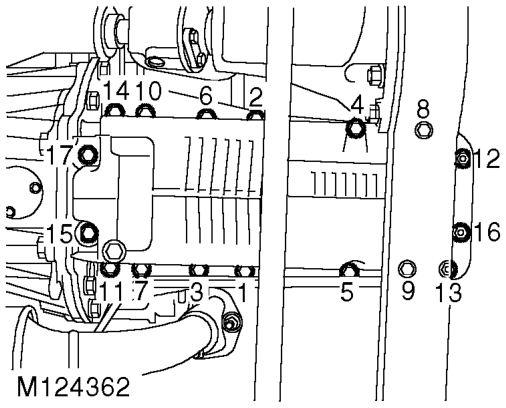
- Working in the sequence illustrated, tighten the sump bolts to 22 Nm (16 lbf.ft).
- Position side clip bracket, fit and tighten bolt.
- Position oil cooler pipe clips, fit and tighten nuts.
Parts & tools for this job For Land Rover Discovery
- PARTOil filterSearch: Land Rover Discovery oil filter
- TOOLOil filter wrenchSearch: oil filter wrench
- FLUIDEngine oilSearch: Land Rover Discovery engine oil
Links open Amazon search results in a new tab. As an Amazon Associate I earn from qualifying purchases.