
Bushes - front long arm - ACE
- Make
- Land Rover
- Model
- Discovery II (UK)
- Section
- Repairs › Bushes - front long arm - ACE
Front suspensionBushes - front long arm - ACE · page 1 of 2
Bushes - front long arm - ACE
$% 60.60.46
Remove
- Remove ACE front actuator. FRONT SUSPENSION, REPAIRS, Actuator - front - ACE.
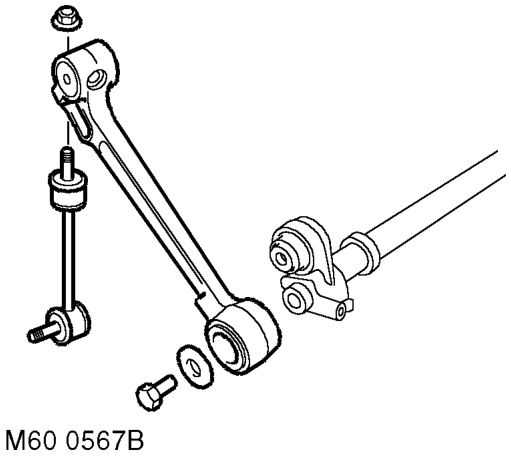
- Remove securing nut and remove anti-roll bar link from torsion bar.
- Restrain torsion bar and remove long arm securing bolt and washer. Remove long arm from torsion bar.
CAUTION: The short arm and torsion bar are supplied as an assembly and must not be separated.
- Use a suitable drift to remove both halves of slipper bush from long arm.
- Use suitable adaptors to press actuator rod end bush from long arm.
Refit
- Clean bush locations in long arm.
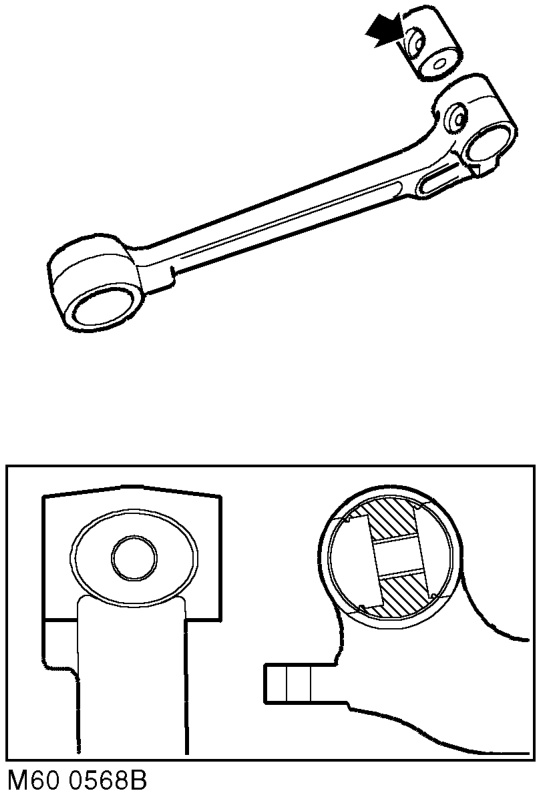
- Use suitable adaptors to press new actuator rod end bush into long arm. Ensure hole in bush is correctly aligned with hole in long arm.
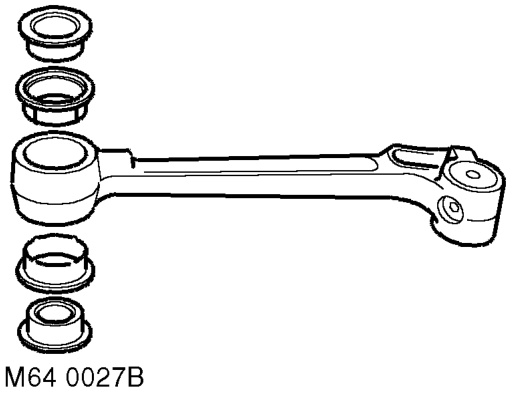
- Align slots in new slipper bush halves with those in long arm. Carefully press both halves of slipper bush into long arm. Ensure the sealing rings on the slipper bush faces are not damaged.
Parts & tools for this job For Land Rover Discovery
- TOOLCoil spring compressorSearch: coil spring compressor
- TOOLBall joint separatorSearch: ball joint separator
- PARTFront shock absorbersSearch: Land Rover Discovery front shock absorbers
Links open Amazon search results in a new tab. As an Amazon Associate I earn from qualifying purchases.