
Pressure transducer - ACE (page 2 of 2)
- Make
- Land Rover
- Model
- Discovery II (UK)
- Section
- Repairs
Front suspensionPressure transducer - ACE · page 2 of 2
Refit
- Ensure pressure transducer and port in valve Solenoid - pressure control valve - ACE block is clean.
- Fit new 'O' ring to pressure transducer. Fit and
$% 60.60.23 tighten pressure transducer to 20 Nm (15 lbf.ft).
Remove
- Connect multiplug to pressure transducer.
- Renew ACE high pressure filter. FRONT SUSPENSION, REPAIRS, Filter - high pressure - ACE.
- Lower vehicle.
Refit
- Raise vehicle on a ramp.
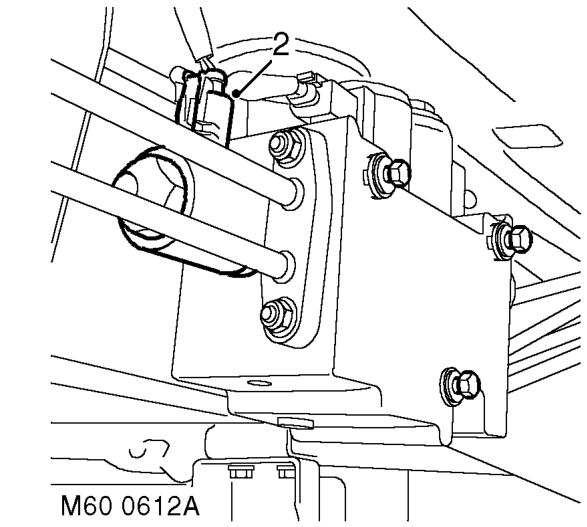
- Disconnect multiplug from solenoid.
- Remove cap securing solenoid to pressure control valve and discard 'O' ring.
- Remove solenoid from pressure control valve and discard 'O' ring from base of valve.
- Ensure solenoid and pressure control valve are clean.
- Fit new 'O' ring to base of pressure control valve.
- Fit solenoid to pressure control valve, with arrow on solenoid pointing away from valve block and connector in correct position.
- Fit new 'O' ring to solenoid securing cap. Fit cap and tighten to 11 Nm (8 lbf.ft).
- Connect multiplug to solenoid.
- Lower vehicle.
Parts & tools for this job For Land Rover Discovery
- TOOLCoil spring compressorSearch: coil spring compressor
- TOOLBall joint separatorSearch: ball joint separator
- PARTFront shock absorbersSearch: Land Rover Discovery front shock absorbers
Links open Amazon search results in a new tab. As an Amazon Associate I earn from qualifying purchases.