
Brake proportioning valve - non ABS (page 2 of 2)
- Make
- Rover
- Model
- 400 Workshop Manual
- Year
- 1995–2000
- Section
- Repairs
BrakesBrake proportioning valve - non ABS · page 2 of 2
Refit
- Rotate disc by hand and scrape all scale and rust from around edge of disc.
- Scrape rust from pad locating surfaces on carrier.
- Clean dust from caliper housing using brake cleaning fluid or industrial alcohol.
WARNING: Do not use an air line to blow dust from brake assembly. Do not use petroleum based fluid as damage will occur to rubber components.
- Position bleed bottle, connect bleed hose to bleed screw and loosen screw.
- Press piston back into housing.
- Tighten bleed screw to 10 Nm.
- Remove bleed bottle.
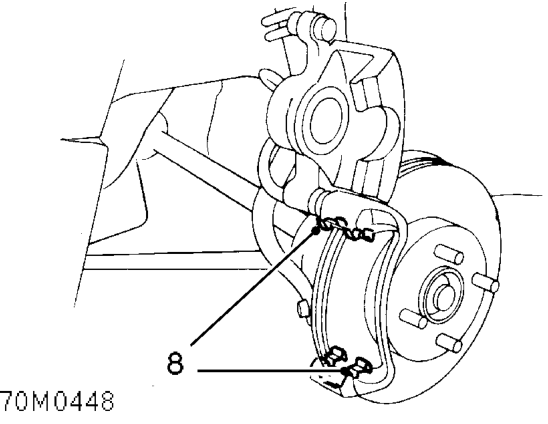
- Fit pad retainers to caliper carrier.
- Apply Molykote M77 to both sides of shims.
- Fit inner shim to piston.
- Fit shims to pads and fit pads to caliper carrier.
NOTE: Fit pad with wear indicator on the inside.
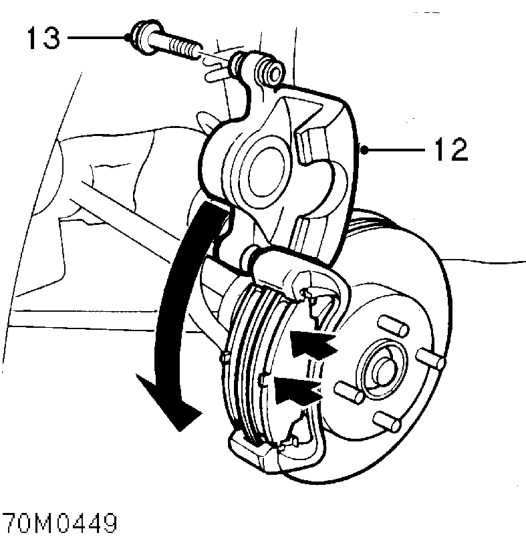
- Lower caliper housing over pads.
- Ensure flats ’A’ on guide pins locate with lugs on caliper housing. Fit bolt and tighten to 27 Nm.
- Repeat procedure for other side.
- Fit road wheel(s) and tighten nuts to correct torque. See INFORMATION, Torque wrench settings.
- Remove stand(s) and lower vehicle.
- Depress brake several times to set pad to disc clearance.
- Check and top-up brake fluid. See INFORMATION, Capacities, fluids and lubricants.
Parts & tools for this job For 1995 Rover 400
- TOOLOBD2 scanner with ABSSearch: OBD2 scanner ABS SRS
- TOOLDigital multimeterSearch: automotive digital multimeter
Links open Amazon search results in a new tab. As an Amazon Associate I earn from qualifying purchases.