
Rear brake shoes (page 2 of 3)
- Make
- Rover
- Model
- 400 Workshop Manual
- Year
- 1995–2000
- Section
- Repairs
BrakesRear brake shoes · page 2 of 3
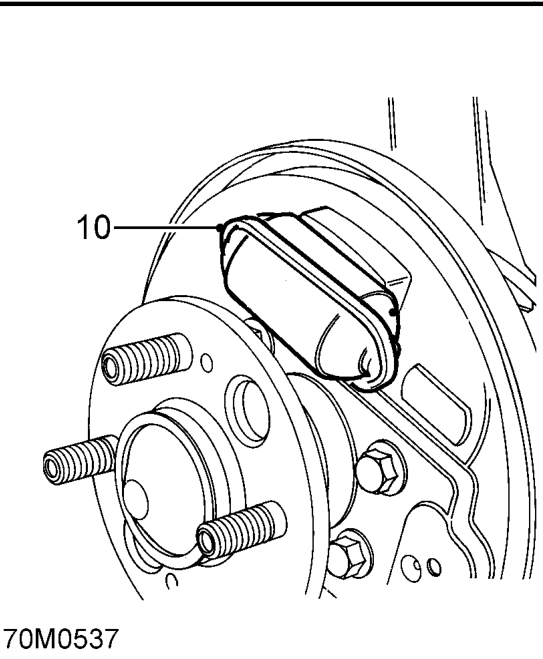
- Fit an elastic band around wheel cylinder to retain pistons. Do not carry out further dismantling if component is removed for access only.
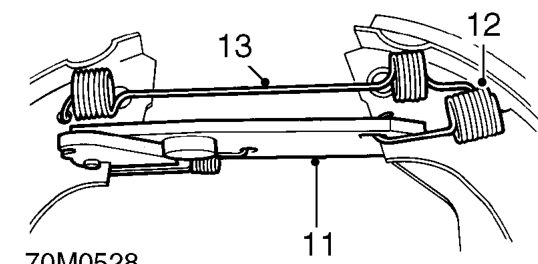
- Position trailing shoe and ease strut from slot in shoe.
- Detach short spring from strut and remove from trailing arm.
- Remove trailing shoe from upper return spring and remove return spring from leading shoe.
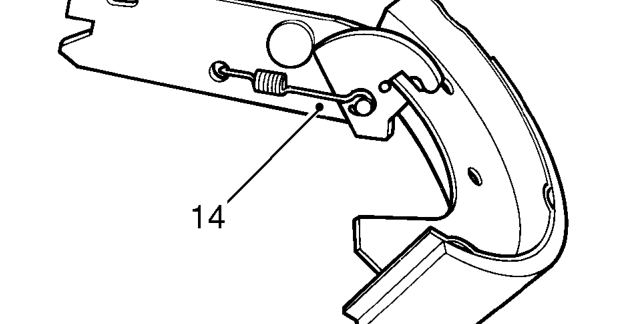
- Remove adjuster strut from leading shoe by pulling on shoe and fully extending cam so that shoe pivots out of engagement.
Inspect
- Clean backplate and drum with brake cleaning fluid.
WARNING: Do not use an air line to blow dust from brake assembly. Do not use petroleum based fluid as damage will occur to rubber components.
- Use a wire brush to remove any corrosion taking care not to damage wheel cylinder covers.
- Inspect all parts for wear or damage
- Examine adjuster strut to ensure it is in working order with no signs of wear or damage. The quadrant lever, when pulled away from the knurled wheel against spring pressure, should move smoothly and freely within its slot in the strut.
- Ensure teeth on quadrant and knurled wheel are undamaged and wheel is firmly attached to strut.
- Examine wheel cylinder dust seals for signs of brake fluid leakage, a certain amount of dampness is usual. However, if fluid is apparent, lift dust seal and check for excessive leakage. Renew wheel cylinder if brake linings have become contaminated.
- Check wheel cylinder pistons for freedom of movement.
- Check condition of springs, renew if necessary.
Parts & tools for this job For 1995 Rover 400
- PARTRear brake padsSearch: Rover 400 1995 rear brake pads
- TOOLCaliper piston rewind toolSearch: brake caliper piston rewind tool
- FLUIDBrake fluidSearch: brake fluid
Links open Amazon search results in a new tab. As an Amazon Associate I earn from qualifying purchases.