
Door moulding removal
- Make
- Rover
- Model
- 600 Rover 600 Repair Manual - Volumes 1 and 2 - 2nd Edition
- Section
- Exterior fittings › Door moulding removal
BodyDoor moulding removal
The following materials and tools are required to repair the door mouldings.
Note: Follow the manufacturer’s instructions.
Materials: (Reference)
- Stripe remover
3M 08907 - Stripe adhesive remover
3M 08908 - Adhesive tape
3M Super Automotive Attachment Tape
Tools:
- Protective tape
- Knife or Cutter
- Sponge or cloth
- Infrared dryer
- Film
- Putty knife
- Alcohol
CAUTION: Wear gloves to remove and install the door mouldings.
Door moulding removal
- Remove the door panel and pull back the plastic cover.
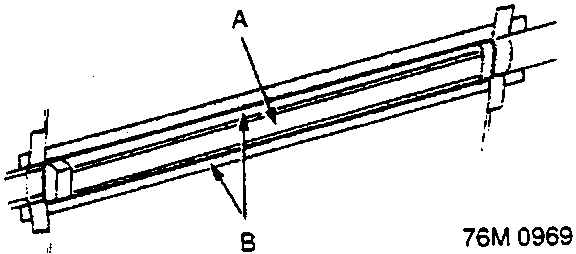
- A Door moulding
- B Protective tape
- Apply protective tape on and around the moulding.
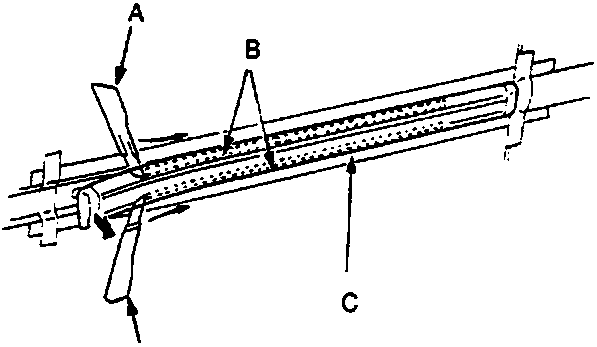
- A Knife
- B Adhesive tape
- C Door moulding
- D Knife
- Release the clips from inside of the door.
Note: Carefully cut the adhesive tape with a knife or cutter while pulling the edge of the moulding away from the door as shown.
Note: Take care not to scratch or bend the moulding.
Front door moulding
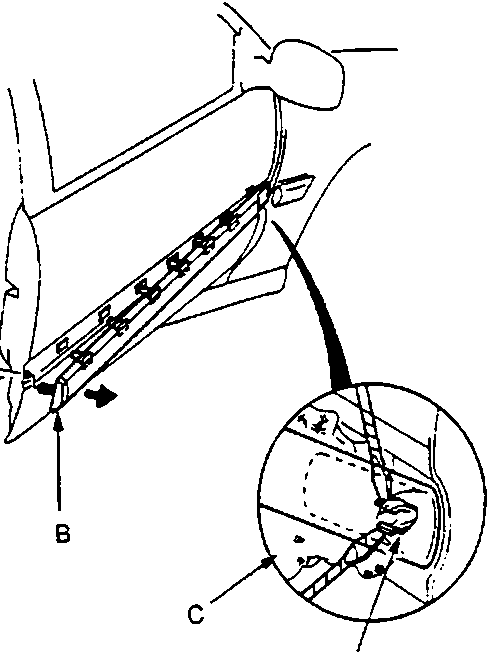
- A Plastic nut
- B Front door moulding
- C Cloth
- D Front clip A
Detach the front clip A from the outside.
Parts & tools for this job For Rover 600
- TOOLTrim removal tool kitSearch: trim removal tool kit
- PARTTouch-up paintSearch: Rover touch up paint
- PARTPanel clip assortmentSearch: Rover panel clips assortment
Links open Amazon search results in a new tab. As an Amazon Associate I earn from qualifying purchases.