
Original page
- Make
- Rover
- Model
- 600 Rover 600 Repair Manual - Volumes 1 and 2 - 2nd Edition
- Section
- Exterior fittings › Original page
BodyOriginal page

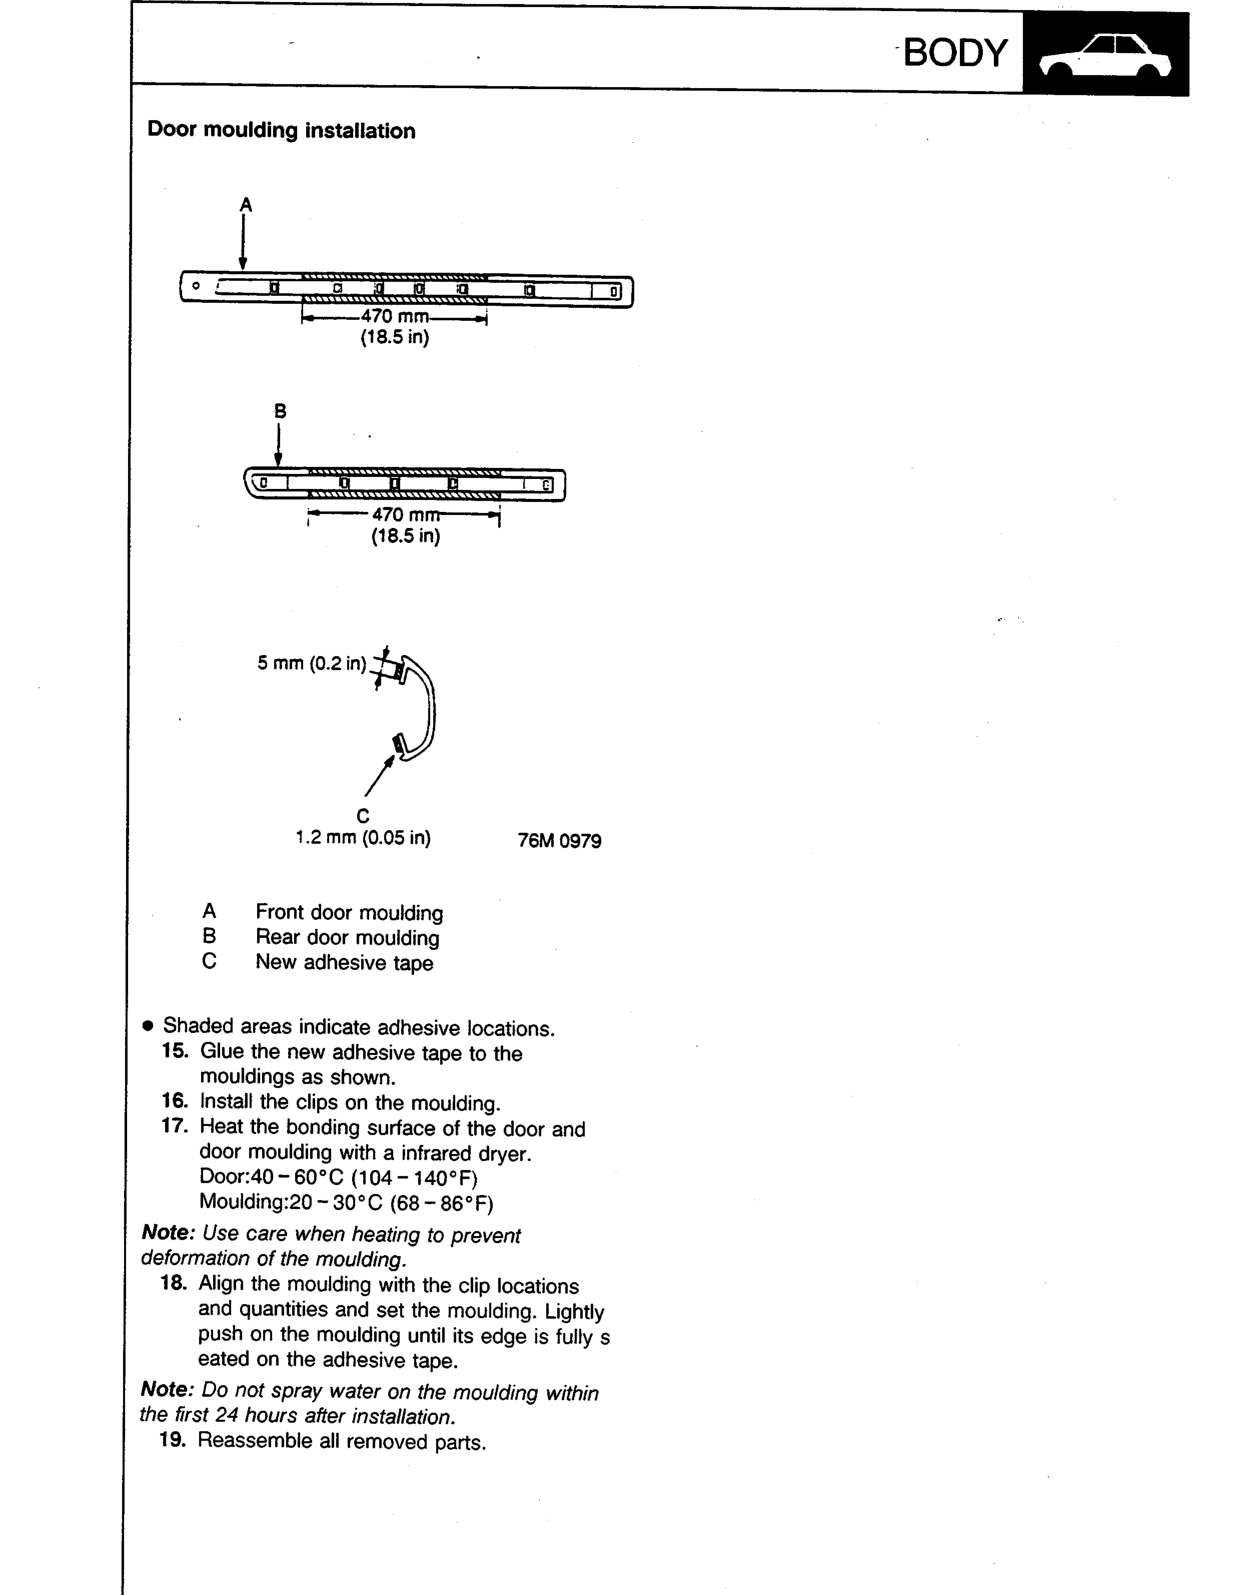
- A Front door moulding
- B Rear door moulding
- C New adhesive tape
Shaded areas indicate adhesive locations.
- Glue the new adhesive tape to the mouldings as shown.
- Install the clips on the moulding.
- Heat the bonding surface of the door and door moulding with a infrared dryer.
Door:40 – 60°C (104 – 140°F)
Moulding:20 – 30°C (68 – 86°F)
Note: Use care when heating to prevent deformation of the moulding.
- Align the moulding with the clip locations and quantities and set the moulding. Lightly push on the moulding until its edge is fully s eated on the adhesive tape.
Note: Do not spray water on the moulding within the first 24 hours after installation.
- Reassemble all removed parts.
Original page
Parts & tools for this job For Rover 600
- TOOLTrim removal tool kitSearch: trim removal tool kit
- PARTTouch-up paintSearch: Rover touch up paint
- PARTPanel clip assortmentSearch: Rover panel clips assortment
Links open Amazon search results in a new tab. As an Amazon Associate I earn from qualifying purchases.