
Roof Moulding
- Make
- Rover
- Model
- 600 Rover 600 Repair Manual - Volumes 1 and 2 - 2nd Edition
- Section
- Exterior fittings › Roof Moulding
BodyRoof Moulding
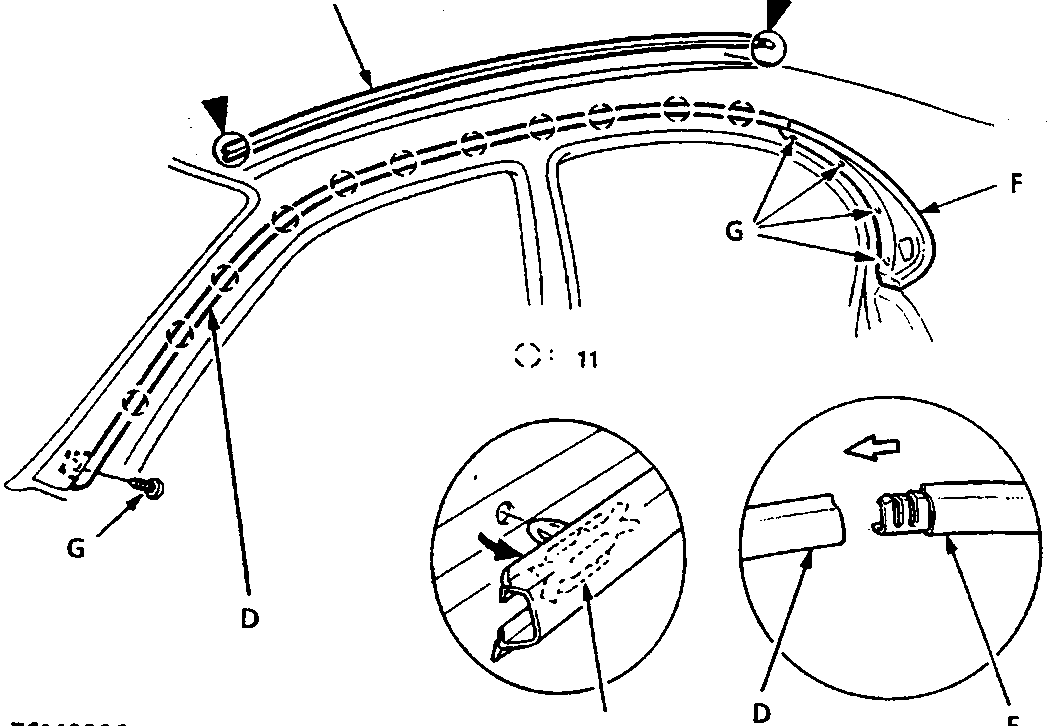
- A Roof moulding
- B Hook
- C Protective tape
- D Side window moulding
- E Side moulding clips
- F Rear quarter moulding
- G Screw
Roof Moulding
- Prise up the roof moulding carefully with a suitable tool or flat - bladed screwdriver.
CAUTION: When prising with a flat-bladed screwdriver, wrap it with protective tape to prevent damage.
Note:
Parts & tools for this job For Rover 600
- TOOLTrim removal tool kitSearch: trim removal tool kit
- PARTTouch-up paintSearch: Rover touch up paint
- PARTPanel clip assortmentSearch: Rover panel clips assortment
Links open Amazon search results in a new tab. As an Amazon Associate I earn from qualifying purchases.