
Front grille/licence plate trim
- Make
- Rover
- Model
- 600 Rover 600 Repair Manual - Volumes 1 and 2 - 2nd Edition
- Section
- Exterior fittings › Front grille/licence plate trim
BodyFront grille/licence plate trim
FRONT GRILLE/LICENCE PLATE TRIM
Front Grille Replacement
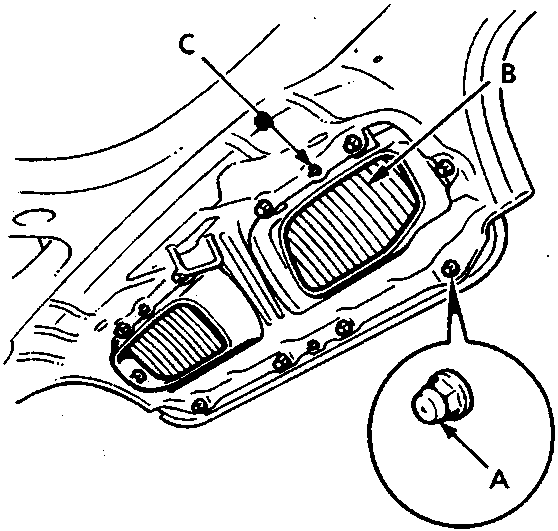
76M1206
- A Plastic nuts (10)
- B Front grille
- C Locating pins
- Remove the front grille by removing the plastic nuts.
- Installation is the reverse of the removal procedure.
Note:
- Do not overtighten the plastic nuts.
- If necessary replace any damaged fixings.
- Take care not to scratch the front grille and bonnet.
● Bolt locations and quantities are shown by black triangles.
● Be careful not to damage the security cylinder switch ( B’).
● Remove the fuel lid latch ( G’) by turning it 90°.
● Be careful not to damage the security latch switch ( H’).
Installation is the reverse of the removal procedure.
Note:
- Take care not to bend the opener cables.
- Make sure the fuel lid fits flush with the body.
- Make sure the boot lid and fuel lid locks securely.
- Make sure the fuel lid and boot lid open properly.
Parts & tools for this job For Rover 600
- TOOLTrim removal tool kitSearch: trim removal tool kit
- PARTTouch-up paintSearch: Rover touch up paint
- PARTPanel clip assortmentSearch: Rover panel clips assortment
Links open Amazon search results in a new tab. As an Amazon Associate I earn from qualifying purchases.