
Removal
- Make
- Rover
- Model
- 600 Rover 600 Repair Manual - Volumes 1 and 2 - 2nd Edition
- Section
- Exterior fittings › Removal
BodyRemoval · page 1 of 3
Removal
CAUTION: Wear gloves to remove or install the windscreen.
Use wing covers, seat covers and protect the dashboard etc, to avoid damaging any surfaces.
- To remove the windscreen first remove the following :
- Interior mirror.
- Sunvisors.
- Front pillar to "B" post trim.
- Interior light/sun roof switch pack.
- Wiper arms and blades.
- Air scoop.
- Lower the forward edge of headlining and protect with tape, taking care not to bend the headlining excessively.
- Lower the bonnet, apply a protective covering i.e. masking tape to rear edge of bonnet, screen pillars, rear edges of front wings and forward edge of roof to protect the paintwork.
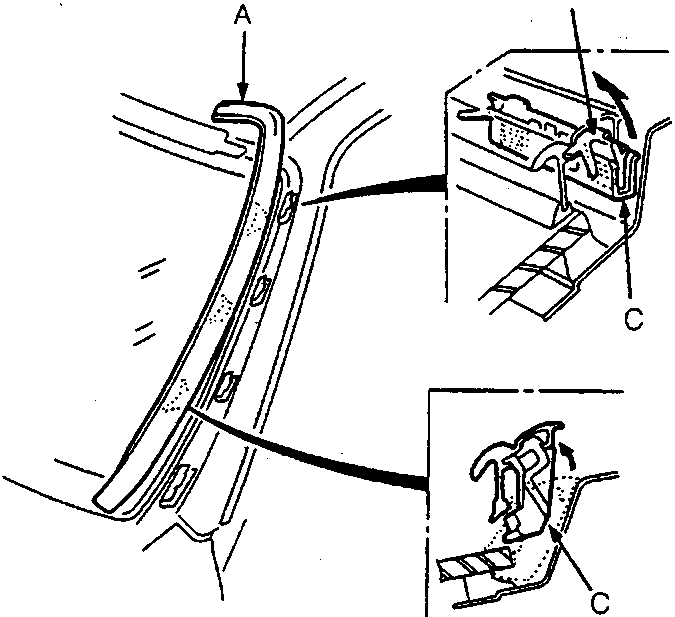
- Side moulding
- Side clip (body)
- Side clip (moulding)
- To remove the side mouldings detach the clips from the retainers, then remove both the side mouldings as shown.
Note: Replace any damaged clips as necessary.
Note: You will need a moulding clip release tool to remove some mouldings. If necessary, make one to the dimensions shown.
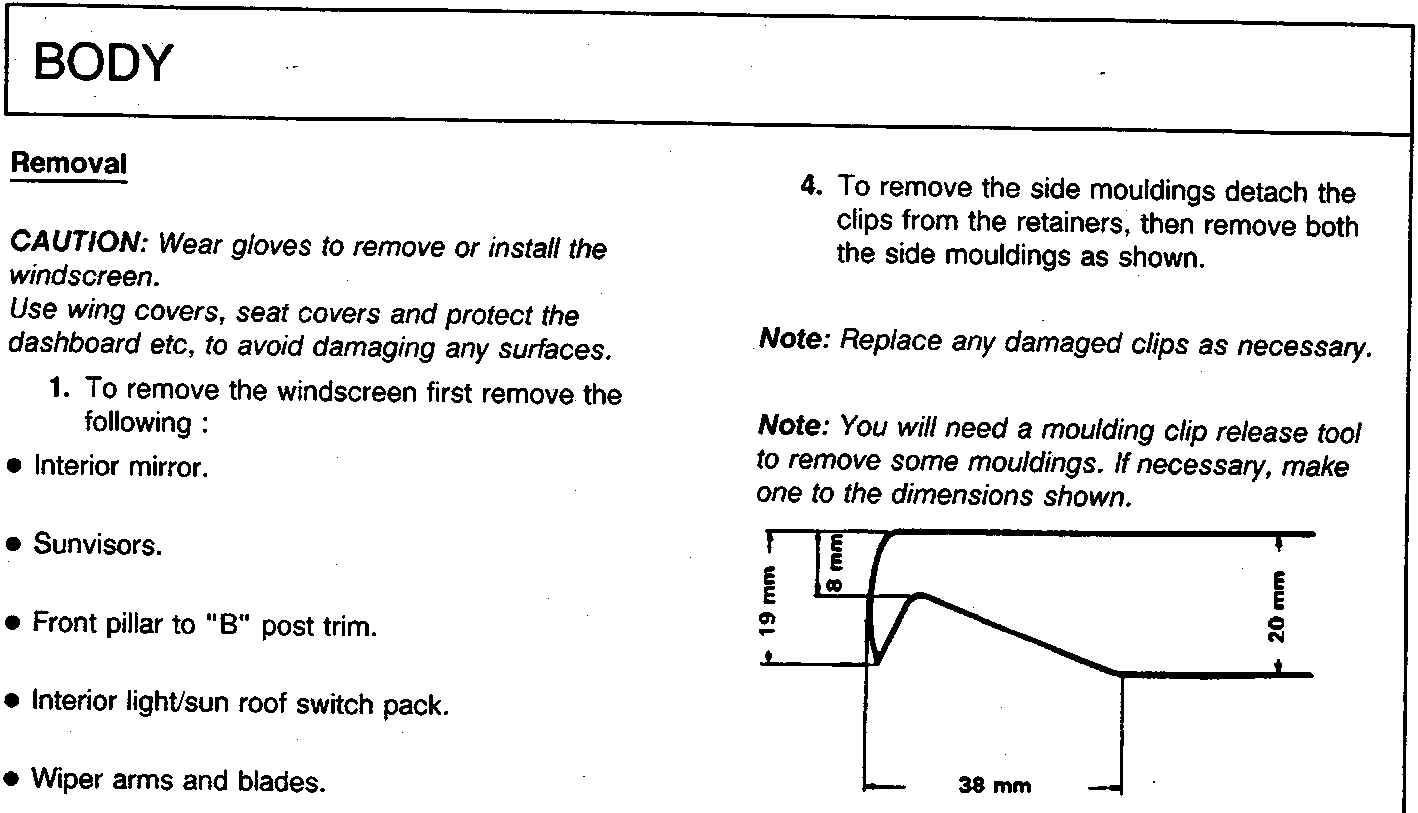
Moulding clip release tool:
Thickness: 2mm, pointed at the end.
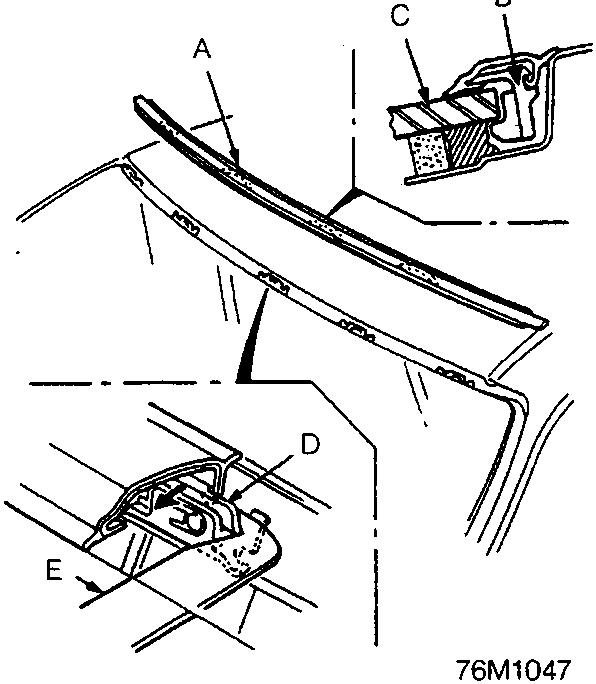
- Upper moulding
- Upper clip (moulding)
- Windscreen
- Upper clip (body)
- Tool
- Remove the upper moulding with a moulding clip release tool. Detach the upper clips and remove the moulding as shown.
Parts & tools for this job For Rover 600
- TOOLTrim removal tool kitSearch: trim removal tool kit
- PARTTouch-up paintSearch: Rover touch up paint
- PARTPanel clip assortmentSearch: Rover panel clips assortment
Links open Amazon search results in a new tab. As an Amazon Associate I earn from qualifying purchases.