
Replacement
- Make
- Rover
- Model
- 600 Rover 600 Repair Manual - Volumes 1 and 2 - 2nd Edition
- Section
- Exterior fittings › Replacement
BodyReplacement
Replacement
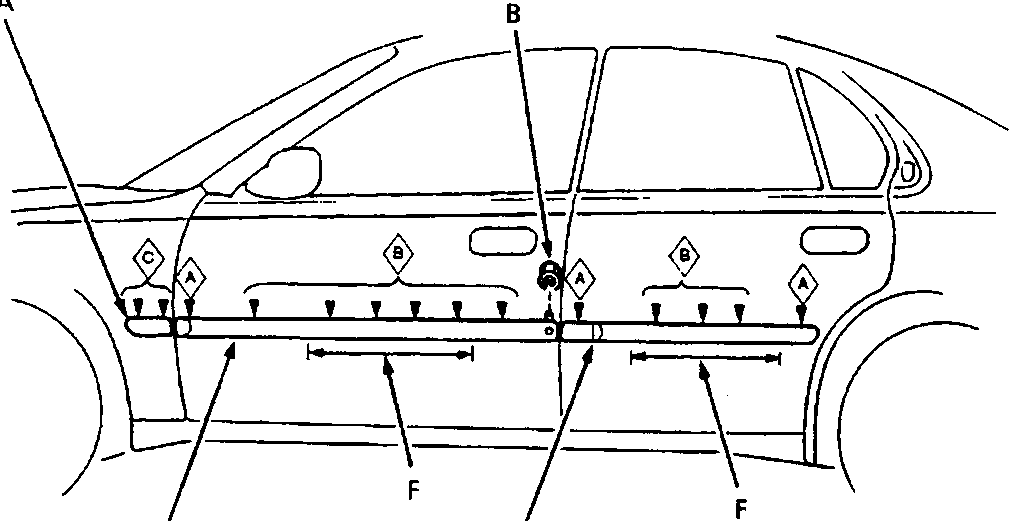
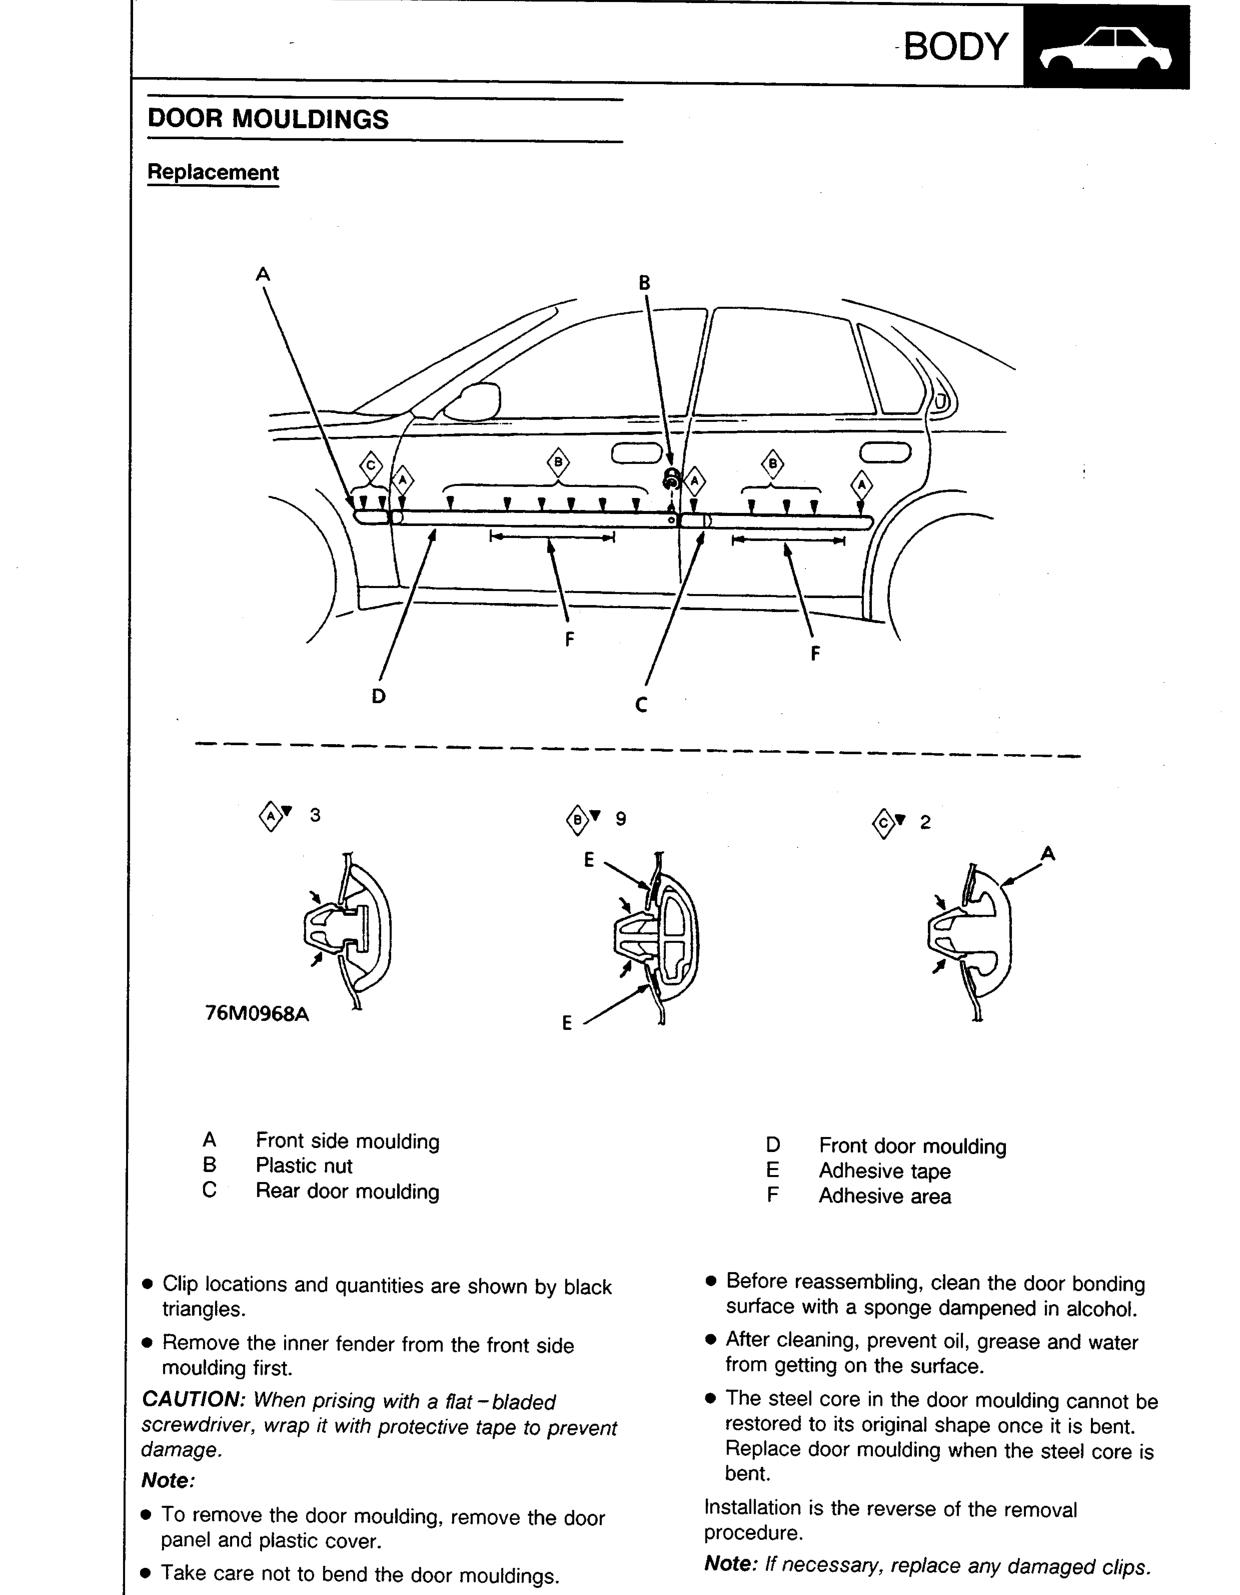
- Front side moulding clip
- Rear door moulding clip
- Plastic nut for rear door moulding
Note:
- To remove the door moulding, remove the door panel and plastic cover.
- Take care not to bend the door mouldings.
| A | Front side moulding | D | Front door moulding |
| B | Plastic nut | E | Adhesive tape |
| C | Rear door moulding | F | Adhesive area |
- Clip locations and quantities are shown by black triangles.
- Remove the inner fender from the front side moulding first.
CAUTION: When prising with a flat-bladed screwdriver, wrap it with protective tape to prevent damage.
- Before reassembling, clean the door bonding surface with a sponge dampened in alcohol.
- After cleaning, prevent oil, grease and water from getting on the surface.
- The steel core in the door moulding cannot be restored to its original shape once it is bent. Replace door moulding when the steel core is bent.
Installation is the reverse of the removal procedure.
Note: If necessary, replace any damaged clips.
Original page
Parts & tools for this job For Rover 600
- TOOLTrim removal tool kitSearch: trim removal tool kit
- PARTTouch-up paintSearch: Rover touch up paint
- PARTPanel clip assortmentSearch: Rover panel clips assortment
Links open Amazon search results in a new tab. As an Amazon Associate I earn from qualifying purchases.