
Original page (page 2 of 13)
- Make
- Rover
- Model
- 600 Rover 600 Repair Manual - Volumes 1 and 2 - 2nd Edition
- Section
- Repairs
– 5. Tighten the clutch and gearbox housings with several 8 mm and 10 mm bolts.
– 6. Tap the mainshaft with a plastic hammer.
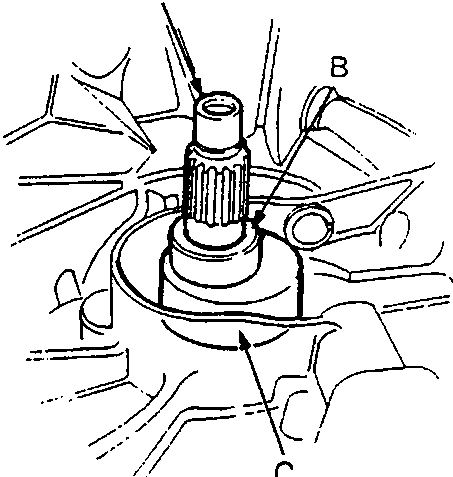
- Mainshaft
- Gearbox housing
- Mainshaft base
– 7. Slide the mainshaft base over the mainshaft.
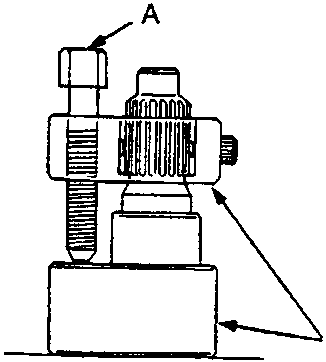
- Mainshaft holder bolt
- Hex bolts
– 8. Attach the mainshaft holder to the mainshaft as follows:
- Back-out the mainshaft holder bolt and loosen the two hex bolts.
- Fit the holder over the mainshaft so its lip is towards the gearbox.
- Align the mainshaft holder's lip around the groove at the inside of the mainshaft splines, then tighten the hex bolts.
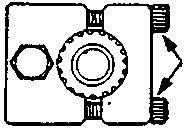
A Dial gauge
– 9. Seat the mainshaft fully by tapping its end with a plastic hammer.
– 10. Thread the mainshaft holder bolt in until it just contacts the wide surface of the mainshaft base.
– 11. Zero a dial gauge on the end of the mainshaft.
– 12. Turn the mainshaft holder bolt clockwise; stop turning when the dial gauge has reached its maximum movement. The reading on the dial gauge is the amount of mainshaft end play.
CAUTION: Turning the mainshaft holder bolt more than 60 degrees after the needle of the dial gauge stops moving may damage the gearbox.
– 13. If the reading is within the standard, the clearance is correct.
If the reading is not within the standard, recheck the thrust shim thickness.
Standard: 0.10 – 0.16 mm
Parts & tools for this job For Rover 600
- PARTClutch kitSearch: Rover 600 clutch kit
- TOOLClutch alignment toolSearch: clutch alignment tool
- FLUIDGear oilSearch: Rover 600 manual gearbox oil
Links open Amazon search results in a new tab. As an Amazon Associate I earn from qualifying purchases.