
Solenoid - directional control valve - ACE (page 3 of 3)
- Make
- Land Rover
- Model
- Discovery II (UK)
- Section
- Repairs
Front suspensionSolenoid - directional control valve - ACE · page 3 of 3
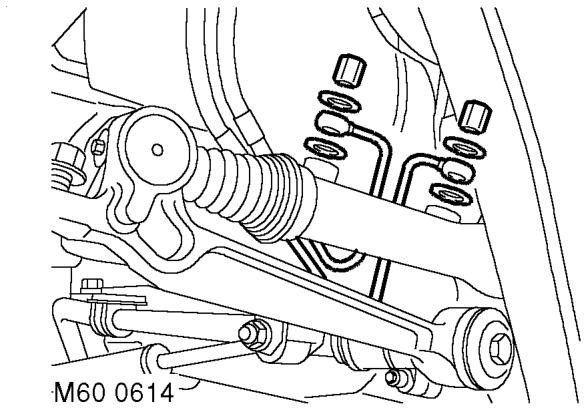
- Remove 2 cap nuts securing pipes to ACE actuator. Disconnect pipes and discard sealing washers.
CAUTION: Always fit plugs to open connections to prevent contamination.
- Release pipes from isolator above chassis RH front outrigger.
- Remove pipe assembly.
Refit
- Position pipe assembly.
- Locate pipes in isolator above chassis RH front outrigger. Fit cable tie around isolator to secure pipes.
- Ensure valve block and pipe connections are clean.
- Fit collets and pipes to clamping plate.
- Connect pipes to valve block. To avoid seal damage, keep pipes square to valve block. Fit and tighten nuts securing clamping plate to valve block to 21 Nm (15 lbf.ft).
CAUTION: Ensure pipes are installed in their correct ports or serious system damage will occur.
- Fit pipe clamps. Secure to chassis with bolt and to bracket on suspension turret with nut.
- Connect pipes to ACE actuator with cap nuts and new sealing washers Tighten cap nuts to 29 Nm (21 lbf.ft). Ensure pipes are not under tension or kinked.
- Secure harness to suspension turret.
- Fit splash shield and secure with screws.
- Fit RH wheel arch liner extension and secure with screws.
- Renew ACE high pressure filter. FRONT SUSPENSION, REPAIRS, Filter - high pressure - ACE.
- Fit road wheel(s) and tighten nuts to 140 Nm (103 lbf.ft).
- Refill and bleed ARC system. FRONT SUSPENSION, ADJUSTMENTS, ACE hydraulic system bleeding.
- Lower vehicle.
Parts & tools for this job For Land Rover Discovery
- PARTEngine gasket setSearch: Land Rover Discovery engine gasket set
- TOOLTorque wrenchSearch: 3/8 inch torque wrench
- TOOLFeeler gauge setSearch: feeler gauge set
Links open Amazon search results in a new tab. As an Amazon Associate I earn from qualifying purchases.