
Trim casing - tail door speaker (page 2 of 2)
- Make
- Land Rover
- Model
- Discovery II (UK)
- Section
- Repairs
Interior trim componentsTrim casing - tail door speaker · page 2 of 2
- Models without third row seats: Remove trim clip from bottom rear corner of trim casing. Trim casing - upper - 'B' post
- Release trim casing to gain access to rear seat belt reel.
$% 76.13.28
Remove
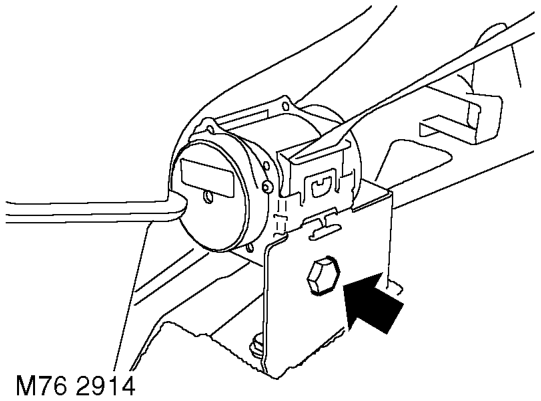
- Remove bolt securing rear seat belt reel to body.
- Remove trim casing.
Refit
- Position trim casing.
- Fit rear seat belt reel to body and tighten bolt to 50 Nm (37 lbf.ft).
- Models without third row seats: Fit trim clip securing bottom rear corner of trim casing.
- Fit trim clip securing trim casing to lower 'D' post.
- Fit access panel to trim casing.
- Fit trim clips securing trim casing to body.
- Fit rear door aperture seal.
- Models with ICE headphone control panels: Position trim cap and connect multiplug to headphone control panel.
- Fit trim cap to trim casing and secure with screw.
- Fit 'D' post trim casing. INTERIOR TRIM COMPONENTS, REPAIRS, Trim casing - 'D' post.
- Fit accessory socket. LIGHTING, REPAIRS, Socket - accessory.
- Models with third row seats: Fit third row seat. SEATS, REPAIRS, Seat - third row.
Refit
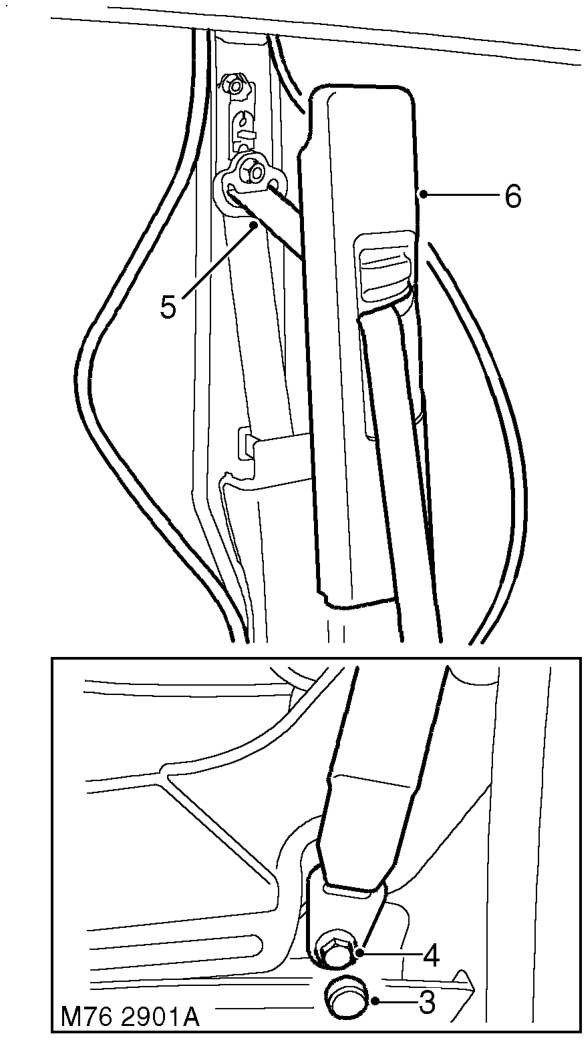
- Release front door aperture seal from 'B' post.
2. Release rear door aperture seal from 'B' post. 3. Remove cap from front seat belt lower anchorage bolt.
- Remove front seat belt lower anchorage bolt.
- Feed seat belt through trim casing.
6. Remove trim casing.
- Remove sound insulation from trim casing.
- Fit sound insulation to trim casing.
- Feed front seat belt through trim casing.
- Fit front seat belt lower anchorage and tighten bolt to 32 Nm (24 lbf.ft).
- Fit cap to front seat belt lower anchorage bolt.
- Fit trim casing to 'B' post.
- Fit front door aperture seal to 'B' post.
- Fit rear door aperture seal to 'B' post.
Parts & tools for this job For Land Rover Discovery
- TOOLTrim removal tool kitSearch: trim removal tool kit
- PARTTouch-up paintSearch: Land Rover touch up paint
- PARTPanel clip assortmentSearch: Land Rover panel clips assortment
Links open Amazon search results in a new tab. As an Amazon Associate I earn from qualifying purchases.