
Trim casing - rear door - from 04MY (page 2 of 2)
- Make
- Land Rover
- Model
- Freelander Service Procedures
- Section
- REPAIRS
DOORS
REPAIRS 76-1-21
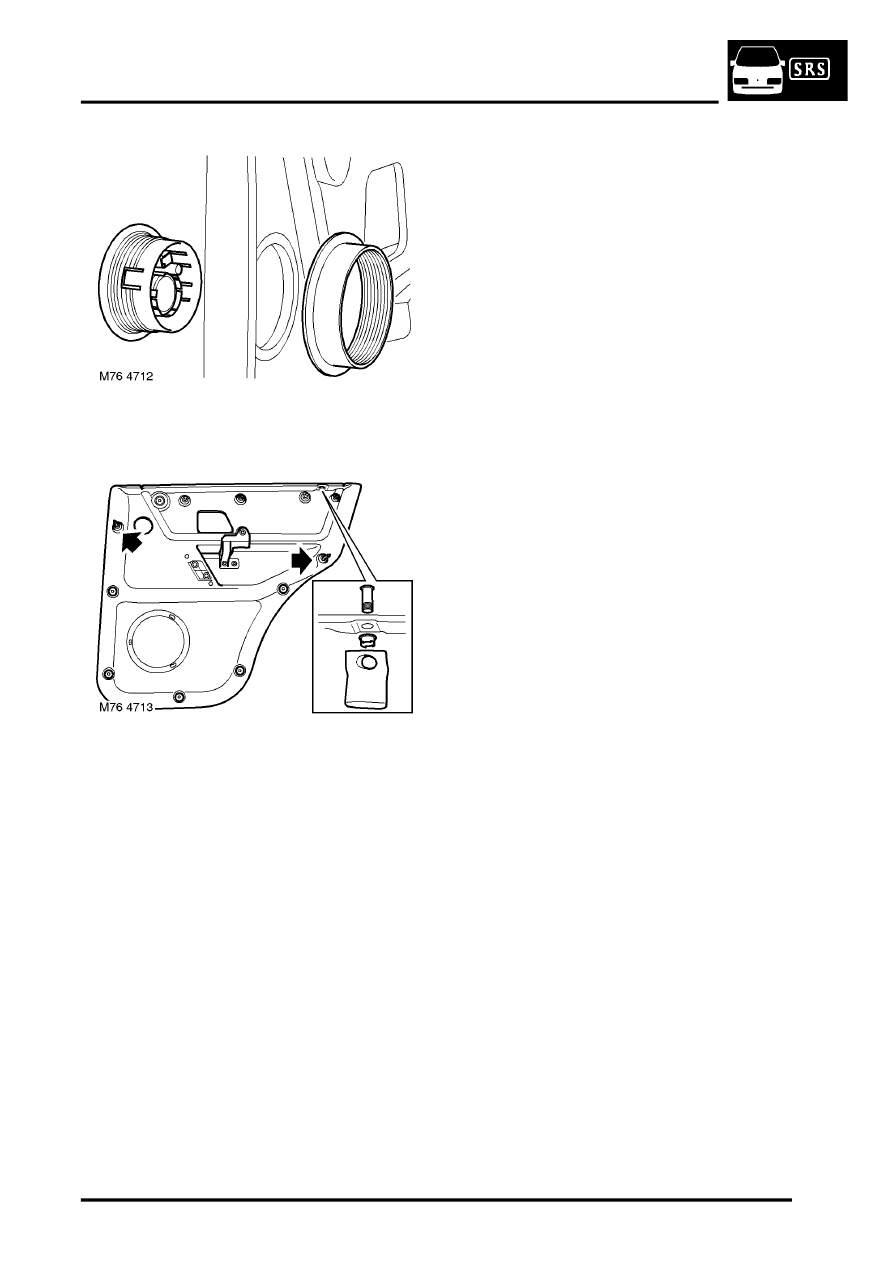
8. Remove locking ring securing tweeter to trim
casing and remove tweeter.
9. Remove foam pad from sill button guide.
10. Release retainer and remove sill button guide.
11. Note the fitted position of the 2 long trim studs
and remove 9 trim studs from trim casing.
12. Release and remove locking ring securing door
pull to trim casing.
13. Remove 2 plastic rivets securing door pull to
trim casing and remove door pull.
NOTE: Plastic rivets are used for production
purposes only. Screws should be used to retain
all parts previously held in place with plastic
rivets.
Refit
1. Fit door pull to trim casing and secure with
screws and locking ring.
2. Fit trim studs to casing.
3. Fit sill button guide to trim casing and secure
with retainer.
4. Fit foam pad to sill button guide.
5. Fit tweeter to trim casing and secure with
locking ring.
6. Fit and secure window lift switch and finisher to
trim casing.
7. Connect multiplugs to window lift switch and
door tweeter.
8. Position trim casing, align fasteners with holes
in door and press firmly into position.
9. Fit and tighten screws securing door pull to
door assembly.
10. Fit and secure door pull finisher to door pull.
11. Fit door release escutcheon to trim casing and
secure with screw.
Parts & tools for this job For Land Rover Freelander
- TOOLTrim removal tool kitSearch: trim removal tool kit
- PARTTouch-up paintSearch: Land Rover touch up paint
- PARTPanel clip assortmentSearch: Land Rover panel clips assortment
Links open Amazon search results in a new tab. As an Amazon Associate I earn from qualifying purchases.