
Exhaust manifold gasket - ’t’ series with air conditioning
- Make
- Rover
- Model
- 400 Workshop Manual
- Year
- 1995–2000
- Section
- Repairs › Exhaust manifold gasket - ’t’ series with air conditioning
Manifold & exhaust systemsExhaust manifold gasket - ’t’ series with air conditioning · page 1 of 3
Do not carry out further dismantling if component is removed for access only.
- Remove heated oxygen sensor from exhaust manifold and collect sealing washer.
- Fit sealing washer to sensor.
- Fit sensor to NEW manifold and tighten to 55 Nm.
Refit
- Clean dipstick tube and housing.
- Clean exhaust manifold and cylinder head mating faces.
- Fit NEW gasket to cylinder head.
- Fit manifold and position to cylinder head studs.
- Fit 2 nuts securing manifold to cylinder head, but do not tighten.
- Clean dipstick tube and apply Loctite 601.
- Fit dipstick tube to engine.
- Fit bolt securing dipstick tube to coolant rail.
- Fit dipstick.
- Fit and tighten bolt securing PAS pipe to coolant rail.
- Fit bolt securing coolant rail to cylinder head and tighten to 25 Nm .
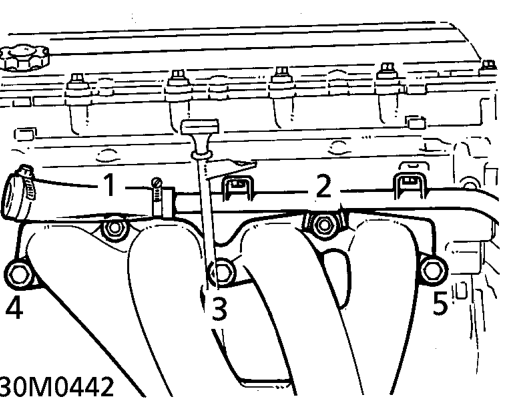
- Align coolant rail support bracket to manifold fixing, fit nuts and bolts and tighten manifold fixings in sequence shown to 45 Nm.
- Connect heated oxygen sensor multiplug and secure to clip.
- Clean exhaust front pipe to manifold mating faces.
- Fit NEW exhaust front pipe flange gasket to manifold, connect front pipe, fit nuts and tighten to 50 Nm.
- Connect battery earth lead.
EXHAUST MANIFOLD GASKET - ’T’ SERIES WITH AIR CONDITIONING
Service repair no - 30.15.12/20
Remove
- Remove radiator cooling fan. See COOLING SYSTEM, Repairs.
- Remove air cleaner. See ENGINE MANAGEMENT SYSTEM - MEMS, Repairs.
- Remove alternator. See ELECTRICAL, Repairs.
- Remove 4 nuts securing exhaust front pipe to manifold.
- Release front pipe from manifold studs.
- Remove and discard front pipe to manifold flange gasket.
- Position container beneath power steering pump.
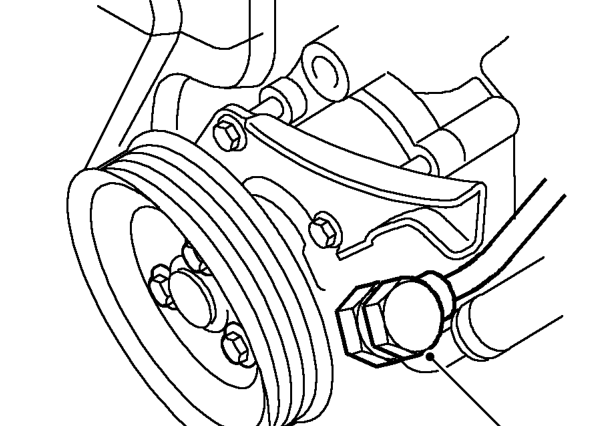
- Using a 22 mm crow foot spanner, remove banjo bolt securing high pressure pipe to steering pump, allow PAS fluid to drain.
- Collect 2 banjo sealing washers and discard.
CAUTION: Plug the connections.
Parts & tools for this job For 1995 Rover 400
- PARTExhaust gasketSearch: Rover 400 1995 exhaust gasket
- TOOLPenetrating oilSearch: penetrating oil
- TOOLOBD2 scannerSearch: OBD2 scanner
Links open Amazon search results in a new tab. As an Amazon Associate I earn from qualifying purchases.