
Original page
- Make
- Rover
- Model
- 600 Rover 600 Repair Manual - Volumes 1 and 2 - 2nd Edition
- Section
- Doors › Original page
BodyOriginal page · page 1 of 2
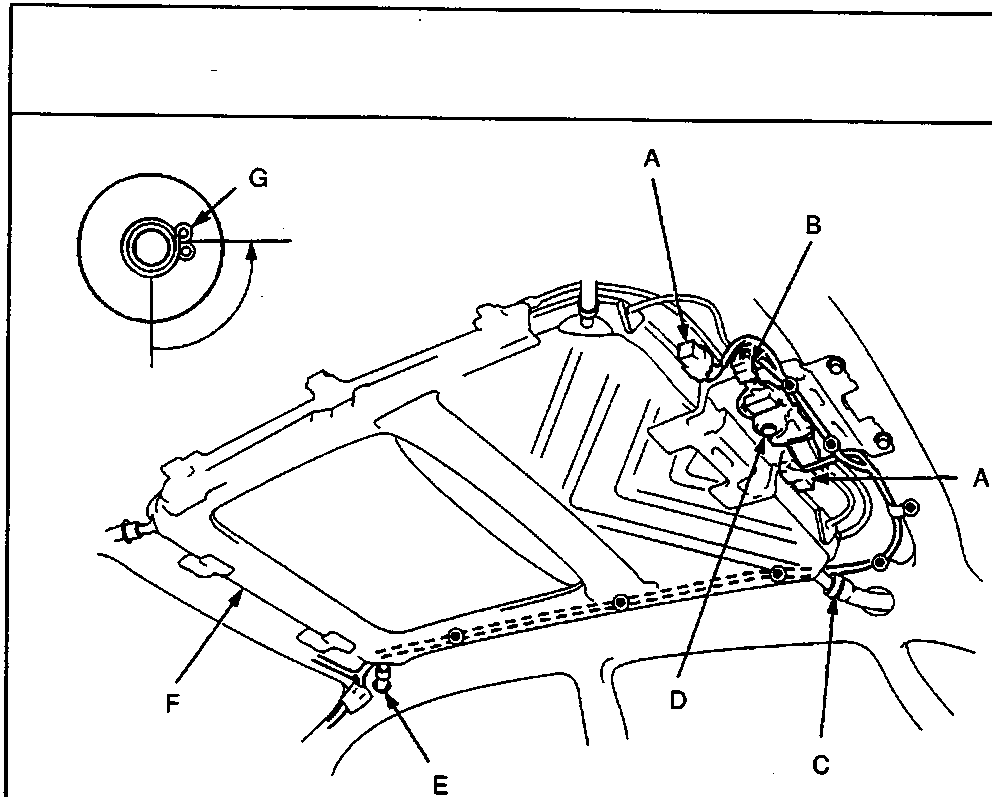
76M 0880
A Relay
E Front drain tube
B Connector
F Frame
C Rear drain tube
G Tube clip
D Motor
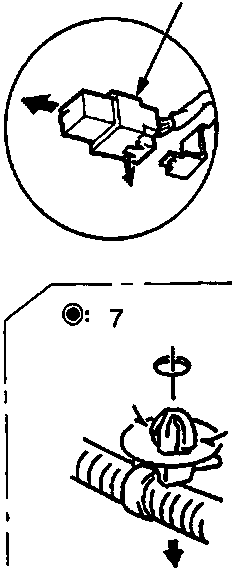
- Clip locations and quantities are shown by black/white circles.
- Disconnect the motor connector, harness clips and remove the relays.
- Disconnect the drain tubes.
Note: Install the tube clips with the ends facing the side to ease installation of the headliner.
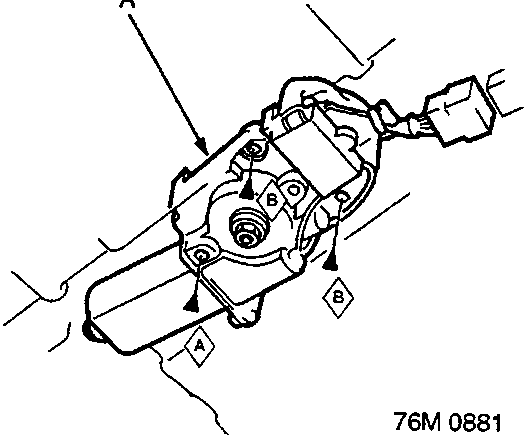
A Motor
- Screw locations and quantities are shown by black triangles. (Use TORX T20)
- To remove the motor, remove the three screws.
Note: Make sure the cable sliders are parallel when installing the motor.
Original page
Parts & tools for this job For Rover 600
- TOOLTrim removal tool kitSearch: trim removal tool kit
- PARTTouch-up paintSearch: Rover touch up paint
- PARTPanel clip assortmentSearch: Rover panel clips assortment
Links open Amazon search results in a new tab. As an Amazon Associate I earn from qualifying purchases.