
Replacement
- Make
- Rover
- Model
- 600 Rover 600 Repair Manual - Volumes 1 and 2 - 2nd Edition
- Section
- Doors › Replacement
BodyReplacement · page 1 of 2
Replacement
- Remove the frame from the car.
- Remove the motor.
- Remove the glass brackets.
► 4
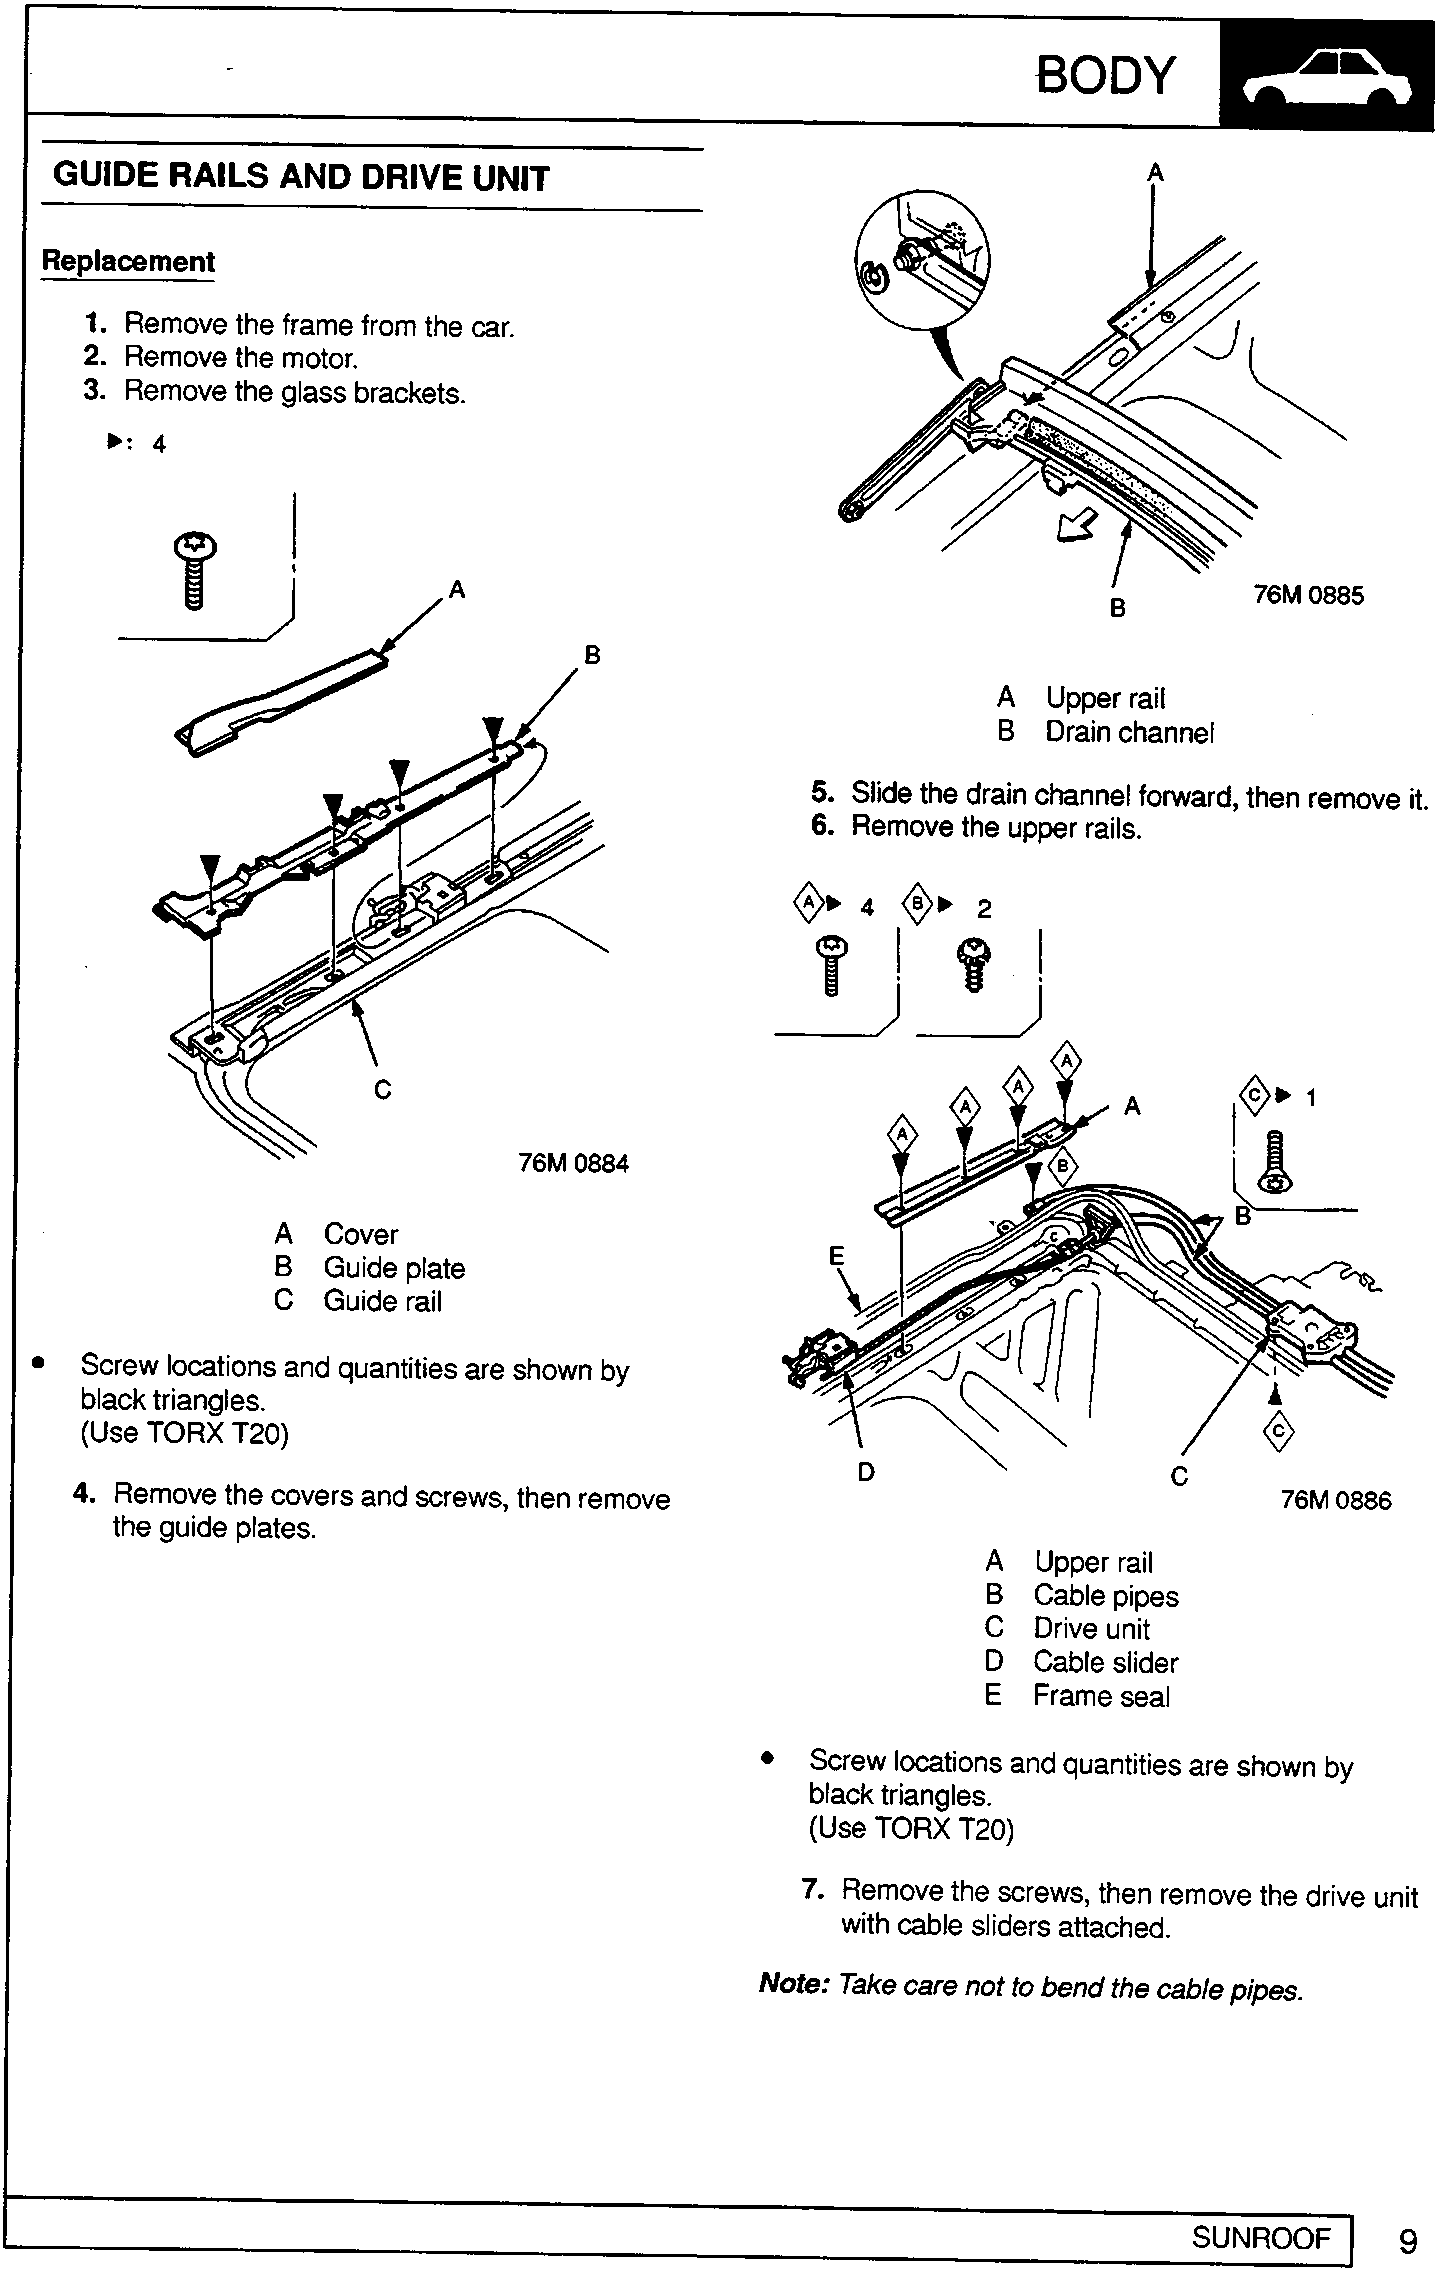
- A Upper rail
B Drain channel
A Cover
B Guide plate
C Guide rail
- Screw locations and quantities are shown by black triangles.
(Use TORX T20)
- Remove the covers and screws, then remove the guide plates.
- Slide the drain channel forward, then remove it.
- Remove the upper rails.
- A Upper rail
B Cable pipes
C Drive unit
D Cable slider
E Frame seal
- Screw locations and quantities are shown by black triangles.
(Use TORX T20)
- Remove the screws, then remove the drive unit with cable sliders attached.
Note: Take care not to bend the cable pipes.
Parts & tools for this job For Rover 600
- TOOLTrim removal tool kitSearch: trim removal tool kit
- PARTTouch-up paintSearch: Rover touch up paint
- PARTPanel clip assortmentSearch: Rover panel clips assortment
Links open Amazon search results in a new tab. As an Amazon Associate I earn from qualifying purchases.