
1.4 and 1.6 models
- Make
- Rover
- Model
- 400 Body Repair Manual
- Year
- 1995–2000
- Section
- Repairs › 1.4 and 1.6 models
Panel repairs1.4 and 1.6 models
- Remove the inner wing upper member.
- Centre punch around the spot weld imprints.
- Use the special spot cutter to drill holes at the spot weld nuggets.
- Remove the MIG weld flange with a disc sander.
WARNING: To prevent eye injury, wear goggles or safety glasses whenever sanding, cutting or grinding.
- Using a chisel, prise off the welded flange from the front pillar and spring housing.
NOTE: Remove the inner wing upper members carefully so they can be reused.
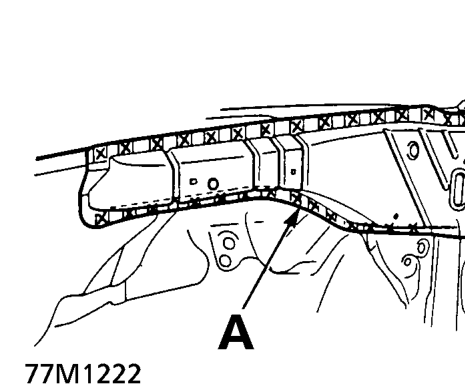
A. Inner wing upper member
- Cut and prise off the front inner wing and spring housing.
- Centre punch around the spot weld imprints on the front side frame and lower dashboard.
- Drill holes in the centre punched areas using a spot cutter.
- Using a chisel, prise off the welded flange.
- Level and finish the burrs left on the welding surfaces with a sander.
- Fill all drilled holes by gas welding.
- When replacing the front inner wing only.
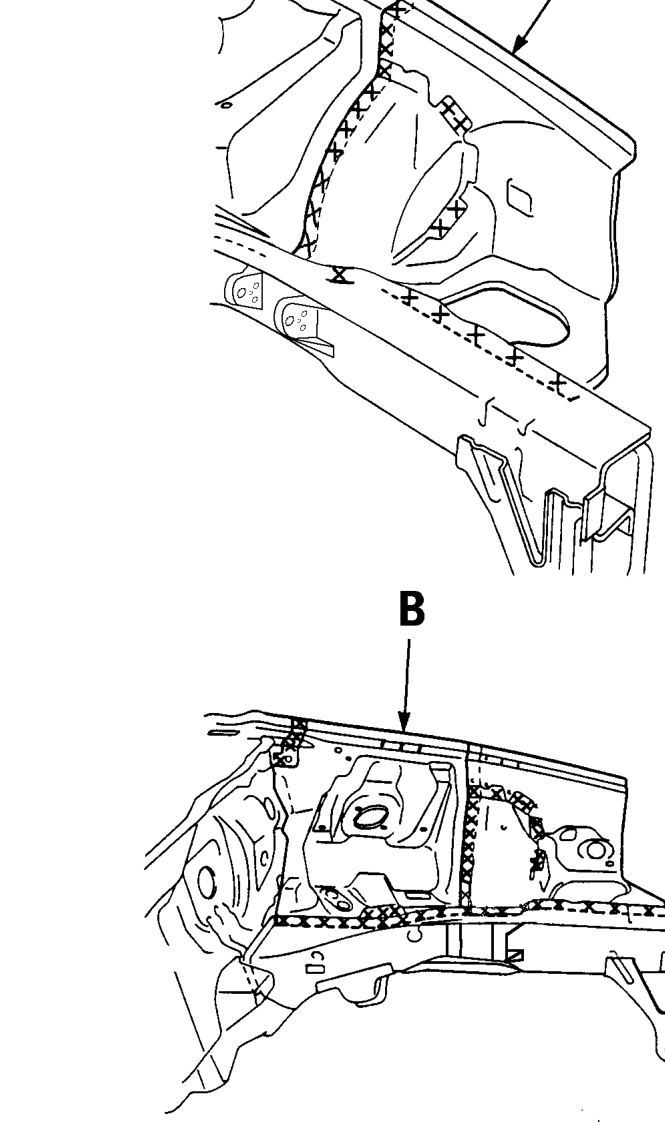
1.4 and 1.6 models
A. Front Inner wing B. Spring Housing
Parts & tools for this job For 1995 Rover 400
- TOOLTorque wrenchSearch: 3/8 inch torque wrench
- TOOLSocket setSearch: socket set metric
- BOOKHaynes manualSearch: Haynes manual Rover 400
Links open Amazon search results in a new tab. As an Amazon Associate I earn from qualifying purchases.