
Replacement
- Make
- Rover
- Model
- 400 Body Repair Manual
- Year
- 1995–2000
- Section
- Repairs › Replacement
Panel repairsReplacement
Replacement
- Remove the related parts.
- Parts to be removed when removing the front bulkhead.
- Parts on passenger side of lower dashboard which are especially flammable.
- Electrical accessories in engine compartment and wire harnesses.
NOTE: See the Rover 400 Series Workshop Manual, for removal and installation of the engine, front suspension and brakes.
- Pull out and straighten the damaged area to approximately the original shape.
- Attach the car to the frame straightener by tightening the underbody clamps at the horizontal pinch weld points.
- Before cutting off the damaged sections, pull them out so that they are restored to the original shape.
- Do not pull out more than necessary.
- Pull out and straighten the damaged area of the lower dashboard, front pillar, and other parts.
- After pulling, check the spring housing position using the body dimensional drawings and positioning jig.
NOTE: Check the condition of the door and hinges.
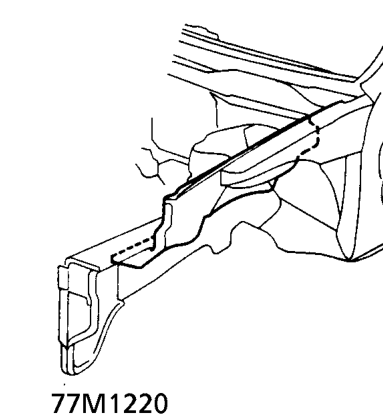
- Peel off the undercoat. Heat the undercoat at the weld areas of the front inner wing and front side frame with a gas torch and peel off the undercoat with a metal spatula.
CAUTION: Be careful not to burn the fittings inside the passenger compartment and dashboard insulator when heating.
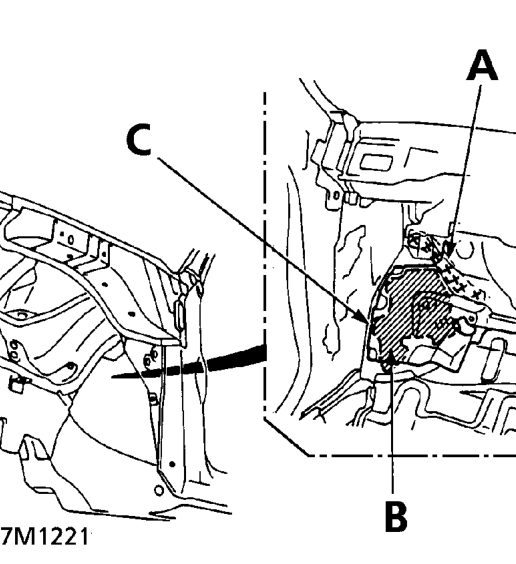
A. Spring housing B. Dashboard insulator C. Insulator panel
Parts & tools for this job For 1995 Rover 400
- TOOLTorque wrenchSearch: 3/8 inch torque wrench
- TOOLSocket setSearch: socket set metric
- BOOKHaynes manualSearch: Haynes manual Rover 400
Links open Amazon search results in a new tab. As an Amazon Associate I earn from qualifying purchases.