
Replacement
- Make
- Rover
- Model
- 400 Body Repair Manual
- Year
- 1995–2000
- Section
- Repairs › Replacement
Panel repairsReplacement · page 1 of 4
Replacement
- Remove the related parts.
- Front and rear doors (remove according to part damaged)
- Side and centre pillar trim
- Door opening trim
- Carpet
- Door switch
- Seat belt
- Pull out and straighten the damaged area. Damage may extend to the inner pillar, inside sill and floor. Determine the extent of the damage first, so that frame can be pulled out properly.
- Cut and prise off the side sill.
- Check the damage on the outer side sill, then cut the repair outer side sill so it will overlap by 30 mm (1.2 in) in the front and back.
- Cut the side sill with a handsaw along the bold line shown in the figure to the right.
NOTE: Be careful not to cut the inside sill. This could result in extensive repair.
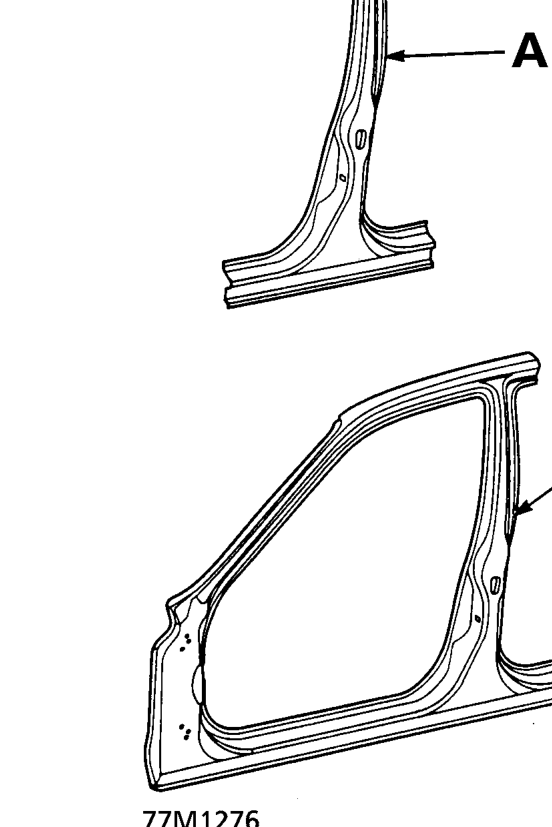
A. Repair part
- If the damage involves part of the centre pillar, cut them as shown with a handsaw.
- Cut the side sill with a chisel leaving the weld flanges intact.
- Centre punch around the spot weld imprints on the welded flange.
- Drill holes using the spot cutter.
- Prise off the welded flange with a chisel.
NOTE: Be careful not to let the holes penetrate down to the inner section.
Parts & tools for this job For 1995 Rover 400
- TOOLTorque wrenchSearch: 3/8 inch torque wrench
- TOOLSocket setSearch: socket set metric
- BOOKHaynes manualSearch: Haynes manual Rover 400
Links open Amazon search results in a new tab. As an Amazon Associate I earn from qualifying purchases.