
Windscreen lower
- Make
- Rover
- Model
- 400 Body Repair Manual
- Year
- 1995–2000
- Section
- Repairs › Windscreen lower
Panel repairsWindscreen lower · page 1 of 3
WINDSCREEN LOWER
Description
Impact damage to the windscreen lower area may spread to the back of the panel and wiper mounting area, calling for replacement of the affected skins.
Mass Production Body Welding Diagram
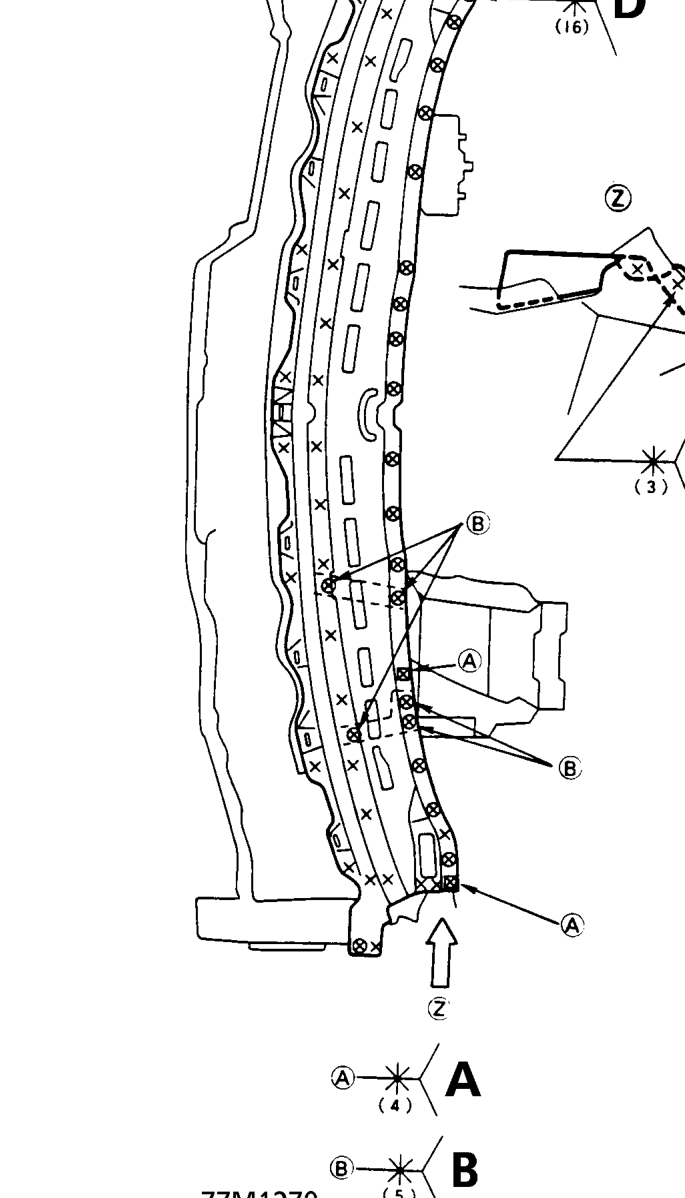
Key to illustration 77M1270
A. Windscreen lower, Defroster duct and Dashboard upper (4-plate welding) B. Windscreen lower, Windscreen lower stiffener and Defroster duct C. Windscreen lower and Defroster duct D. Windscreen lower, Defroster duct and Dashboard upper E. Windscreen lower and Dashboard upper side member
Replacement
- Remove the related parts.
- Wiper arm and motor
- Windscreen
- Right and left front wings
- Right and left front door opening trims
- Front pillar trim
- Bonnet
- Wire harnesses and electrical accessories
- Steering column
- Dashboard, etc.
- Cut the windscreen lower and separate the welded flange.
- Centre punch around the spot weld imprints.
- Drill holes with a spot cutter through the nuggets.
- Peel off the welding flange using a chisel.
- Level off and finish the burrs of the prised off spot welds with a sander.
WARNING: To prevent eye injury, wear goggles or safety glasses whenever sanding, cutting or grinding.
Parts & tools for this job For 1995 Rover 400
- TOOLTorque wrenchSearch: 3/8 inch torque wrench
- TOOLSocket setSearch: socket set metric
- BOOKHaynes manualSearch: Haynes manual Rover 400
Links open Amazon search results in a new tab. As an Amazon Associate I earn from qualifying purchases.