
Replacement
- Make
- Rover
- Model
- 400 Body Repair Manual
- Year
- 1995–2000
- Section
- Repairs › Replacement
Panel repairsReplacement
Replacement
- Remove the related parts.
- Rear bumper
- Lock and its attachments
- Other related parts
- Rear and side trim panels
- Tail lights
- Pull out and straighten the damaged area.
- Pull out the related rear side inner panel, rear floor, rear frame and other damaged parts with the frame straightener.
- Attach the car to the frame straightener by tightening the underbody clamps located at the jack-up points on the bottom of the side sill and the side sill side flanges.
- Cut and prise off the rear panel.
- Cut along the bold line shown with a gas cutter or an air chisel and remove the rear panel.
- Centre punch around the spot weld imprints with the rear side outer panel and rear floor.
- Drill holes using a spot cutter.
NOTE: Be careful not to let holes penetrate through to the rear floor.
- Remove weld flange with a chisel.
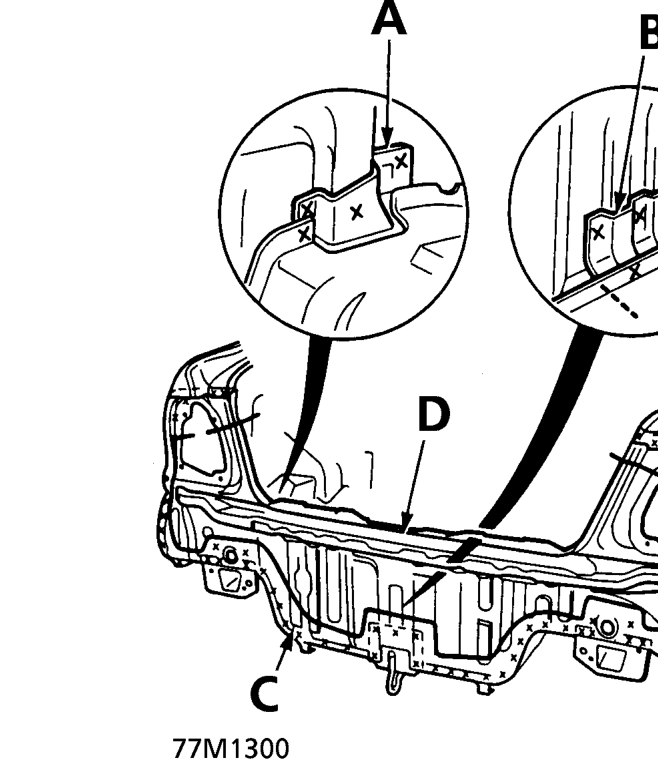
5 door models
A. Jack-up Stiffener B. Rear Frame Gusset C. Rear panel D. Bumper upper beam
Parts & tools for this job For 1995 Rover 400
- TOOLTorque wrenchSearch: 3/8 inch torque wrench
- TOOLSocket setSearch: socket set metric
- BOOKHaynes manualSearch: Haynes manual Rover 400
Links open Amazon search results in a new tab. As an Amazon Associate I earn from qualifying purchases.