
Saloon illustrated
- Make
- Rover
- Model
- 400 Body Repair Manual
- Year
- 1995–2000
- Section
- Repairs › Saloon illustrated
Panel repairsSaloon illustrated
- Set the repair part.
- Install the outer panel and clamp it with vice-grips.
NOTE: Apply the spot sealer to the welding surface when spot welding.
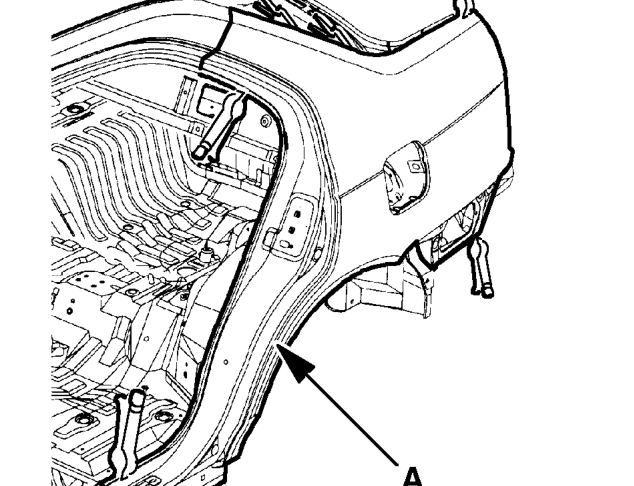
Saloon illustrated
A. Repair Part
- Check the body dimensions.
- Tack weld the repair part.
WARNING: To prevent eye injury and burns when welding, wear an approved welding helmet, gloves and safety shoes.
Temporarily spot weld the outer panel at the clamped positions.
- Remove the vice-grips and check the alignment of the boot lid and door.
NOTE: Check for flushness of the front wing, door, and the rear wing and make sure the body lines flow smoothly.
- Check the boot lid and door openings.
Parts & tools for this job For 1995 Rover 400
- TOOLTorque wrenchSearch: 3/8 inch torque wrench
- TOOLSocket setSearch: socket set metric
- BOOKHaynes manualSearch: Haynes manual Rover 400
Links open Amazon search results in a new tab. As an Amazon Associate I earn from qualifying purchases.