
Replacement
- Make
- Rover
- Model
- 400 Body Repair Manual
- Year
- 1995–2000
- Section
- Repairs › Replacement
Panel repairsReplacement · page 1 of 4
Replacement
- Remove the related parts.
- Front bumper
- Bonnet
- Right and left headlights and left front wings
- Radiator, condenser
- Bonnet latch
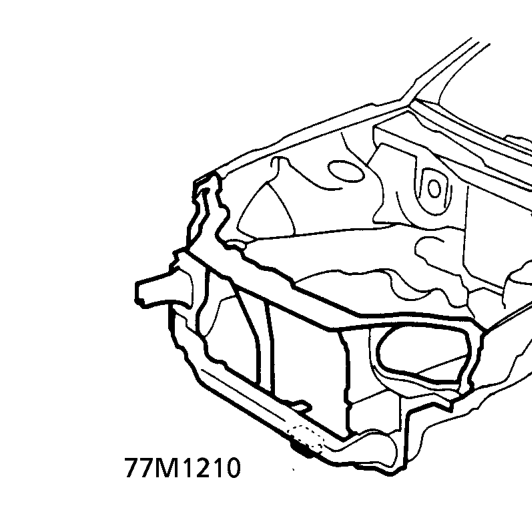
- Roughly pull out and straighten the damaged area.
- Check the damage to the front inner wing and front side frame before removing the front bulkhead. Use the frame straightener to roughly pull out and repair the damaged bulkhead before removing the bulkhead.
NOTE: Check the fit of the door, taking care not to pull the damaged area out more than necessary.
- Use the horizontal pinch weld clamps and attach the car to the frame straightener at the clamping points securely.
- Keep the body level. Jack up the body, and place safety stands at the four designated places of the side sills. See JACKING, SUPPORTING AND TOWING for positioning of safety stands.
- Cut and prise off the front bulkhead.
- Centre punch around the spot weld imprints.
- Use the special spot cutter to drill holes at the spot weld nuggets on the front inner wing and front side frame.
NOTE: When drilling holes be careful not to drill down to the front inner wing and front side frame. • Cut off the side bulkhead with an air chisel, leaving the welding flanges intact. • Level and finish the burrs from the prised off spot welds with a disc sander.
WARNING: To prevent eye injury, wear goggles or safety glasses whenever sanding, cutting or grinding.
Parts & tools for this job For 1995 Rover 400
- TOOLTorque wrenchSearch: 3/8 inch torque wrench
- TOOLSocket setSearch: socket set metric
- BOOKHaynes manualSearch: Haynes manual Rover 400
Links open Amazon search results in a new tab. As an Amazon Associate I earn from qualifying purchases.