
Original page (page 2 of 3)
- Make
- Rover
- Model
- 600 Rover 600 Repair Manual - Volumes 1 and 2 - 2nd Edition
- Section
- Exterior fittings
BodyOriginal page · page 2 of 3
Note: Do not get the glass and body primer applicators mixed up.
Do not apply body primer to rear screen.
Never touch the primed surfaces with your hands.
Keep water, dust and abrasive materials away from primed surfaces.
Wipe off any spillage immediately.
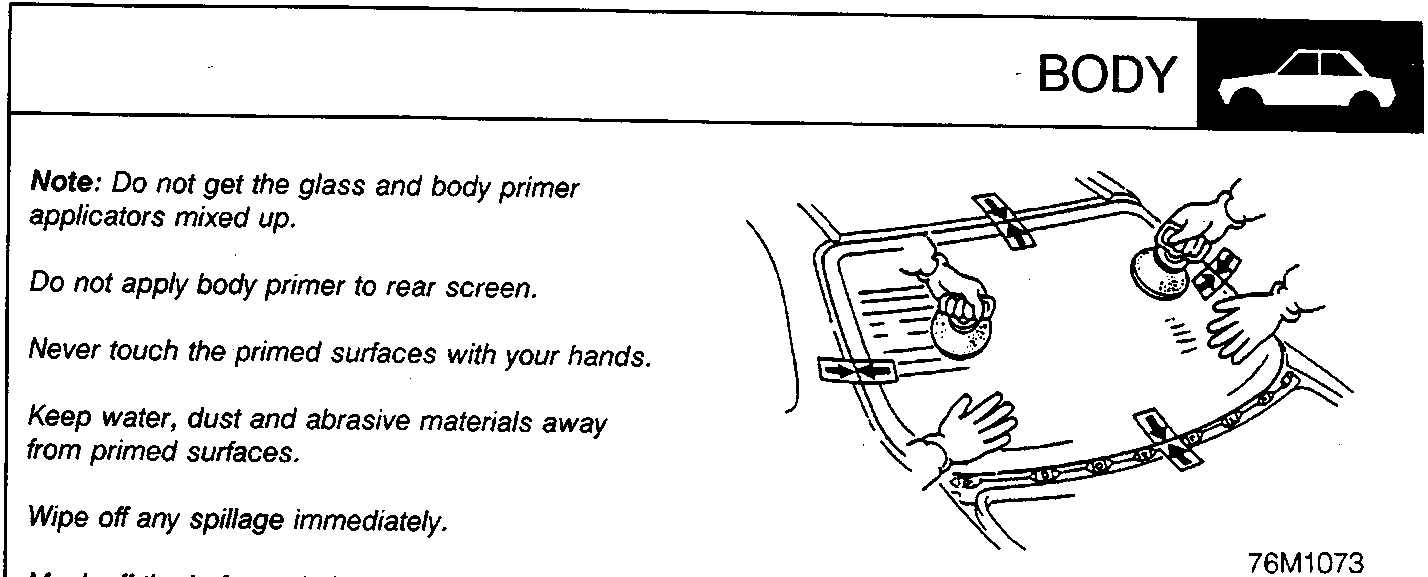
Mask off the before priming the body flange.
- When the primer is dry, wipe primed surfaces with a clean lint free cloth
- Pierce adhesive cartridge in the centre of the threaded end and fit the pre-cut nozzle to cartridge. Shake out the crystals from under the lid of the cartridge base.
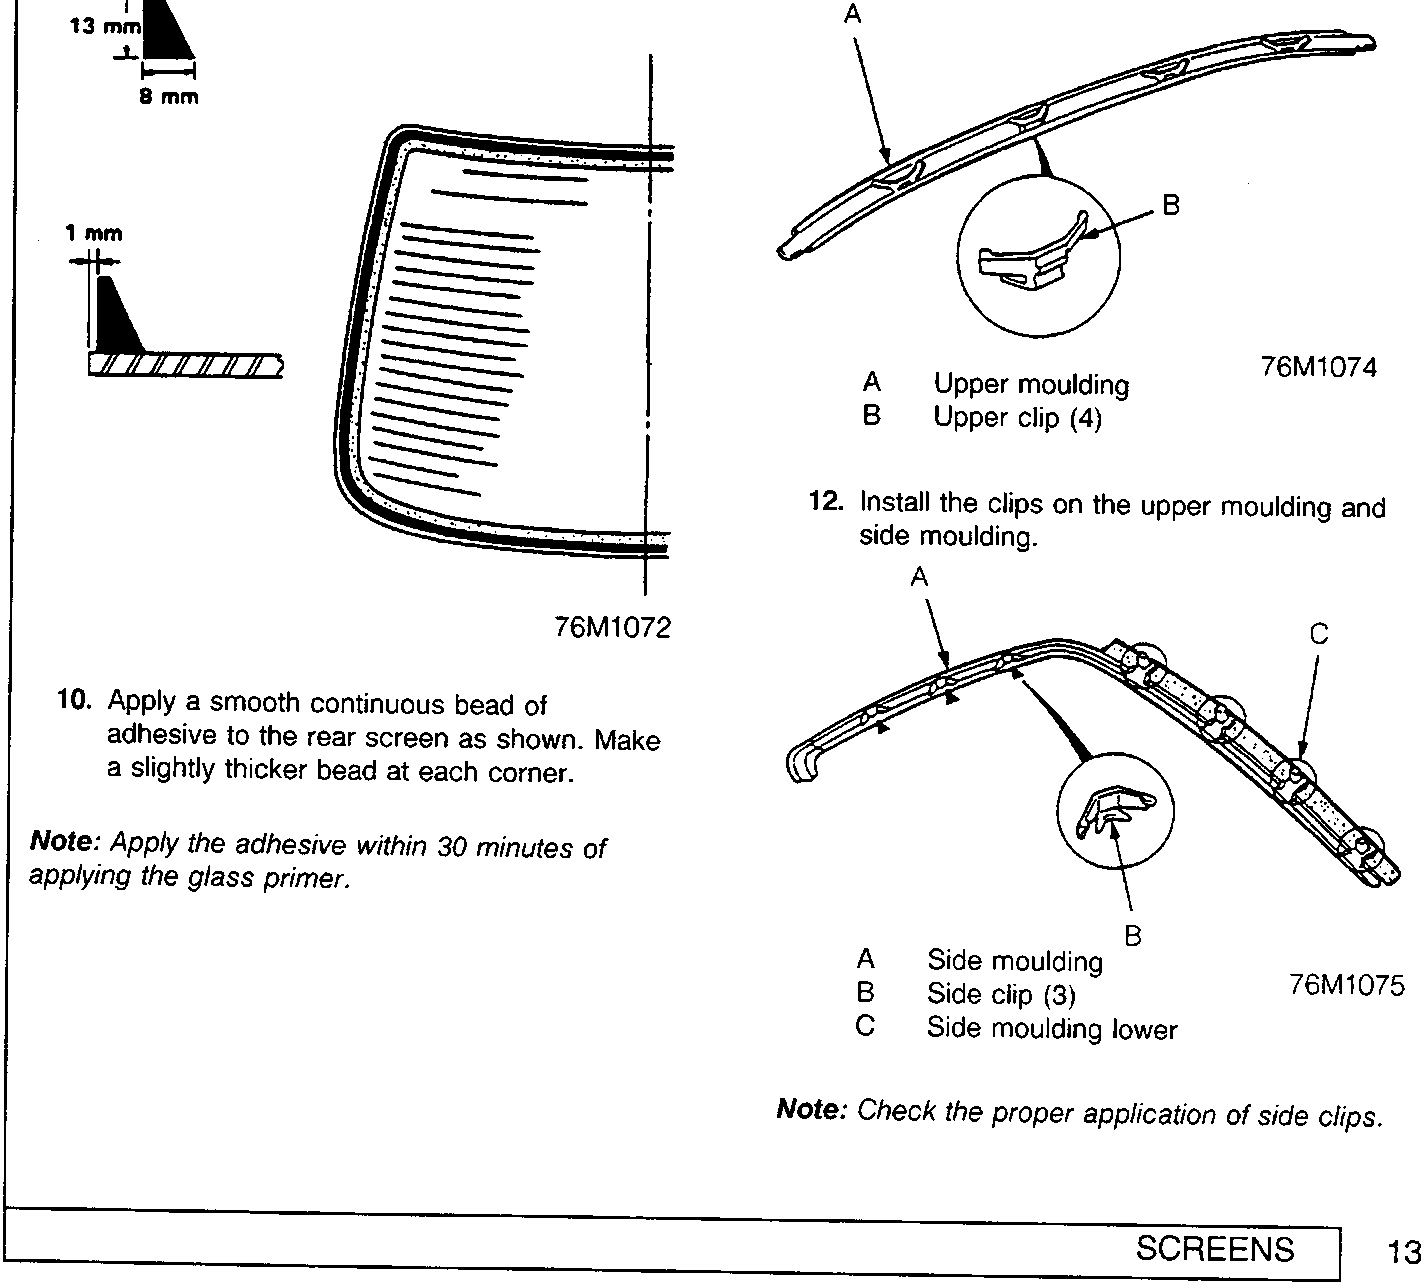
- Apply a smooth continuous bead of adhesive to the rear screen as shown. Make a slightly thicker bead at each corner.
Note: Apply the adhesive within 30 minutes of applying the glass primer.
- Use the suction cups to hold the rear screen over the aperture, align it with the alignment marks made in step 3 then carefully lower into position against the L shaped spacers and set it down on the adhesive. Lightly push on the rear screen until its edge is fully seated on the adhesive all the way around.
Note: Do not close or open the doors until the adhesive is dry.
- Install the clips on the upper moulding and side moulding.
Note: Check the proper application of side clips.
Parts & tools for this job For Rover 600
- TOOLTrim removal tool kitSearch: trim removal tool kit
- PARTTouch-up paintSearch: Rover touch up paint
- PARTPanel clip assortmentSearch: Rover panel clips assortment
Links open Amazon search results in a new tab. As an Amazon Associate I earn from qualifying purchases.