
Original page (page 3 of 3)
- Make
- Rover
- Model
- 600 Rover 600 Repair Manual - Volumes 1 and 2 - 2nd Edition
- Section
- Exterior fittings
BodyOriginal page · page 3 of 3
Note: The numbers after the part names show the quantities of the parts used.
- Clean off the excess adhesive, remove protective tape.
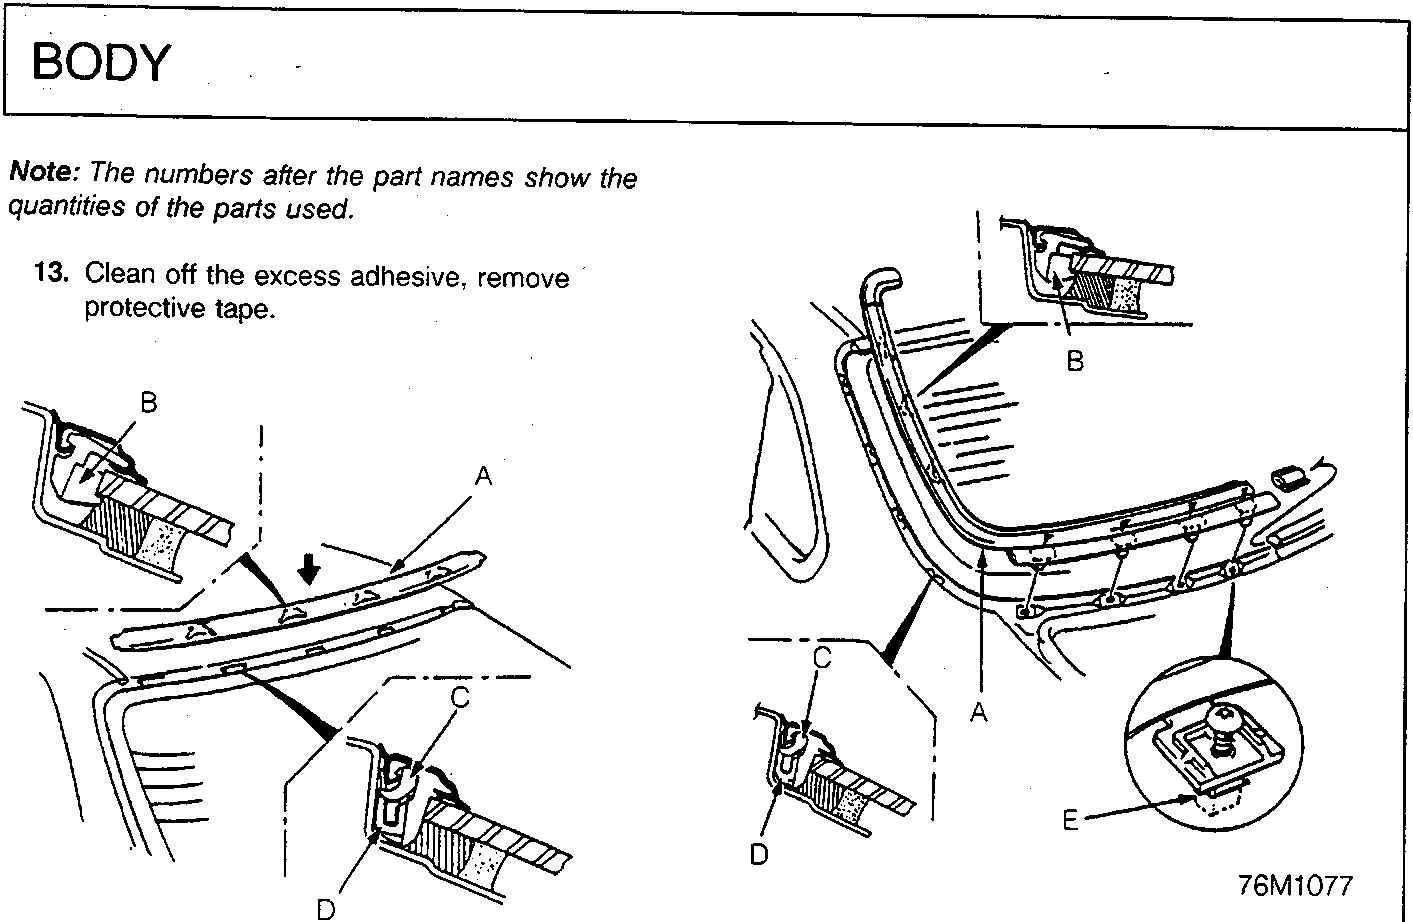
- Upper moulding
- Upper clip (moulding)
- Upper clip (body)
- Retainer
- Side moulding
- Side clip (moulding)
- Side clip (body)
- Retainer
- Moulding lower holder
- Install the upper moulding.
- Install the side moulding.
- Allow at least 1 hour for the adhesive to dry then test the rear screen seal for leaks, use either leak test equipment or spray with water.
CAUTION: If a leak is detected, dry the glass apply sealer to the area ensuring spacing blocks are well covered and retest. Do not attempt to remove windscreen or spread the adhesive already applied.
- Refit headlining into position, refit heated rear screen wiring, refit rear pillar trim panels, parcel shelf and rear seat.
CAUTION: Do not slam vehicle doors with the windows closed or drive the car at speed until the adhesive has completely cured. A curing time of 4 to 6 hours is desirable before driving the vehicle.
Parts & tools for this job For Rover 600
- TOOLTrim removal tool kitSearch: trim removal tool kit
- PARTTouch-up paintSearch: Rover touch up paint
- PARTPanel clip assortmentSearch: Rover panel clips assortment
Links open Amazon search results in a new tab. As an Amazon Associate I earn from qualifying purchases.