
All models
- Make
- Rover
- Model
- Coupé, Cabriolet & Tourer 200/400 Coupé, Cabriolet & Tourer Workshop Manual
- Section
- Interior trim components › All models
BodyAll models
All models
- Fit rear seat squab, see Rear seat squab – 400 Series.
- Fit rear seat cushion, see Rear seat cushion – 400 Series.
- Connect battery earth lead..
LUGGAGE COMPARTMENT FINISHER
Service Repair No. 76.13.53
Remove
- Release luggage compartment cover handle and fold back cover.
- Remove luggage compartment carpet.
- Remove spare wheel cover board.
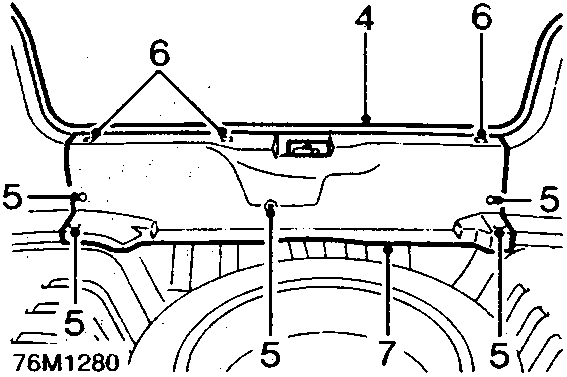
- Release taildoor aperture seal from flange.
- Remove 5 screws securing trim finisher to body.
- Release 3 clips securing finisher to body.
- Remove luggage compartment finisher.
Refit
- Position trim finisher to body and secure with clips.
- Fit and tighten screws.
- Fit seal to taildoor aperture flange.
- Fit spare wheel cover board and luggage compartment carpet.
TAILDOOR TRIM PAD
Service Repair No. 76.34.11
Remove
- Open taildoor.
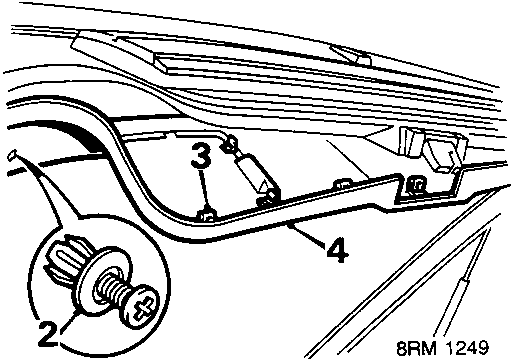
- Remove 2 screws and clips, trim pad to taildoor.
- Start at lower corner and release 10 clips securing trim pad to taildoor.
- Release trim pad from glass finishers and remove.
Do not carry out further dismantling if component is removed for access only
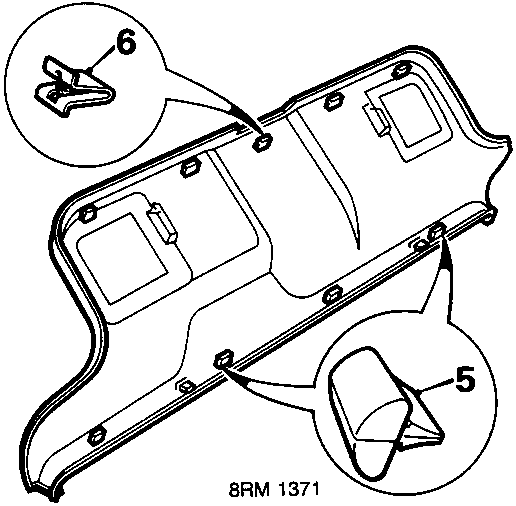
- Remove 2 buffers.
- Remove 10 clips.
- Transfer components removed to new trim pad.
Refit
- Position and align trim pad to glass finishers.
- Align top edge, press to secure clips.
- Align bottom edge, press to secure clips.
- Fit clips and secure with screws.
Parts & tools for this job For Rover Coupé, Cabriolet & Tourer
- TOOLTrim removal tool kitSearch: trim removal tool kit
- PARTTouch-up paintSearch: Rover touch up paint
- PARTPanel clip assortmentSearch: Rover panel clips assortment
Links open Amazon search results in a new tab. As an Amazon Associate I earn from qualifying purchases.