
Refit
- Make
- Rover
- Model
- Coupé, Cabriolet & Tourer 200/400 Coupé, Cabriolet & Tourer Workshop Manual
- Section
- Interior trim components › Refit
BodyRefit
- Remove cover from each seat belt B post anchorage.
- Remove nut securing each seat belt. Release belt from each B post.
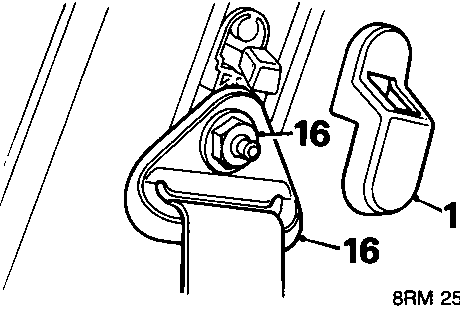
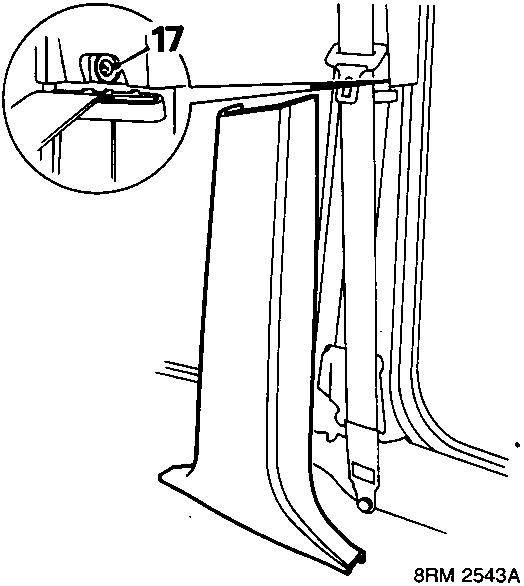
- Remove screw and release lower B post finishers.
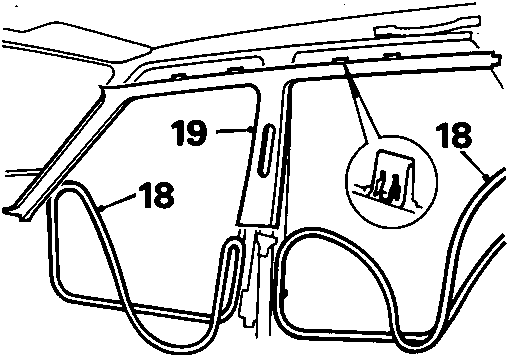
- Release door sealing rubbers from top of each door aperture.
- Release 4 clips A and B/C post finishers and remove both finishers.
- Remove D/E post finishers, see Finisher D/E post – 400 Series.
- Remove rear window top trim.
- Release the Ultrasonic Disable switch and Ultrasonic sensor from the headlining.
- Disconnect the connectors from the switch and the sensor and remove the units.
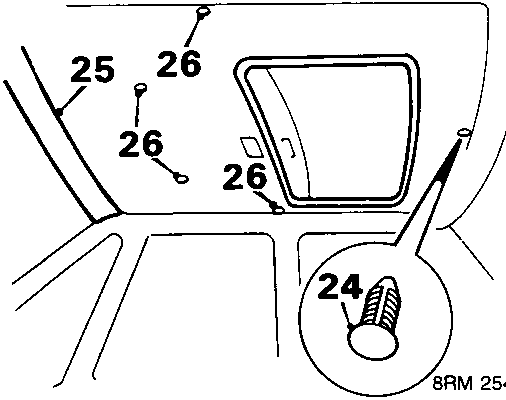
- Remove stud, headlining front.
- Remove rear screen top finisher.
- Remove 4 studs, headlining sides.
- With assistance, release and manoeuvre headlining through luggage compartment.
Refit
- With assistance, manoeuvre headlining through luggage compartment and into position.
- Fit studs to secure headlining.
- Connect the Ultrasonic Disable switch and Ultrasonic sensor connectors.
- Fit the switch and the sensor to the headlining.
- Fit D/E post finishers, see Finisher D/E post – 400 Series.
- Fit rear window top finisher.
- Fit A and B/C post finishers.
- Refit door sealing rubbers.
- Fit lower B post finishers.
- Position seat belt anchorages to B post. Fit and tighten nuts to 32 Nm.
- Fit cover to each seat belt anchorage.
- Fit head restraint to each front seat.
- Refit interior lamp, see ELECTRICAL – Repairs.
- Position grab handles, fit and tighten screws.
- Fit screw covers to grab handles.
- Position sun visor clips, fit and tighten screws.
- Fit blanking plug to each sun visor clip.
- Position sun visors, fit and tighten screws.
- Fit sun visors to clips.
Models with sun roof
- Position lining round sun roof aperture.
- Fit aperture seal and cut off surplus fabric.
- Position opening mechanism escutcheon to roof. Fit and tighten screws.
- Fit sun roof handle. Fit and tighten screw.
- Close sun roof.
Parts & tools for this job For Rover Coupé, Cabriolet & Tourer
- TOOLTrim removal tool kitSearch: trim removal tool kit
- PARTTouch-up paintSearch: Rover touch up paint
- PARTPanel clip assortmentSearch: Rover panel clips assortment
Links open Amazon search results in a new tab. As an Amazon Associate I earn from qualifying purchases.