
1.4 and 1.6 models (page 2 of 2)
- Make
- Rover
- Model
- 400 Body Repair Manual
- Year
- 1995–2000
- Section
- Repairs
Panel repairs1.4 and 1.6 models · page 2 of 2
- Weld the inner wing upper member. When the inner wing upper member is to be reused, make MIG plug welds at the drilled holes.
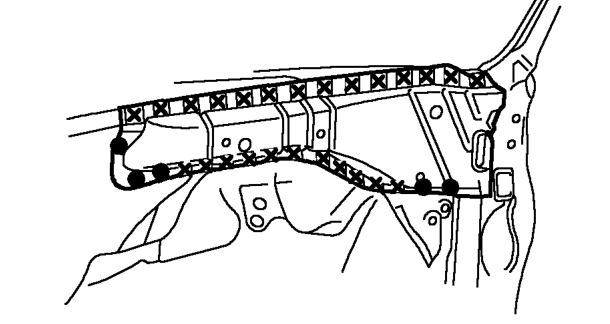
- Finish the welded area. Use a hammer and dolly to even out the side bulkhead and front side frame flanges for close fit with the surface of the front inner wing and spring housing.
- Apply the sealer. Apply sealer to the mating surfaces of the lower dashboard and front side frame, etc.
- Apply the paint.
WARNING: Ventilate when spraying paint. Most paint contains substances that are harmful if inhaled or swallowed. • Read the paint label before opening paint container. • Avoid contact with the skin. Wear an approved respirator, gloves, eye protection and appropriate clothing when painting. • Paint is flammable. Store it in a safe place, and keep it away from sparks, flames or cigarettes.
- Apply the undercoat. Undercoat the front floor, etc., and apply anti-rust agent to the inside of the welding section of the front side frame, lower dashboard, and inner wing upper member, etc.
- Install the related parts. Install in the reverse order of removal.
- Inspect, check and make adjustment.
- Measure the front wheel alignment.
- Inspect the brake system.
- Adjust the headlight aim.
Parts & tools for this job For 1995 Rover 400
- TOOLTorque wrenchSearch: 3/8 inch torque wrench
- TOOLSocket setSearch: socket set metric
- BOOKHaynes manualSearch: Haynes manual Rover 400
Links open Amazon search results in a new tab. As an Amazon Associate I earn from qualifying purchases.