
Engine LH mounting - 1.6 & 1.8 models (page 2 of 2)
- Make
- Rover
- Model
- 200 Workshop Manual
- Year
- 1995–1999
- Section
- Repairs
‹ Prev Engine LH mounting - 1.6 & 1.8 modelsNext › Engine LH mounting - automatic gearbox models with ABS
Engine - K16Engine LH mounting - 1.6 & 1.8 models · page 2 of 2
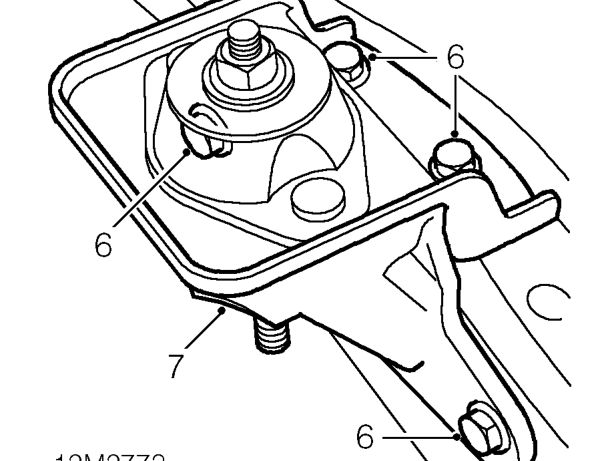
- Remove 4 bolts securing engine LH mounting bracket to body.
- Remove engine mounting and bracket.
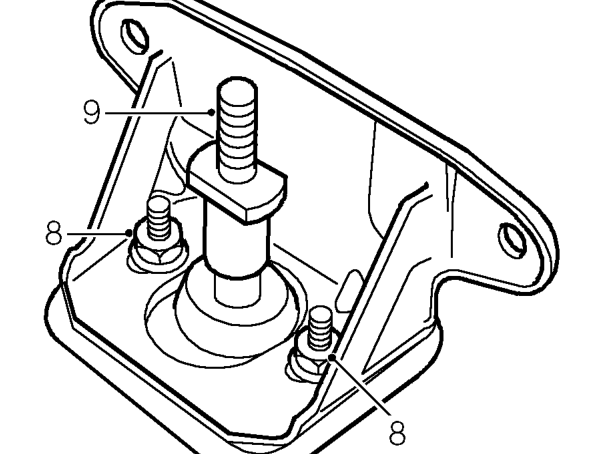
- Remove 2 nuts securing bracket to engine mounting.
- Remove engine mounting.
Refit
- Fit engine mounting to mounting bracket, fit nuts but DO NOT tighten.
- Position engine mounting assembly in vehicle.
- Fit bolts securing lower half of engine mounting bracket to body and tighten to 55 Nm.
- Fit bolts securing upper half of engine mounting bracket to body and tighten to 55 Nm.
- Raise engine and gearbox assembly and locate gearbox mounting bracket on engine mounting.
- Fit NEW Nyloc nut securing gearbox mounting bracket engine mounting and tighten to 160 Nm.
- Tighten 2 nuts securing engine mounting to mounting bracket to 45 Nm.
- Fit air cleaner. See ENGINE MANAGEMENT SYSTEM - MEMS, Repairs.
- Remove stand(s) and lower vehicle.
‹ Prev Engine LH mounting - 1.6 & 1.8 modelsNext › Engine LH mounting - automatic gearbox models with ABS
Parts & tools for this job For 1995 Rover 200
- PARTEngine gasket setSearch: Rover 200 1995 engine gasket set
- TOOLTorque wrenchSearch: 3/8 inch torque wrench
- TOOLFeeler gauge setSearch: feeler gauge set
Links open Amazon search results in a new tab. As an Amazon Associate I earn from qualifying purchases.