
Models with air conditioning fitted (page 5 of 6)
- Make
- Rover
- Model
- 200 Workshop Manual
- Year
- 1995–1999
- Section
- Repairs
Engine - L SeriesModels with air conditioning fitted · page 5 of 6
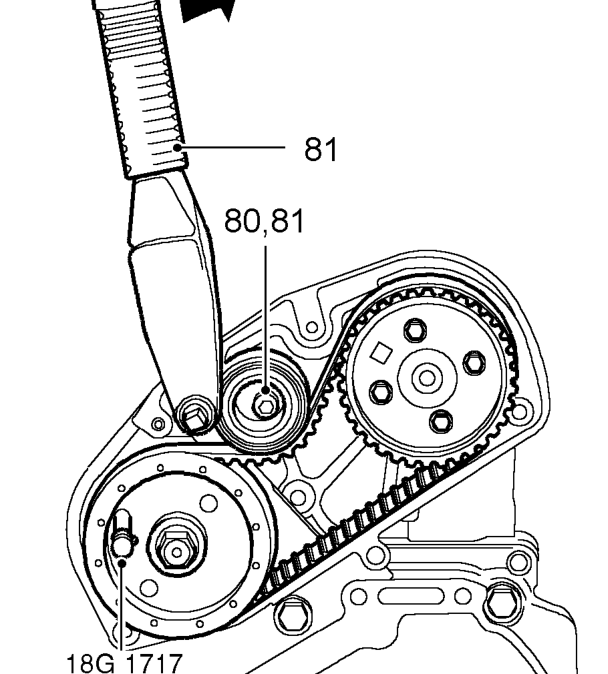
- Loosen tensioner pulley Allen bolt.
- Using a torque wrench fitted to tensioner pulley backplate, apply a clockwise (viewed from rear of engine) torque loading of 6 Nm to belt. Maintain loading and tighten tensioner pulley Allen bolt to 44 Nm.
CAUTION: Do not exceed specified torque figure.
- Remove timing pin 18G 1523 and locking pin 18G 1717.
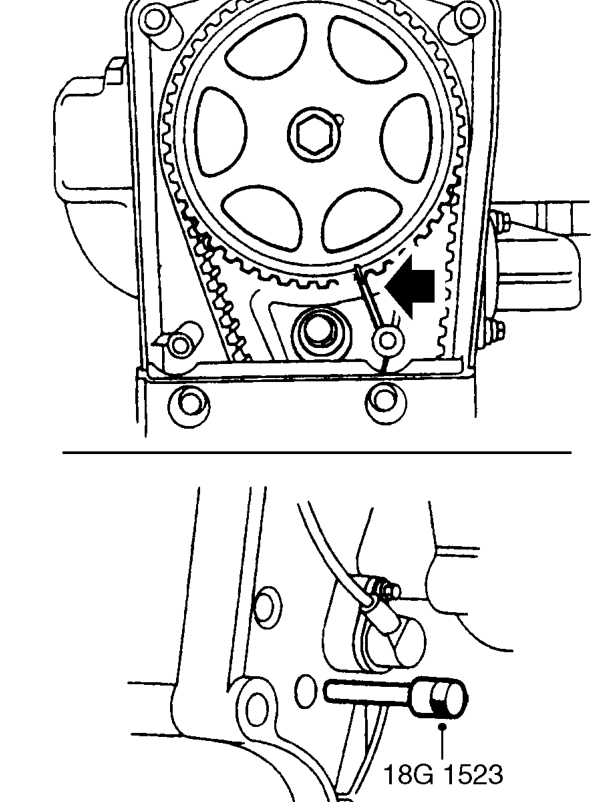
- Rotate crankshaft 2 turns clockwise, fit timing pin 18G 1523 ensuring that pin is fully inserted in hole in flywheel; check that camshaft gear timing mark is aligned with mark on back cover.
CAUTION: Do not use camshaft gear, gear retaining bolt or timing belt to rotate crankshaft.
Parts & tools for this job For 1995 Rover 200
- TOOLA/C manifold gauge setSearch: AC manifold gauge set
- TOOLUV leak detection kitSearch: AC UV leak detection kit
- PARTCabin filterSearch: Rover 200 1995 cabin filter
Links open Amazon search results in a new tab. As an Amazon Associate I earn from qualifying purchases.