
Oil pressure switch
- Make
- Rover
- Model
- 200 Workshop Manual
- Year
- 1995–1999
- Section
- Repairs › Oil pressure switch
Engine - L SeriesOil pressure switch
OIL PRESSURE SWITCH
Service repair no - 12.60.50
Remove
- Disconnect battery earth lead.
- Raise front of vehicle.
WARNING: Support on safety stands.
- Position drain tin below engine oil filter to collect spillage.
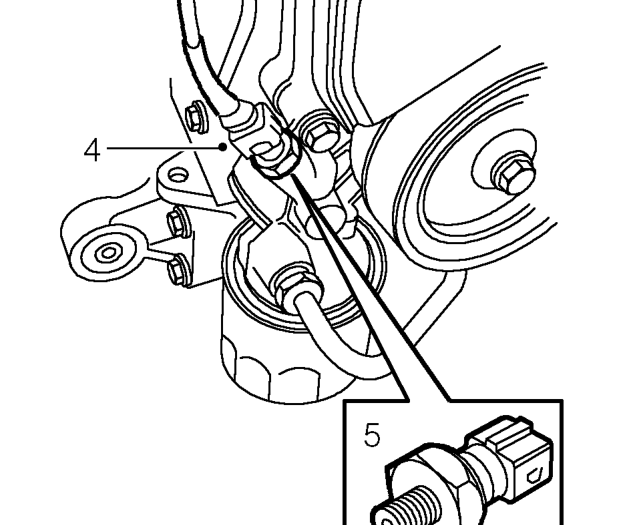
- Disconnect multiplug from oil pressure switch.
- Remove oil pressure switch.
Refit
- Clean oil pressure switch threads.
- Apply Loctite 577 to threads of switch.
- Fit oil pressure switch and tighten to 16 Nm.
- Connect multiplug to oil pressure switch.
- Remove stand(s) and lower vehicle.
- Top-up engine oil. See MAINTENANCE.
- Connect battery earth lead.
OIL COOLER
Service repair no - 12.60.68
Remove
- Remove radiator. See COOLING SYSTEM - ’L’ SERIES, Repairs.
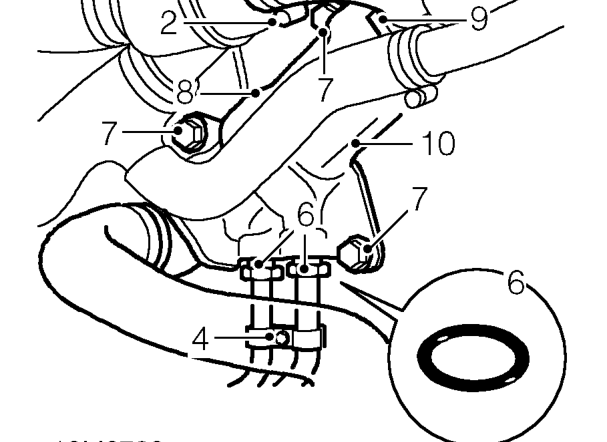
- Loosen clip and disconnect coolant hose from thermostat.
- Position container to collect fluid loss from oil cooler.
- Loosen bolt clamp oil cooler pipes together.
- Using a 22 mm open ended spanner loosen oil pipe unions on cooler.
- Disconnect oil pipes from cooler, remove and discard 2 ’O’ rings.
- Remove 3 bolts securing oil cooler to cylinder block.
- Remove oil cooler and hose assembly. Do not carry out further dismantling if component is removed for access only.
- Loosen clip and remove radiator bottom hose from oil cooler.
- Loosen clip and remove thermostat hose from oil cooler.
- Fit hoses to new oil cooler and tighten clips.
Parts & tools for this job For 1995 Rover 200
- TOOLOBD2 scannerSearch: OBD2 scanner
- TOOLDigital multimeterSearch: automotive digital multimeter
- TOOLBack-probe test leadsSearch: back probe test leads
Links open Amazon search results in a new tab. As an Amazon Associate I earn from qualifying purchases.