
Replacement (page 2 of 5)
- Make
- Rover
- Model
- 400 Body Repair Manual
- Year
- 1995–2000
- Section
- Repairs
Panel repairsReplacement · page 2 of 5
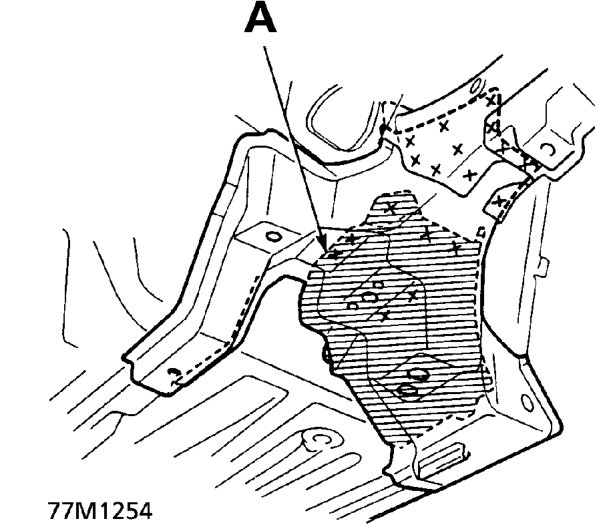
A. Rear Support Stiffener
- Check the rear support stiffener for position and damage.
- Replace the rear support stiffener if necessary.
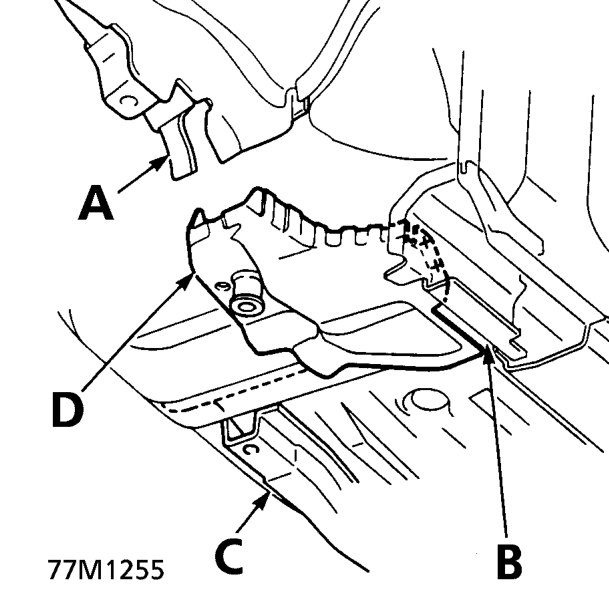
A. Front Side Frame B. Inside Sill Extension C. Floor Frame D. Rear Support Stiffener
- Level off and finish the burrs of the prised off spot welds with a disc sander.
WARNING: To prevent eye injury, wear goggles or safety glasses whenever sanding, cutting or grinding.
- Mould the related parts. Reshape the lower dashboard, front side frame, front floor, inside sill and side sill inner joint using a hammer and dolly.
- Remove the inside sill extension and rear support stiffener from the new front side outrigger.
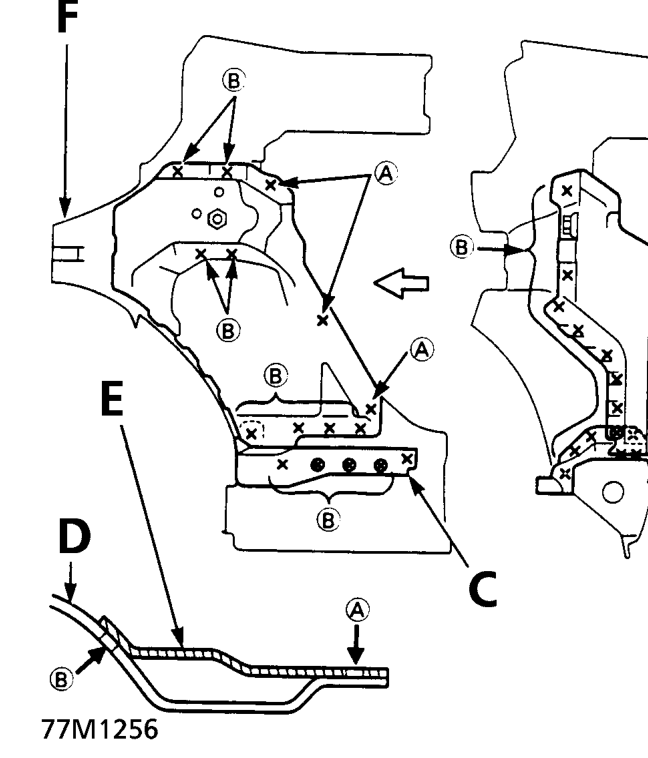
A. Drill holes with a spot cutter from the rear support stiffener side. B. Drill holes with a spot cutter from the front side outrigger side. C. Inside Sill Extension D. Front Side Outrigger E. Rear Support Stiffener F. New Front Side Outrigger
NOTE: Be careful not to let the drilled holes penetrate through to the new part.
Parts & tools for this job For 1995 Rover 400
- TOOLTorque wrenchSearch: 3/8 inch torque wrench
- TOOLSocket setSearch: socket set metric
- BOOKHaynes manualSearch: Haynes manual Rover 400
Links open Amazon search results in a new tab. As an Amazon Associate I earn from qualifying purchases.