
2.0 petrol and diesel models (page 4 of 4)
- Make
- Rover
- Model
- 400 Body Repair Manual
- Year
- 1995–2000
- Section
- Repairs
- Set the new front side frame and check that the weld flange surfaces fit closely.
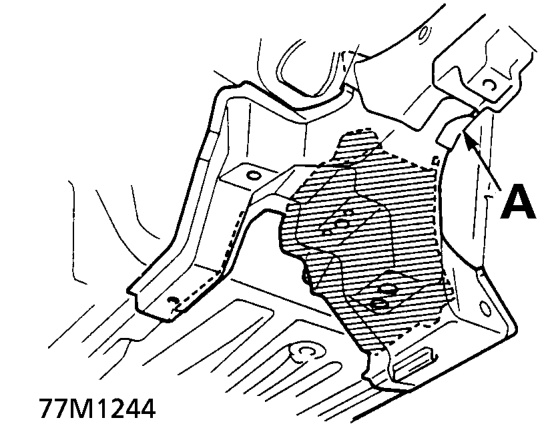
A. New Front Side Frame
- Recheck the position of the new front side frame and rear support stiffener.
- Remove the new front side frame.
- Main weld the new rear support stiffener and inside sill extension.
WARNING: To prevent eye injury and burns when welding, wear an approved welding helmet, gloves and safety shoes.
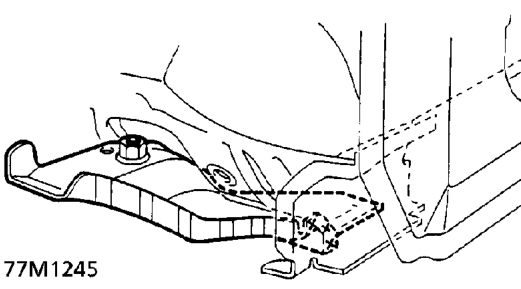
- Set the new front side frame.
- Remove the undercoat from both sides of the welding section, and expose the steel plate using a disc sander.
WARNING: To prevent eye injury, wear goggles or safety glasses whenever sanding, cutting or grinding.
NOTE: Apply the spot sealer to the welding surface when spot welding. Tighten the front side frame against the
• front floor and side sill using vice-grips or pliers. • Place a jack under the front side frame end and support it, and measure the positions for temporary attachment.
NOTE: Use of a positioning jig is recommended.
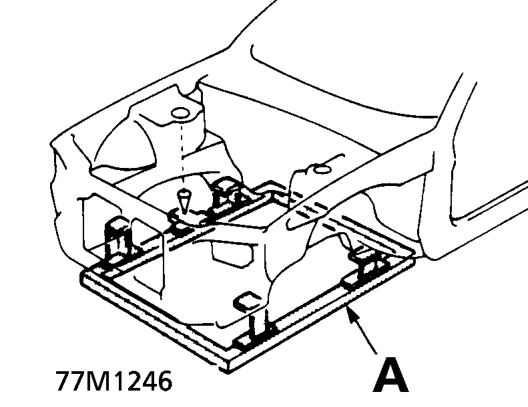
A. Positioning Jig
- Clamp the front bulkhead and front inner wing/spring housing with squill vices and vice-grips.
- Measure the front compartment diagonally.
- Spot weld several points in the clamped sections, and temporarily attach the front side frame.
WARNING: To prevent eye injury and burns when welding, wear an approved welding helmet, gloves and safety shoes.
- Check the body dimensions.
- Install the rear beam, and check the front side frame position.
Parts & tools for this job For 1995 Rover 400
- PARTGlow plugsSearch: Rover 400 1995 glow plugs
- TOOLGlow plug socketSearch: glow plug socket
- TOOLDiesel compression testerSearch: diesel compression tester
Links open Amazon search results in a new tab. As an Amazon Associate I earn from qualifying purchases.