
Remove
- Make
- Rover
- Model
- Coupé, Cabriolet & Tourer 200/400 Coupé, Cabriolet & Tourer Workshop Manual
- Section
- Repairs › Remove
ElectricalRemove
Service Repair No. 86.50.60
Remove
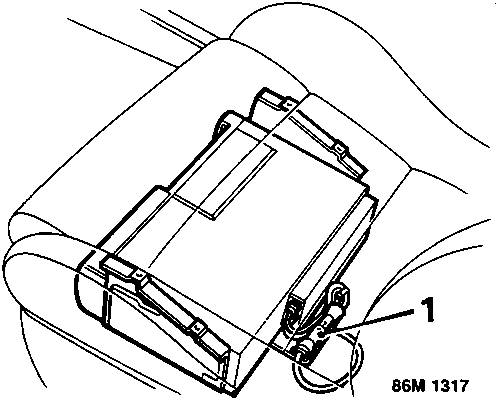
- Disconnect radio link harness from autochanger.
- Remove passenger seat, see BODY – Repairs.
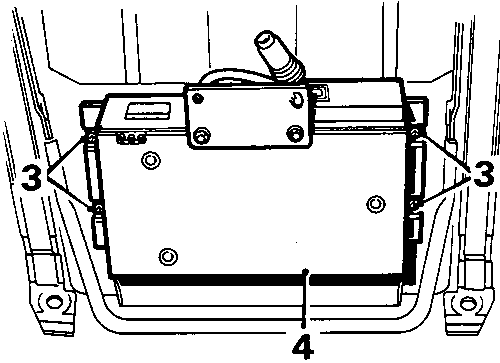
- Remove 4 screws securing autochanger to seat.
- Remove autochanger assembly.
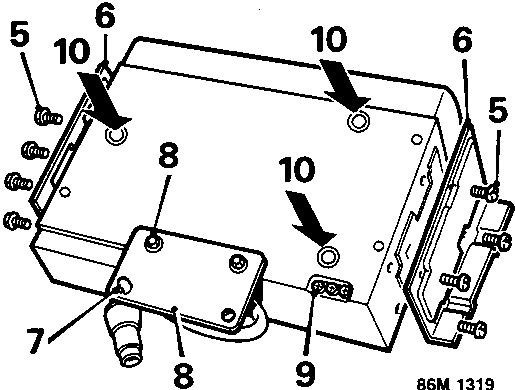
- Remove 8 screws securing 2 mounting brackets to side of autochanger.
- Remove mounting brackets.
- Release clip securing autochanger flylead to bracket.
- Remove 2 screws securing bracket to autochanger and remove bracket.
- Remove 3 transportation screws from storage holes.
- Fit screws into transportation holes.
Refit
- Remove transportation screws and fit into storage holes.
- Position flylead bracket to autochanger, fit and tighten screws.
- Secure flylead clip to bracket
- Position mounting brackets to autochanger, fit and tighten screws.
- Position autochanger assembly to underside of seat, fit screws and tighten.
- Refit passengers seat, see BODY – Repairs.
- Connect radio link harness to autochanger.
Parts & tools for this job For Rover Coupé, Cabriolet & Tourer
- TOOLDigital multimeterSearch: automotive digital multimeter
- PARTAssorted fuse kitSearch: car fuse assortment kit
- TOOLWire crimper and connector kitSearch: wire crimper connector kit
Links open Amazon search results in a new tab. As an Amazon Associate I earn from qualifying purchases.