
Crankshaft front pulley (page 3 of 3)
- Make
- Rover
- Model
- 200 Workshop Manual
- Year
- 1995–1999
- Section
- Repairs
Engine - L SeriesCrankshaft front pulley · page 3 of 3
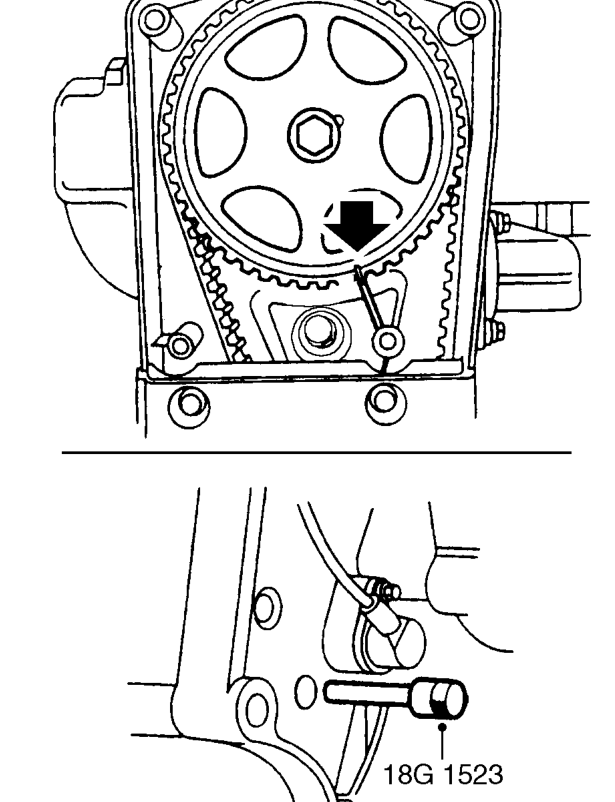
- Rotate crankshaft clockwise 2 complete revolutions and fit timing pin 18G 1523.
CAUTION: Ensure pin is fully inserted into hole in flywheel.
- Check that camshaft drive gear timing mark is aligned with mark on back cover.
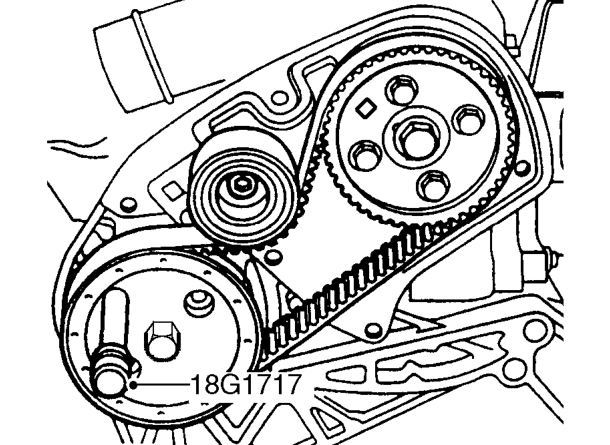
- Insert locking pin 18G 1717 through FIP drive gear and into hole in adapter plate.
CAUTION: To ensure FIP timing is correct, locking pin must be a sliding fit. If pin is a tight fit, drive belt adjustment procedure must be repeated.
- On completion, remove timing pin 18G 1523 and locking pin 18G 1717.
- Fit camshaft timing belt upper cover. See this section.
- Fit FIP timing belt cover, fit bolts and tighten to 5 Nm.
- Fit air cleaner assembly. See ENGINE MANAGEMENT SYSTEM - EDC, Repairs.
- Fit auxiliary drive belt. See ELECTRICAL, Repairs.
Parts & tools for this job For 1995 Rover 200
- PARTEngine gasket setSearch: Rover 200 1995 engine gasket set
- TOOLTorque wrenchSearch: 3/8 inch torque wrench
- TOOLFeeler gauge setSearch: feeler gauge set
Links open Amazon search results in a new tab. As an Amazon Associate I earn from qualifying purchases.