
Components (page 3 of 7)
- Make
- Rover
- Model
- 600 Rover 600 Repair Manual - Volumes 1 and 2 - 2nd Edition
- Section
- Repairs
Automatic gearboxComponents · page 3 of 7
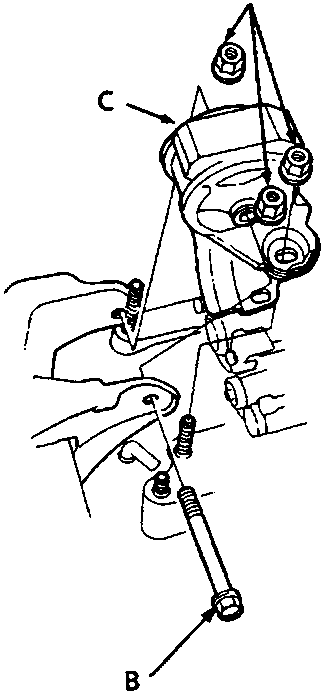
A Nuts
B Bolt
C Gearbox mount
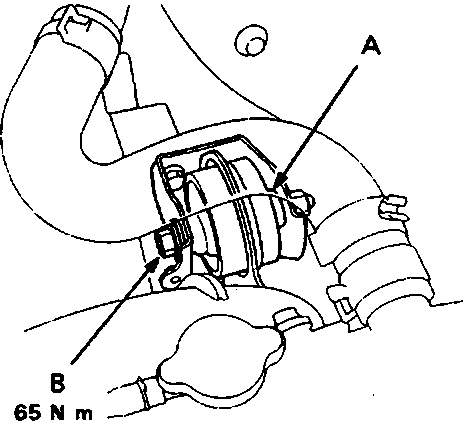
A Front engine mount
B Front engine mount bolt
- Tighten the front engine mount bolt to specified torque.
- Remove the gearbox jack.
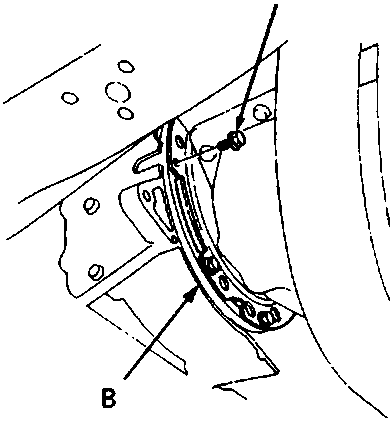
A Drive plate to torque converter bolt
B Drive plate
- Attach the torque converter to the drive plate eight bolts, and torque to 12Nm. Rotate the crankshaft pulley as necessary to tighten the bolts to 1/2 of the specified torque, then final torque, in a crisscross pattern.
- After tightening the last bolt, check that the crankshaft rotates freely.
Note: Tighten the crankshaft pulley bolt, if it is loosened when rotating the crankshaft pulley.
Parts & tools for this job For Rover 600
- PARTTransmission filter kitSearch: Rover 600 transmission filter kit
- FLUIDAutomatic transmission fluidSearch: Rover automatic transmission fluid
- TOOLFluid transfer pumpSearch: fluid transfer pump
Links open Amazon search results in a new tab. As an Amazon Associate I earn from qualifying purchases.