
Remove (page 7 of 10)
- Make
- Rover
- Model
- 600 Rover 600 Repair Manual - Volumes 1 and 2 - 2nd Edition
- Section
- Repairs
Automatic gearboxRemove · page 7 of 10
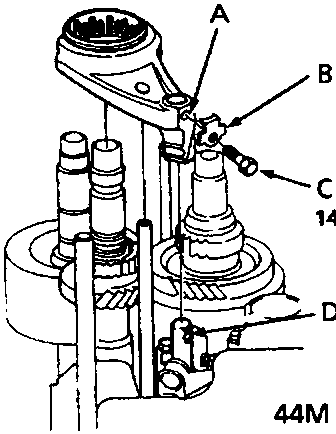
- Turn the shift fork shaft so the large chamfered hole is facing the fork bolt hole. Then install the shift fork and the lock bolt with a new lock washer, and torque to 14 Nm. Bend the lock tab against the bolt head.
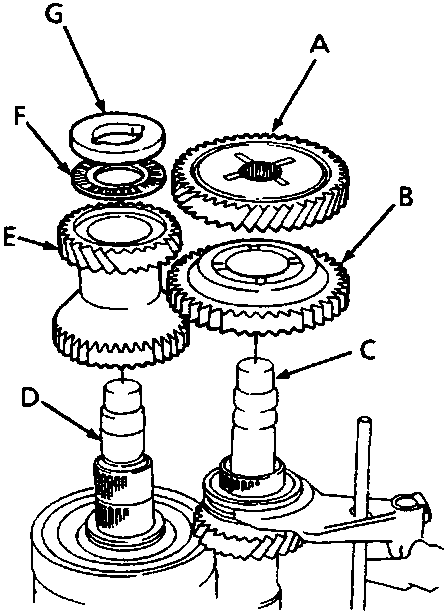
- Install the secondary shaft 2nd gear, thrust needle bearing and thrust washer on the secondary shaft. Install the countershaft reverse gear and 2nd gear on the countershaft.
Parts & tools for this job For Rover 600
- PARTTransmission filter kitSearch: Rover 600 transmission filter kit
- FLUIDAutomatic transmission fluidSearch: Rover automatic transmission fluid
- TOOLFluid transfer pumpSearch: fluid transfer pump
Links open Amazon search results in a new tab. As an Amazon Associate I earn from qualifying purchases.