
Flywheel
- Make
- Rover
- Model
- 600 Repair Manual Supplement
- Year
- 1993–1999
- Section
- Repairs › Flywheel
Engine - L SeriesFlywheel
FLYWHEEL
Service repair no - 12.53.07
Remove
- Raise front of vehicle.
WARNING: Support on safety stands.
- Remove LH road wheel.
- Remove clutch assembly. See CLUTCH, Repairs.
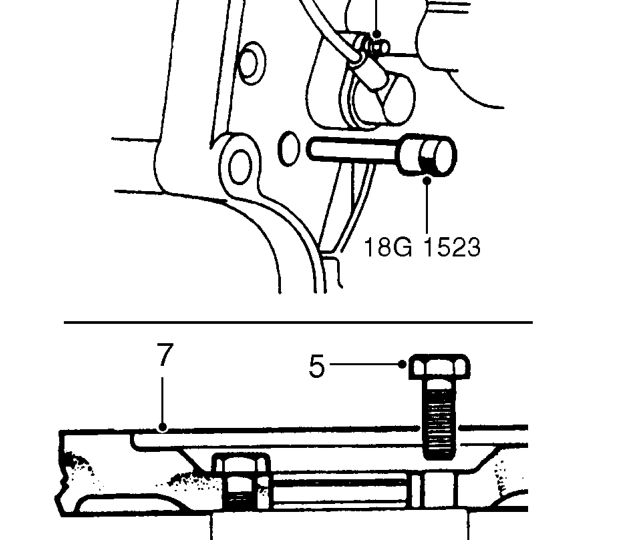
- Remove bolt securing CKP sensor and release sensor from gearbox mounting plate.
- Remove and discard 6 bolts securing flywheel to crankshaft.
- Remove flywheel locking pin tool 18G 1523.
- Using assistance, remove flywheel from crankshaft.
NOTE: Dowel located.
Refit
- Using an old flywheel retaining bolt with saw cuts at 45° to bolt shank, clean old adhesive from thread of flywheel bolt holes in crankshaft.
- Clean flywheel and mating face of crankshaft.
- Clean dowel and dowel hole.
- Using assistance, fit flywheel to crankshaft.
- Fit flywheel locking pin tool 18G 1523.
- Fit NEW bolts securing flywheel to crankshaft and working in a diagonal sequence tighten bolts to 15 Nm + 90 °.
- Clean CKP sensor and mating face.
- Fit CKP sensor, fit and tighten bolt to 8 Nm.
- Fit clutch assembly. See CLUTCH, Repairs.
- Fit road wheel(s) and tighten nuts to correct torque. See INFORMATION, Torque wrench settings.
- Remove stand(s) and lower vehicle.
Parts & tools for this job For 1993 Rover 600
- PARTEngine gasket setSearch: Rover 600 1993 engine gasket set
- TOOLTorque wrenchSearch: 3/8 inch torque wrench
- TOOLFeeler gauge setSearch: feeler gauge set
Links open Amazon search results in a new tab. As an Amazon Associate I earn from qualifying purchases.